Chicken Piccata
Crispy, golden cutlets in a silky lemon-butter-caper sauce — a restaurant-quality dish you can pull off in 20 minutes.
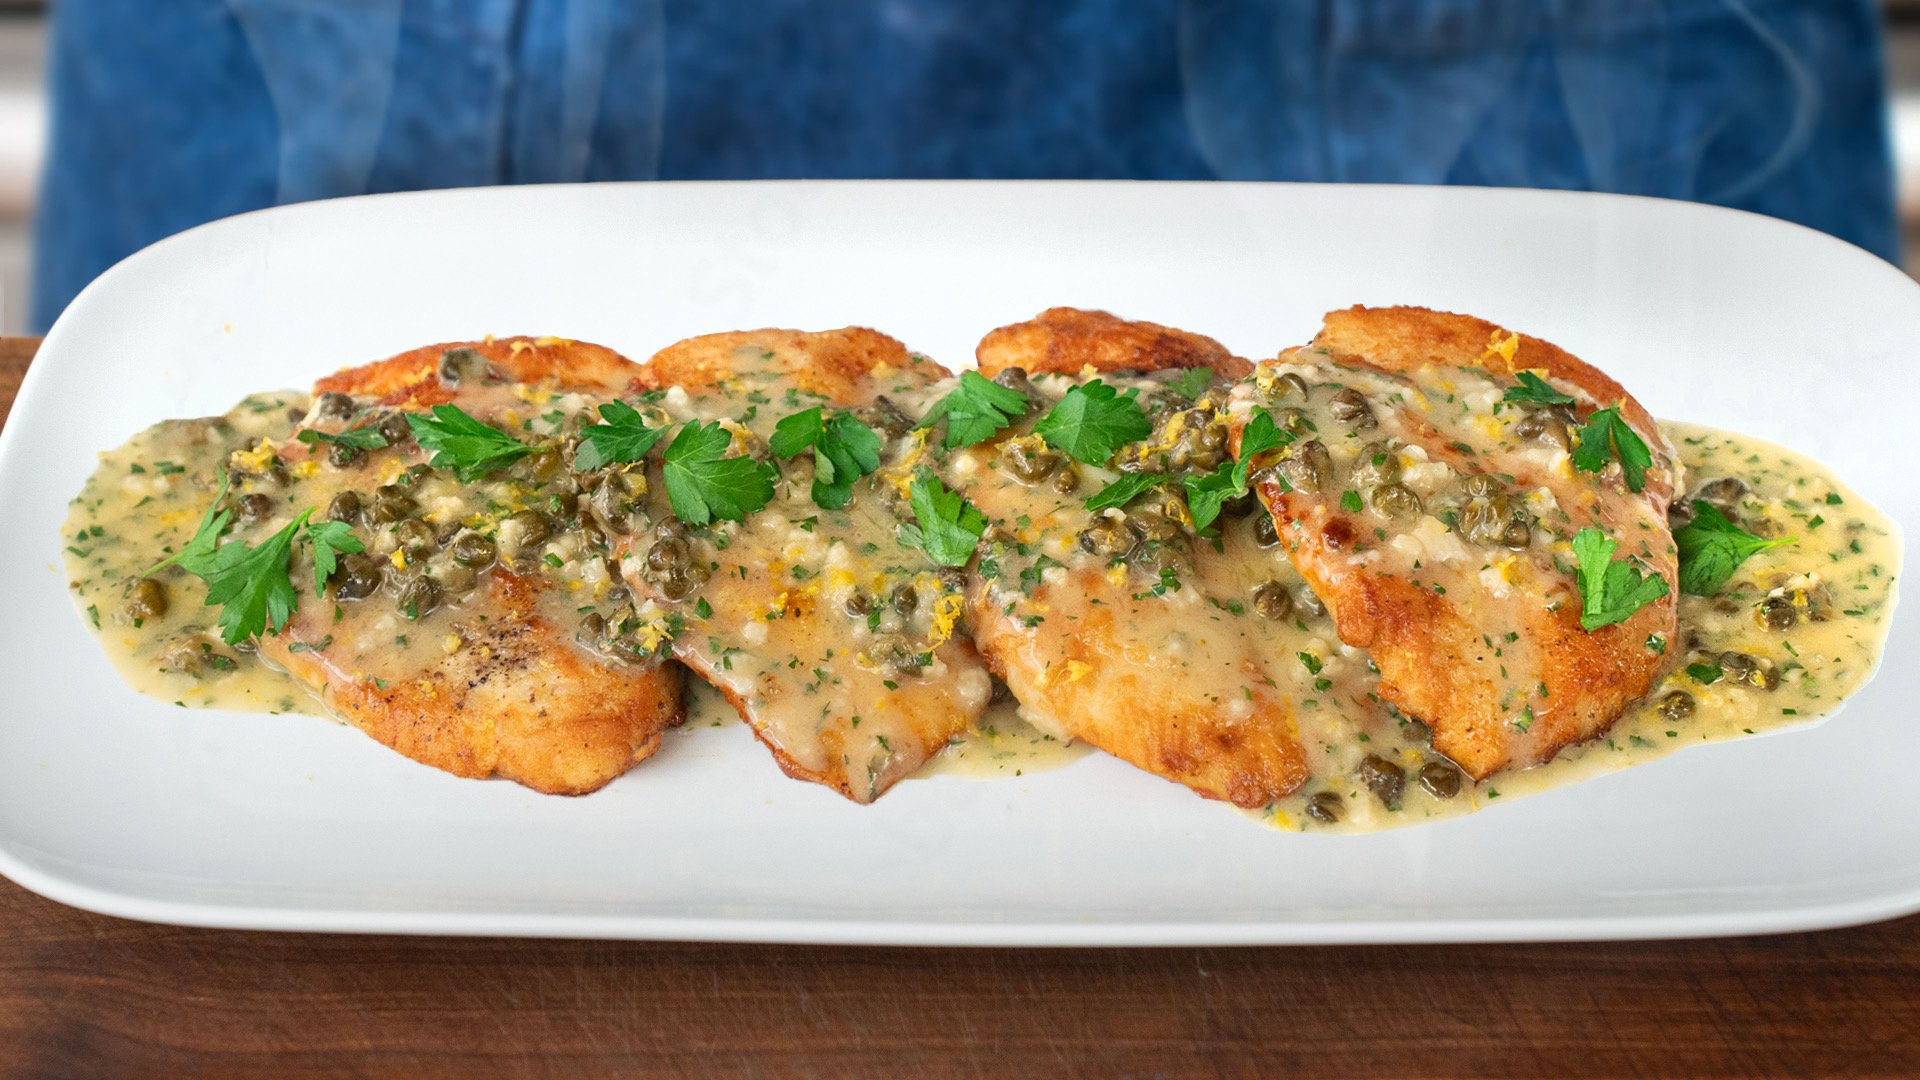
I love Chicken Piccata because it gives a home cook a taste of what it's like to cook in a “white table cloth” restaurant…meaning you are doing dynamic technical cooking on a hot stove “a la minute” or “to order.” This type of cooking is a little more rare for home cooks and that's sad because it's REALLY fun. And not only is this dish entertaining to make-its fast. The whole thing comes together in about 20 minutes and tastes like it should cost 40 dollars a plate.
Brian’s Pro Tips
Butterflying + Pounding - Butterflying and pounding chicken breasts thin means that they cook quickly and evenly. Thick breasts will get dry on the outside before the interior is cooked through. Thin chicken also means more surface area to hold on to the flour dredge, which means more crust. More crust = more flavorful browning and more area to grip the silky butter sauce.
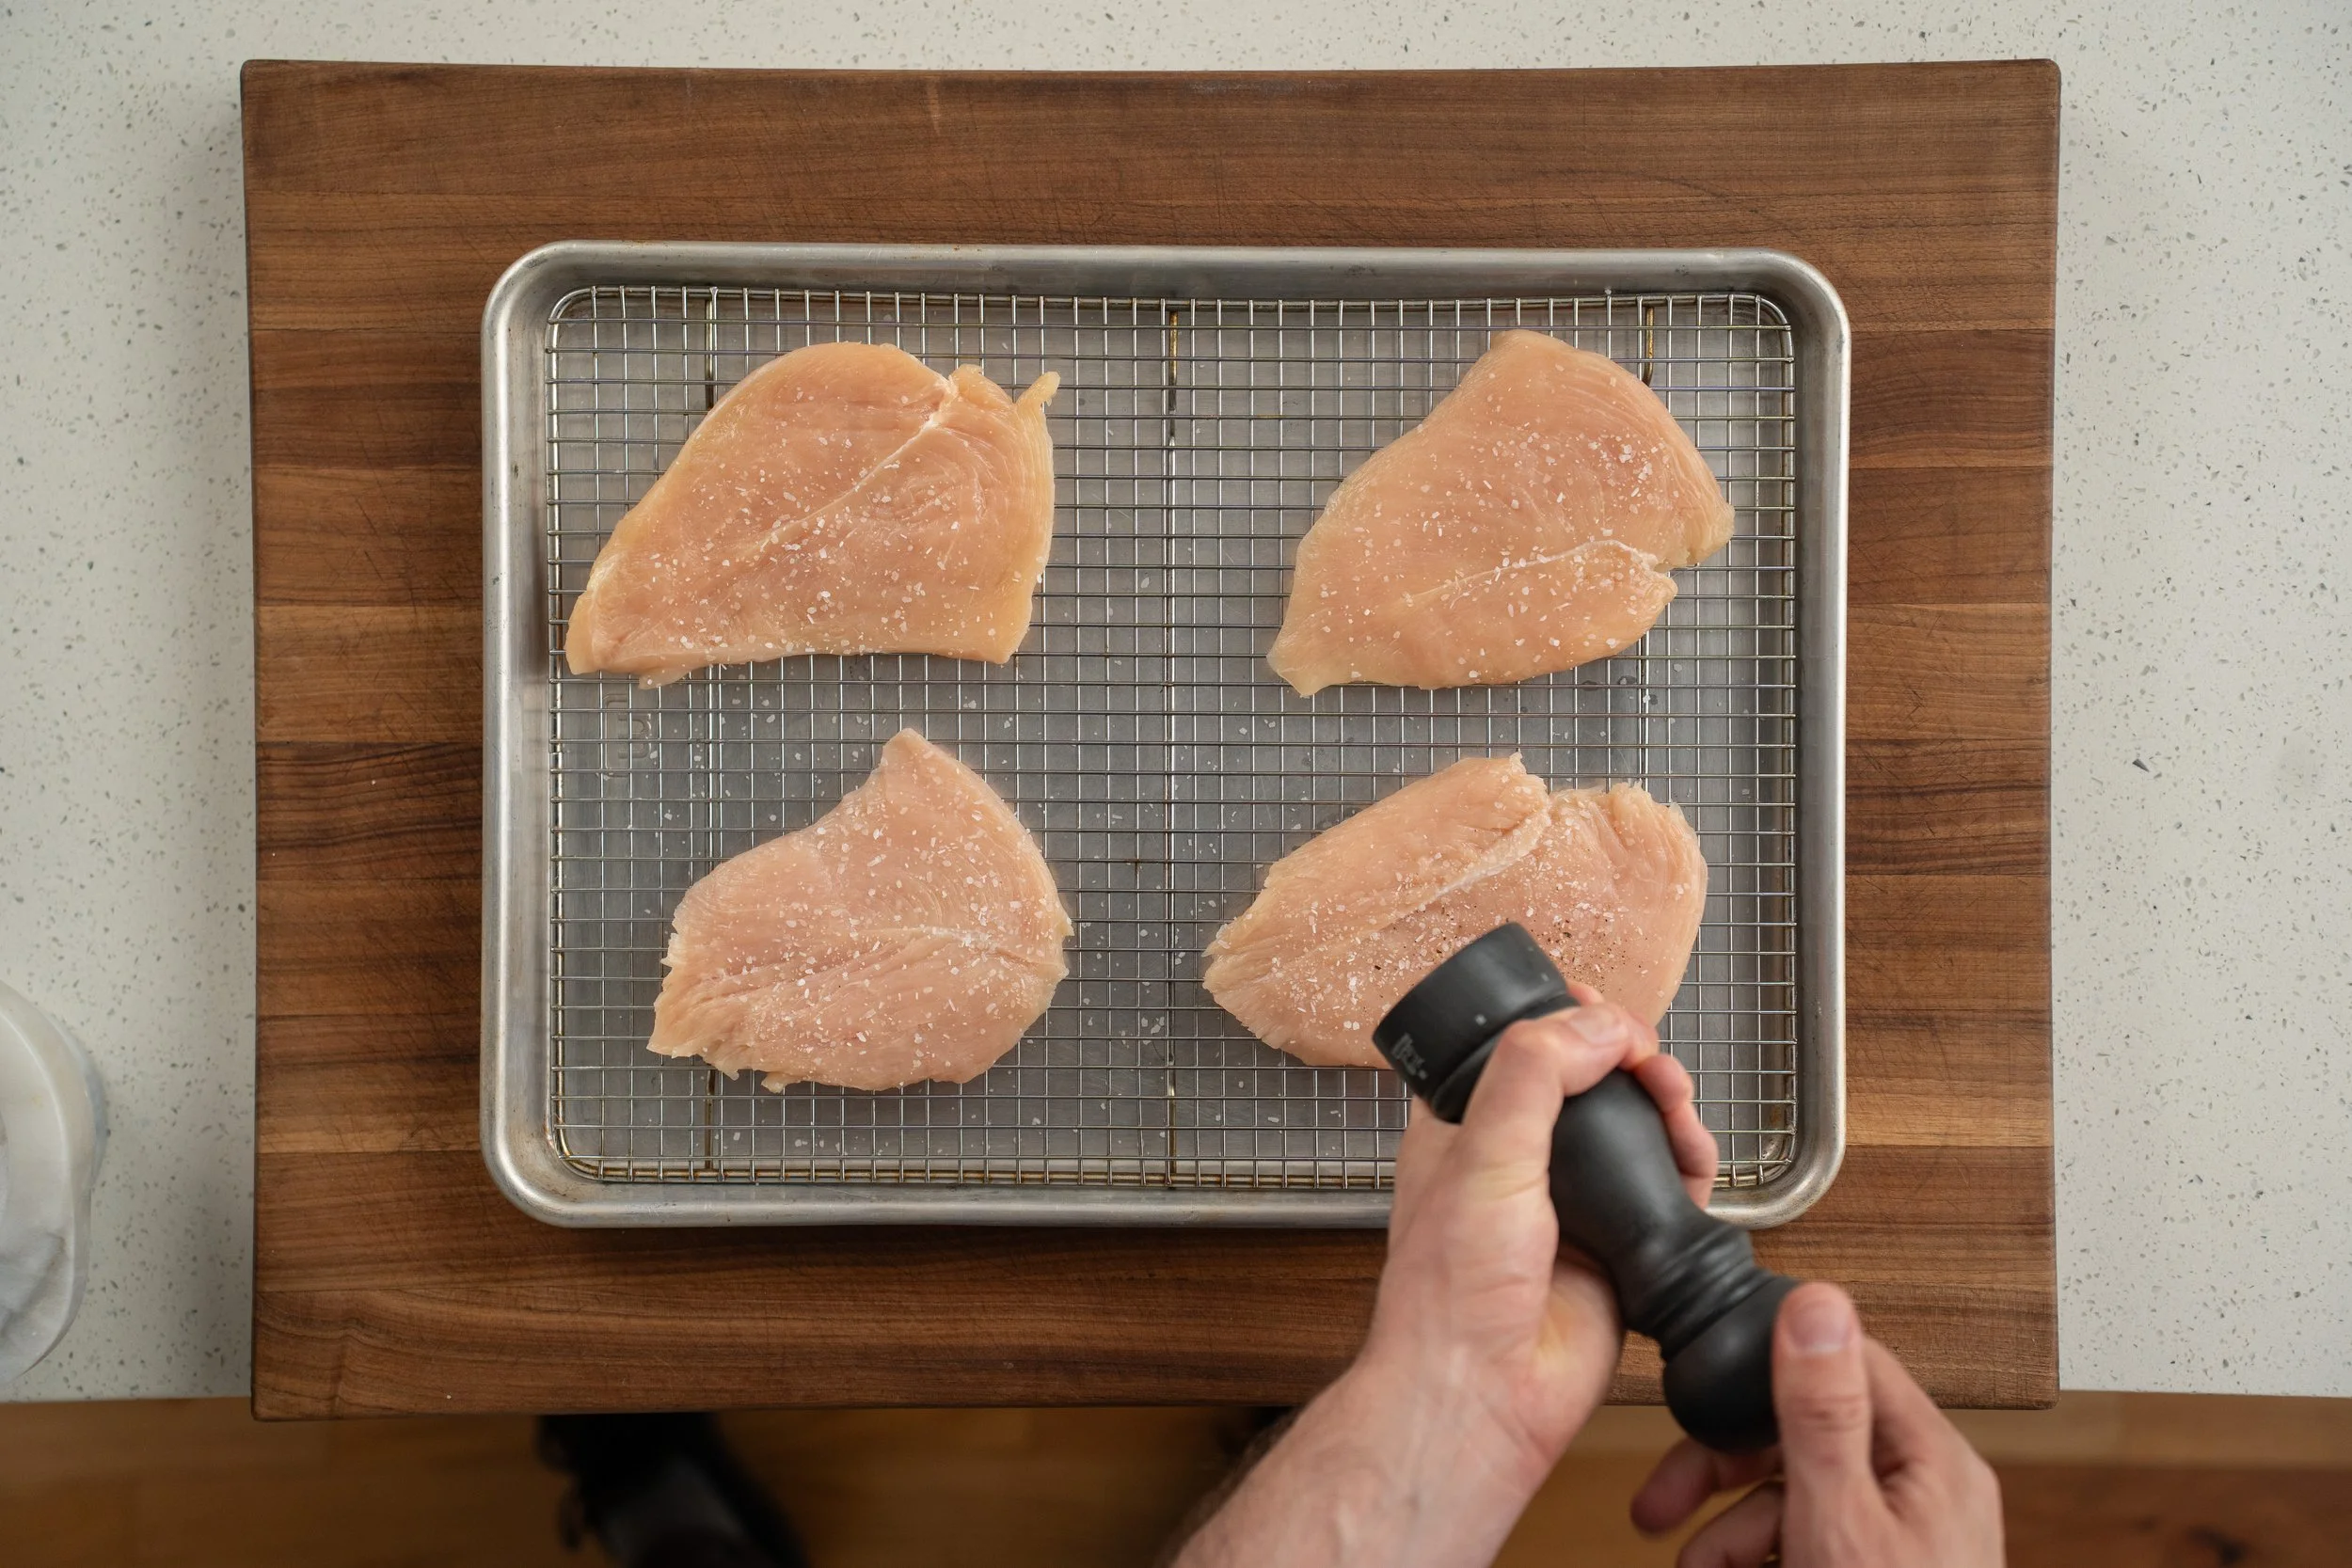
Dry Brine - Salting the cutlets and letting them sit for even 5–10 minutes seasons the meat all the way through, not just the surface. It also changes the proteins in the meat in a way that allows them to retain significantly more moisture as as they cook. That means juicier meats thats much harder to overcook.
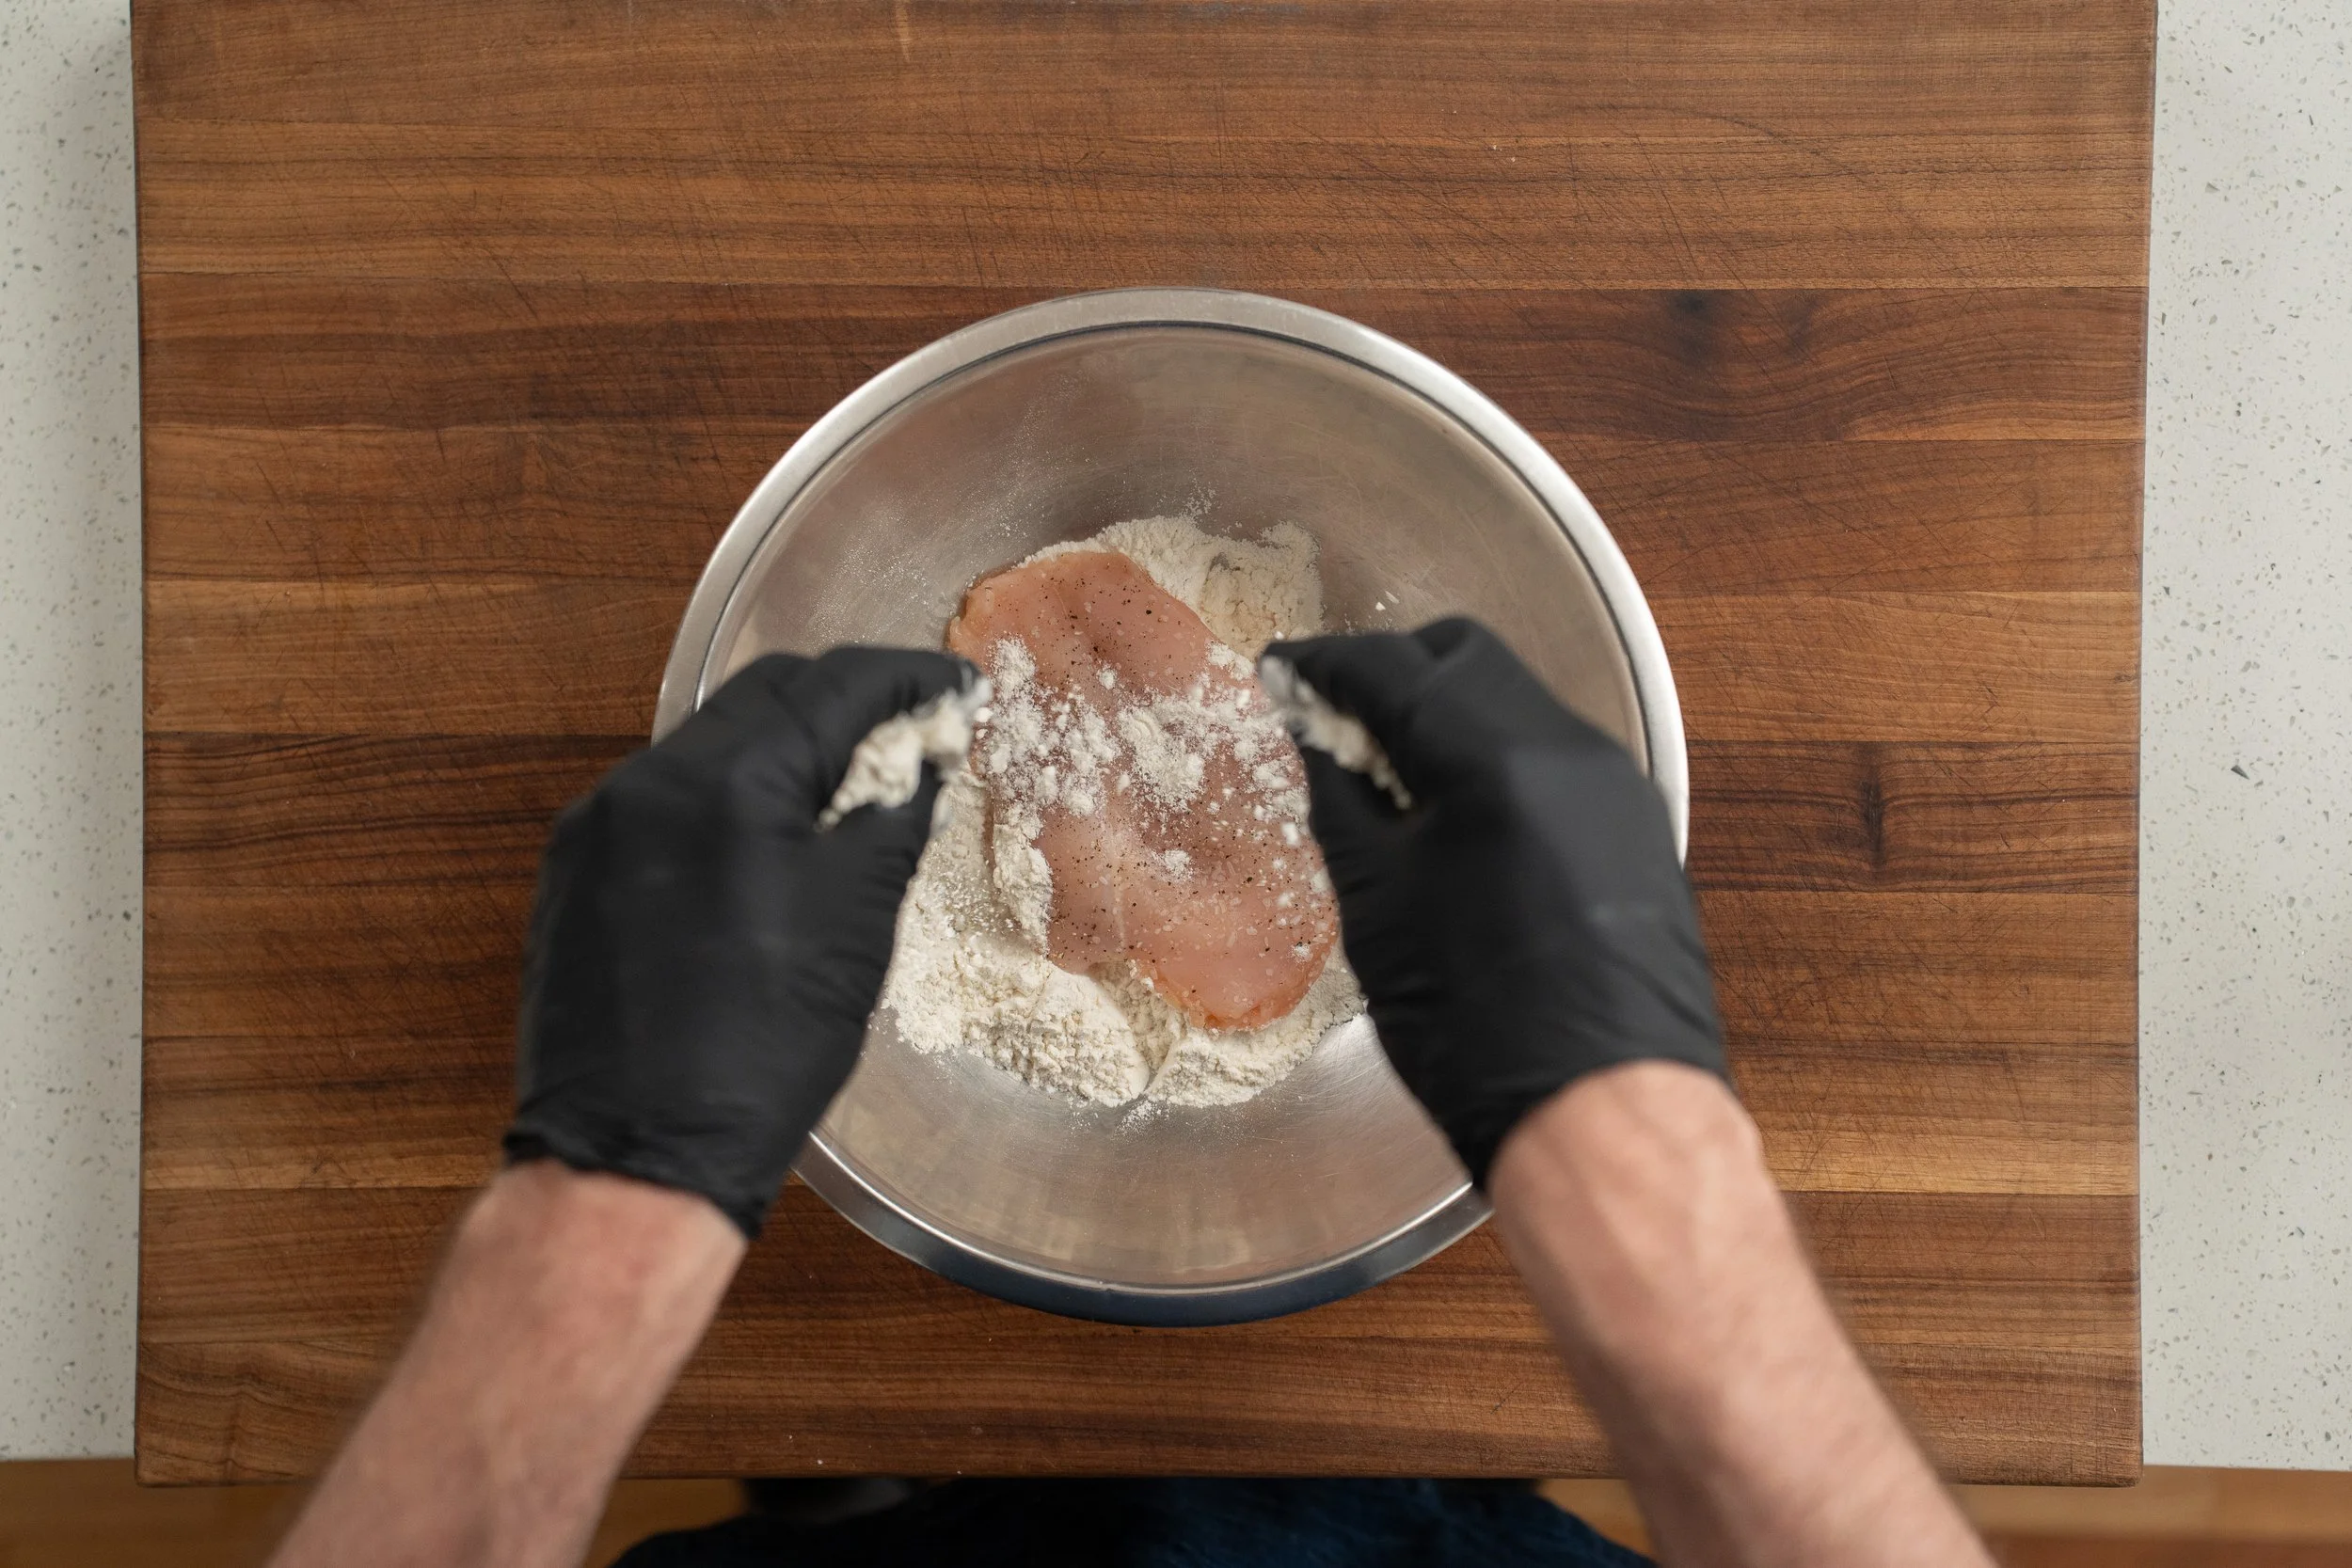
Double Dredge — Flouring the chicken, letting it sit for 5 minutes, then dredging again right before it hits the pan gives you a thicker, crispier crust that browned more evenly AND holds more sauce. The first pass absorbs moisture from the surface. The second pass adds a dry outer layer that fries up golden and creates this savory, almost chicken-nugget-like coating. It’s absurdly good.
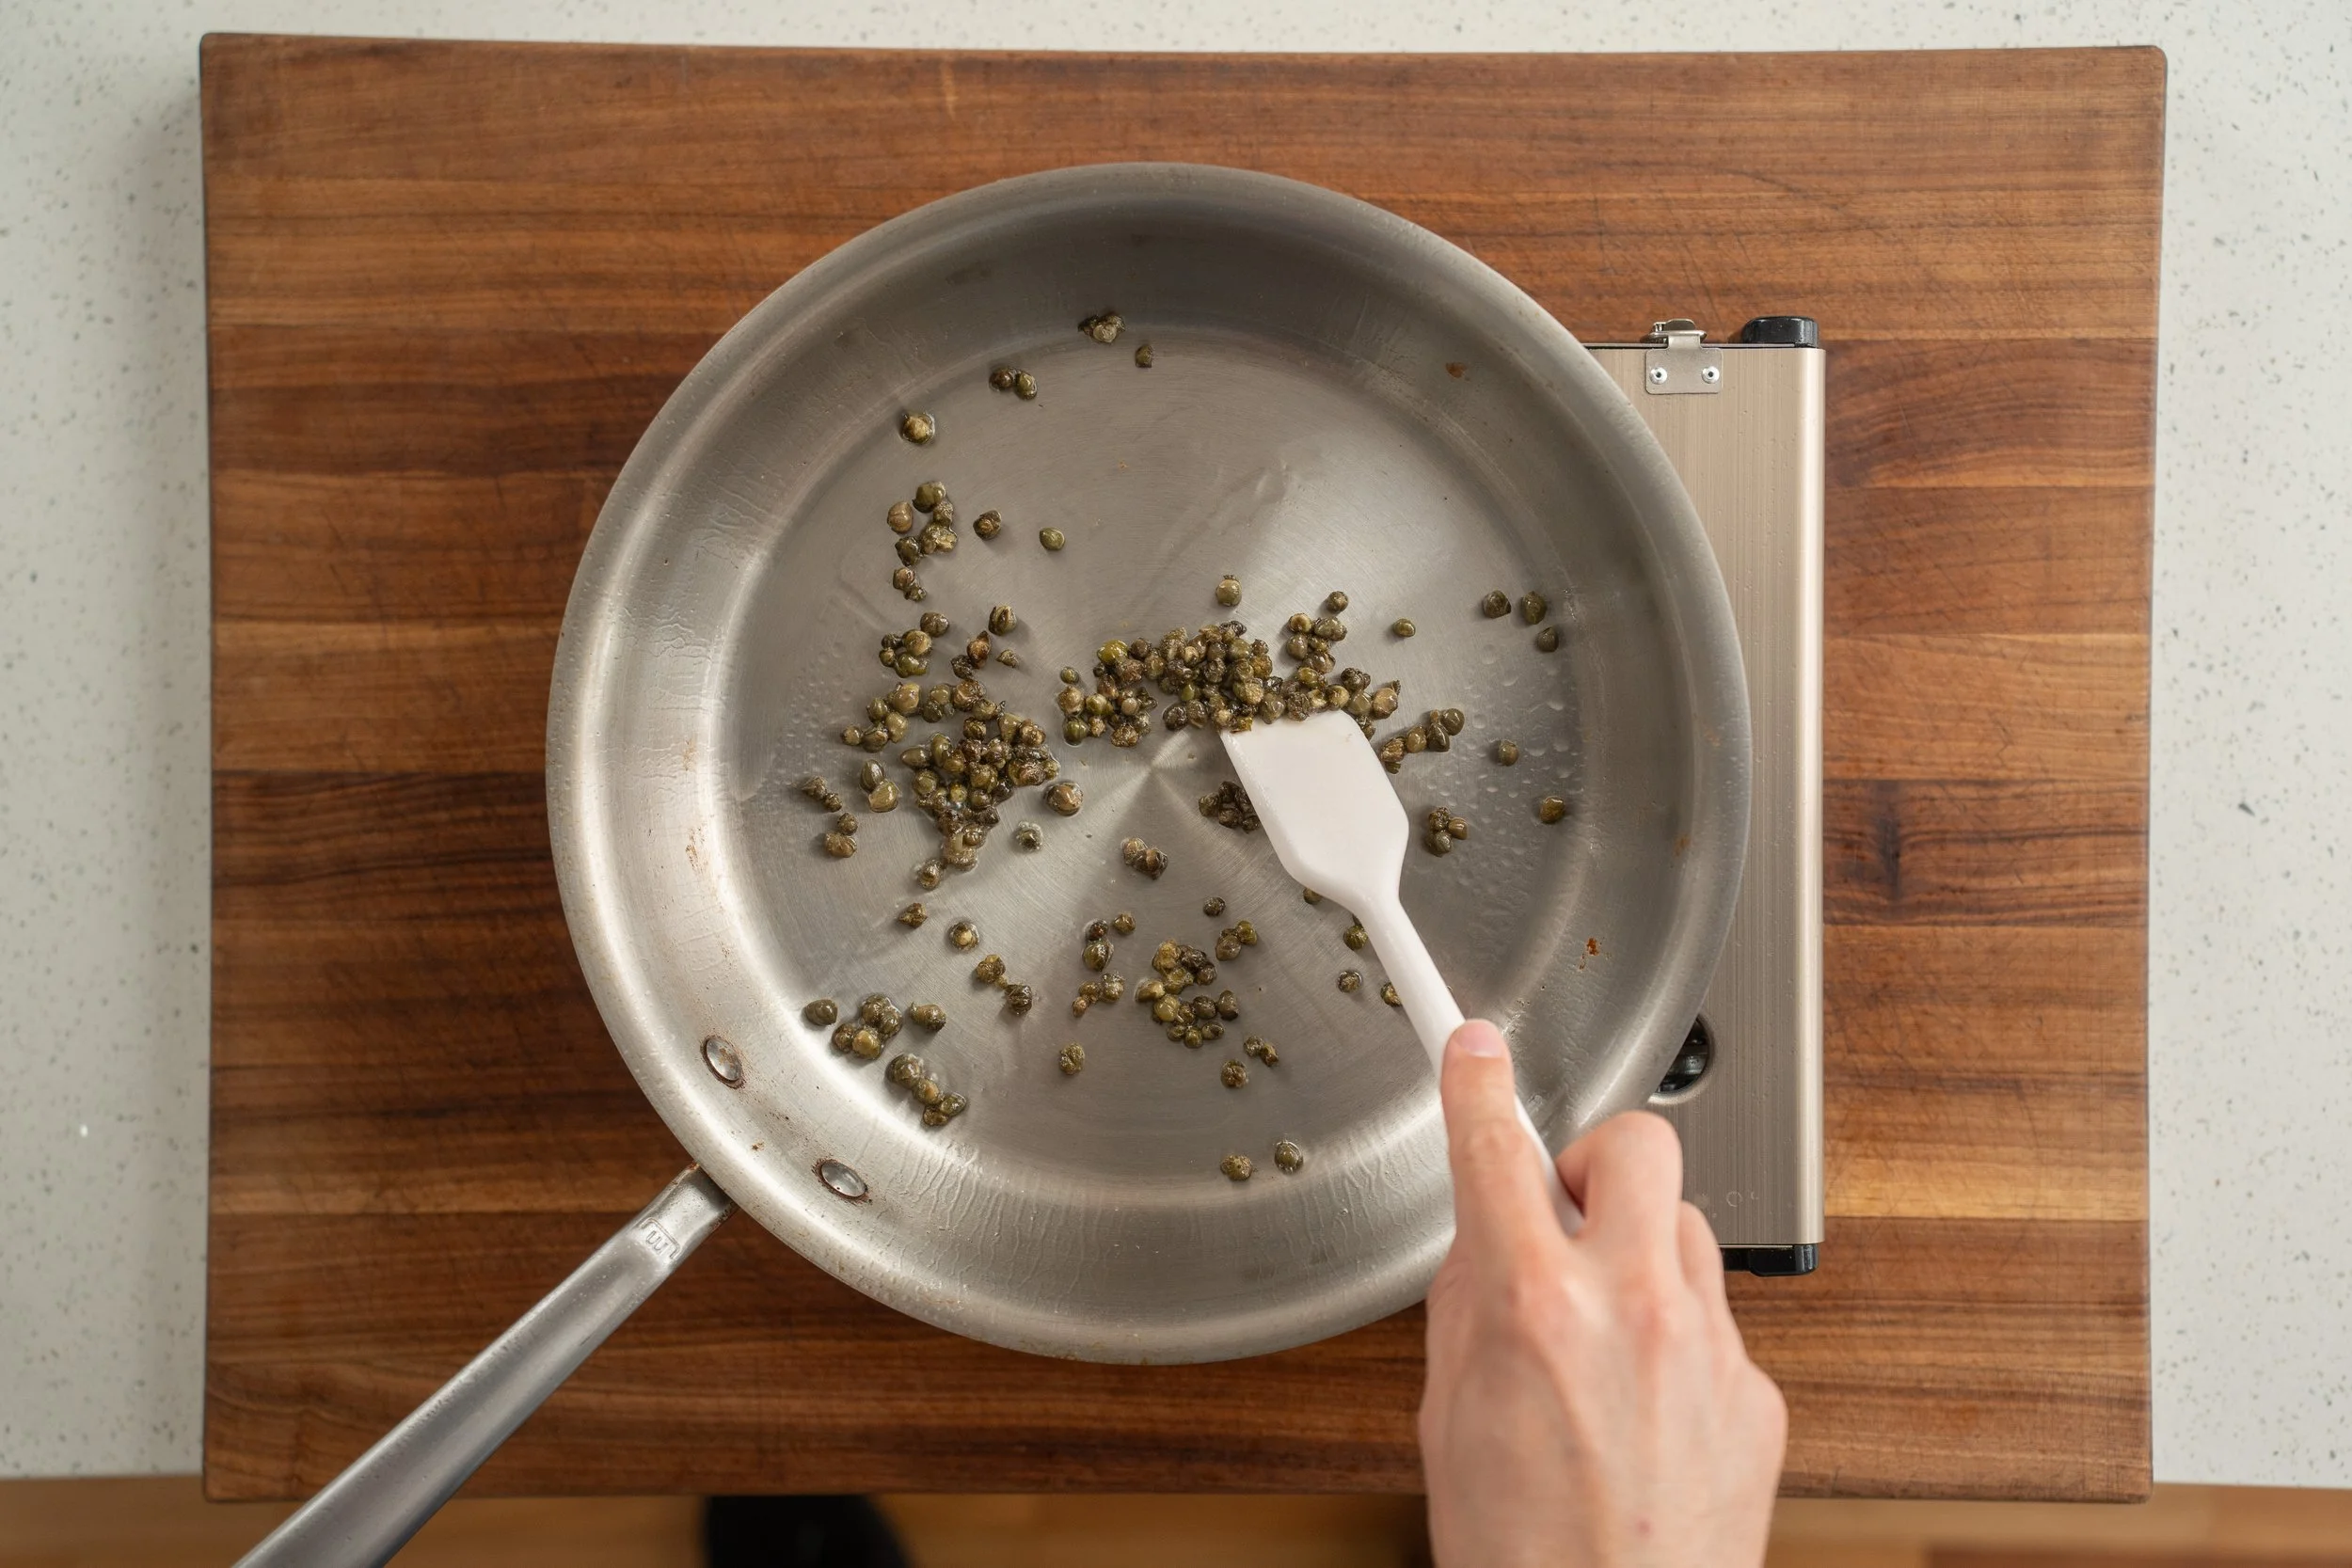
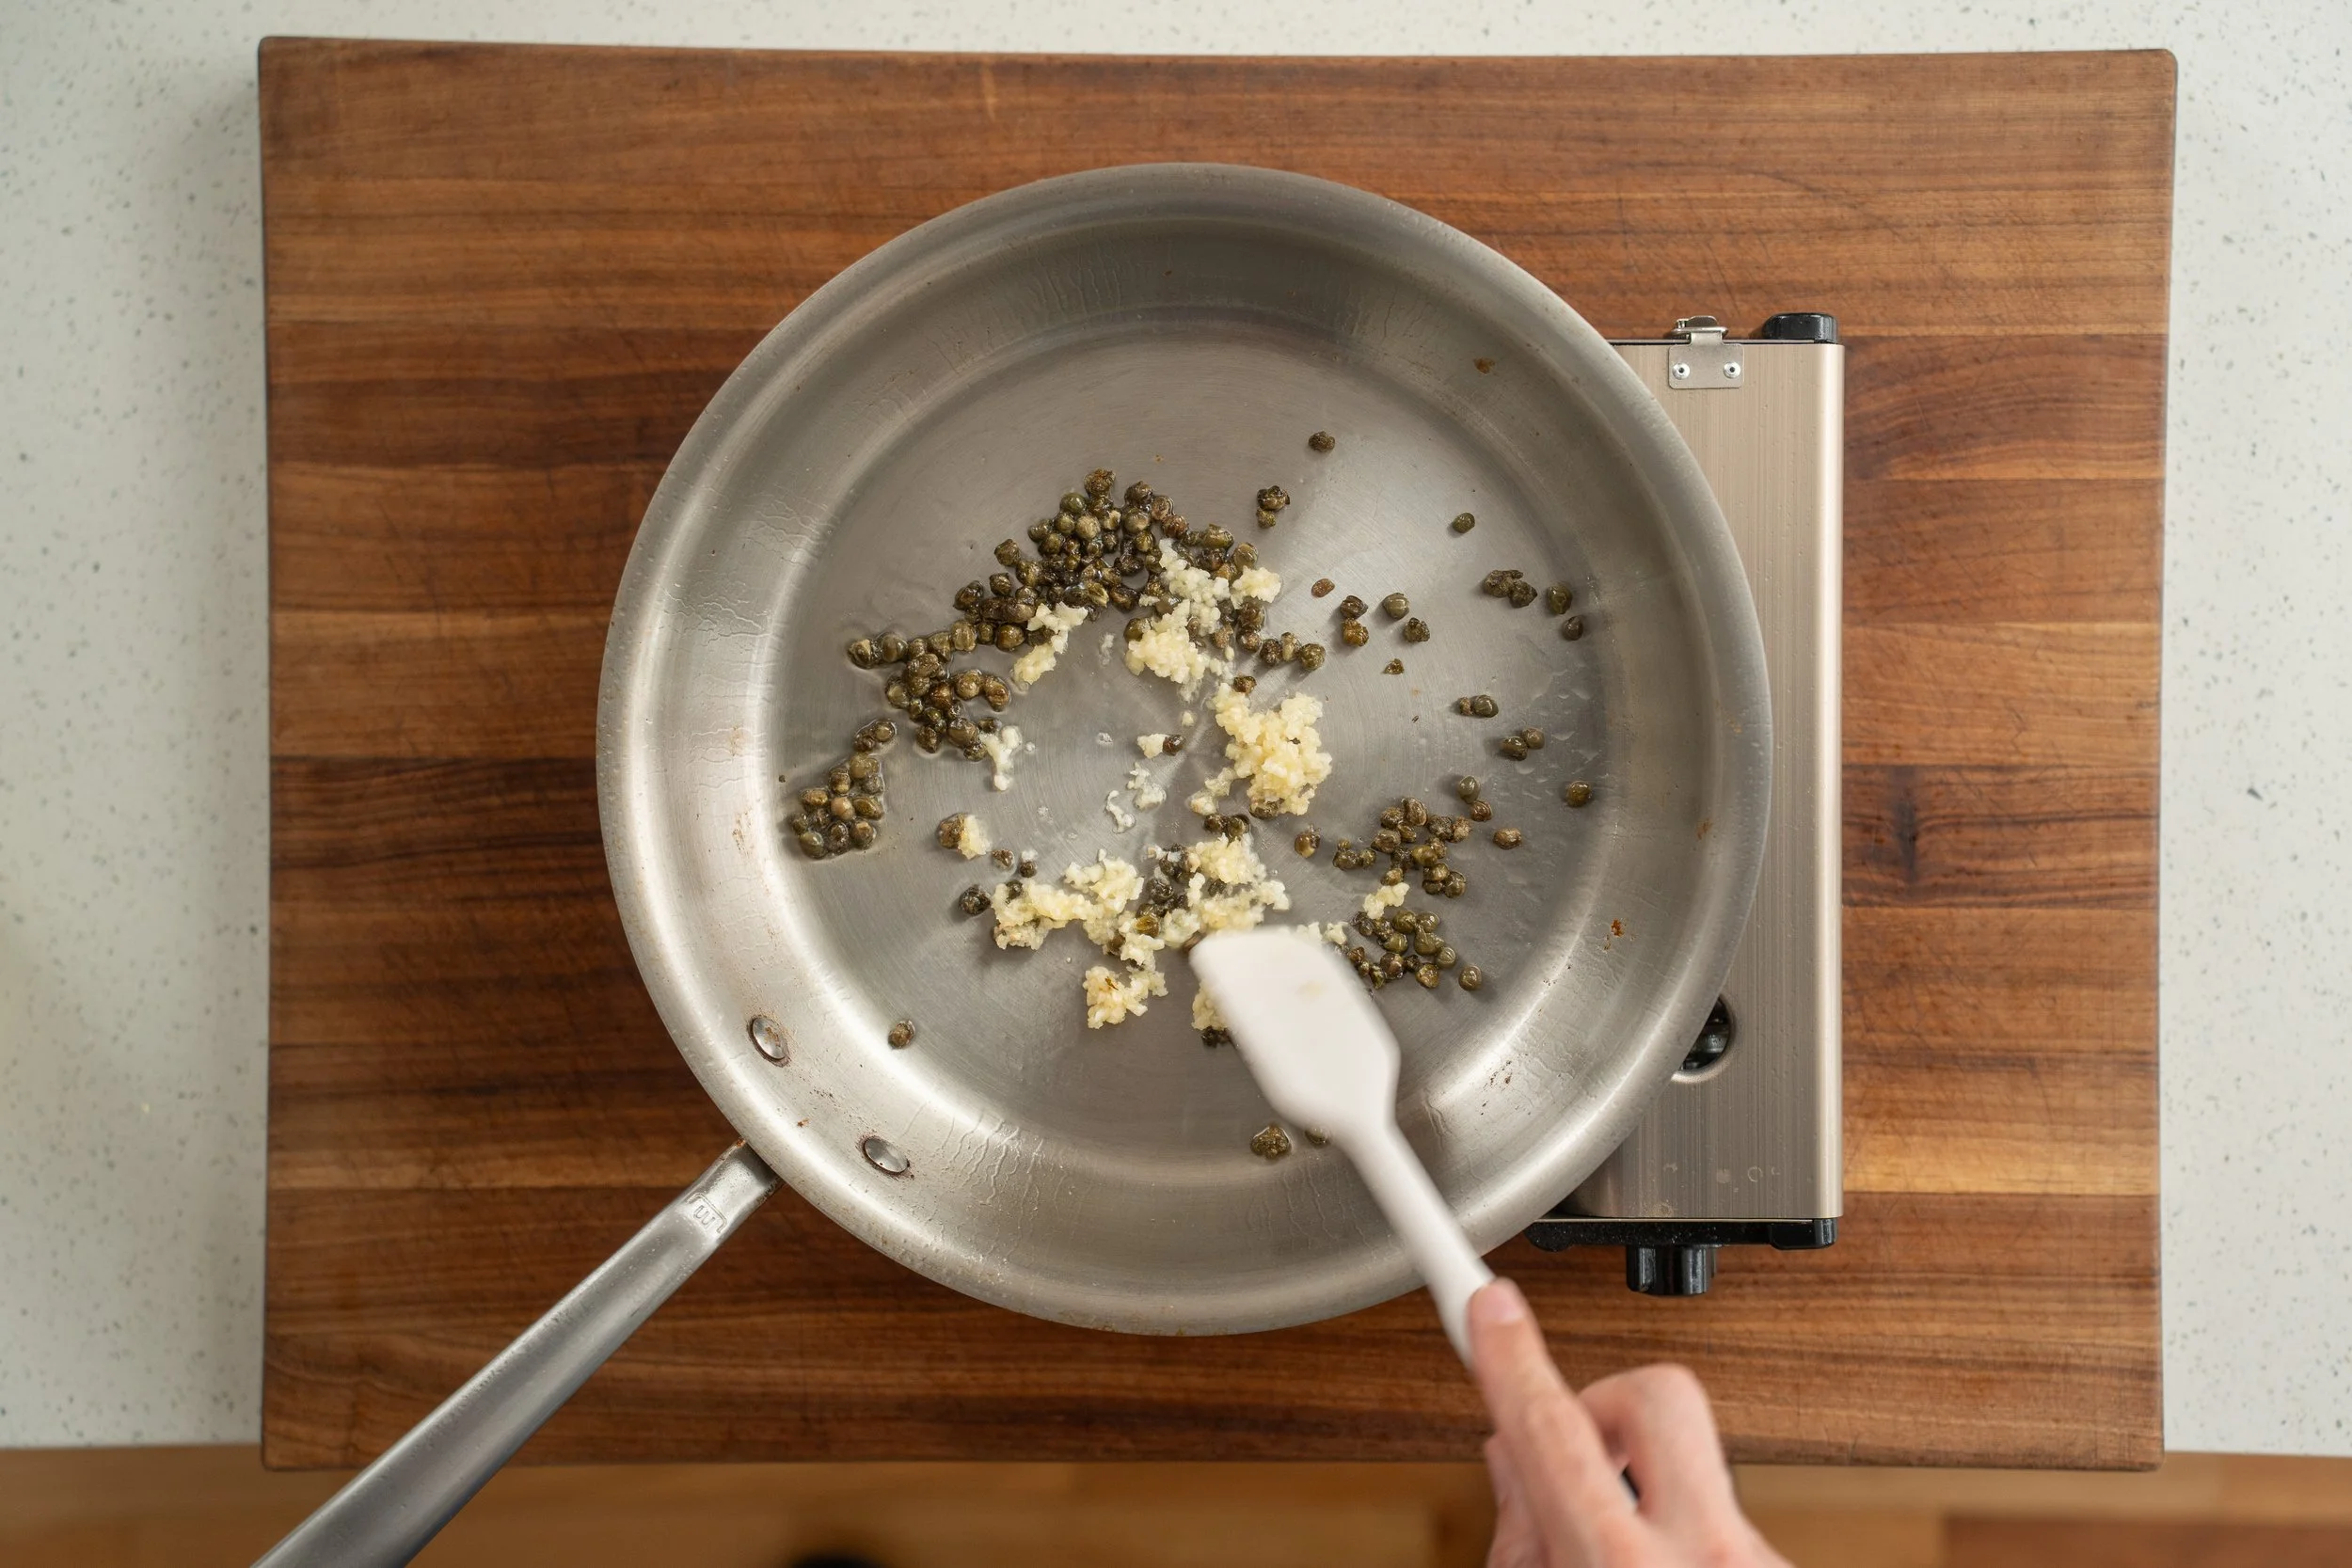
Bloomed Capers & Slow Cooked Garlic - Sizzling the capers in hot oil before adding the garlic concentrates their briny flavor and softens them so they melt into the sauce instead of standing out as crunchy, salty pearls that pop in your mouth. Cooking the garlic gently also prevents burning and gives you a mellow, warm sweetness rather than a harsh, sharp bite. These two ingredients are the backbone of the sauce, and taking an extra 90 seconds to baby them over medium-low heat is the difference between a C-tier and S-tier piccata.
Off-Heat Butter Emulsion - Pulling the pan off the heat before whisking in cold, cubed butter is the single most important step in the sauce. The cold butter melts slowly into the hot liquid, creating a glossy, creamy emulsion that clings to the chicken. If you add warm butter—or add it over high heat—the butterfat separates and the sauce breaks into a greasy, heavy mess. Cold butter is the key to a silky, restaurant-quality sauce.
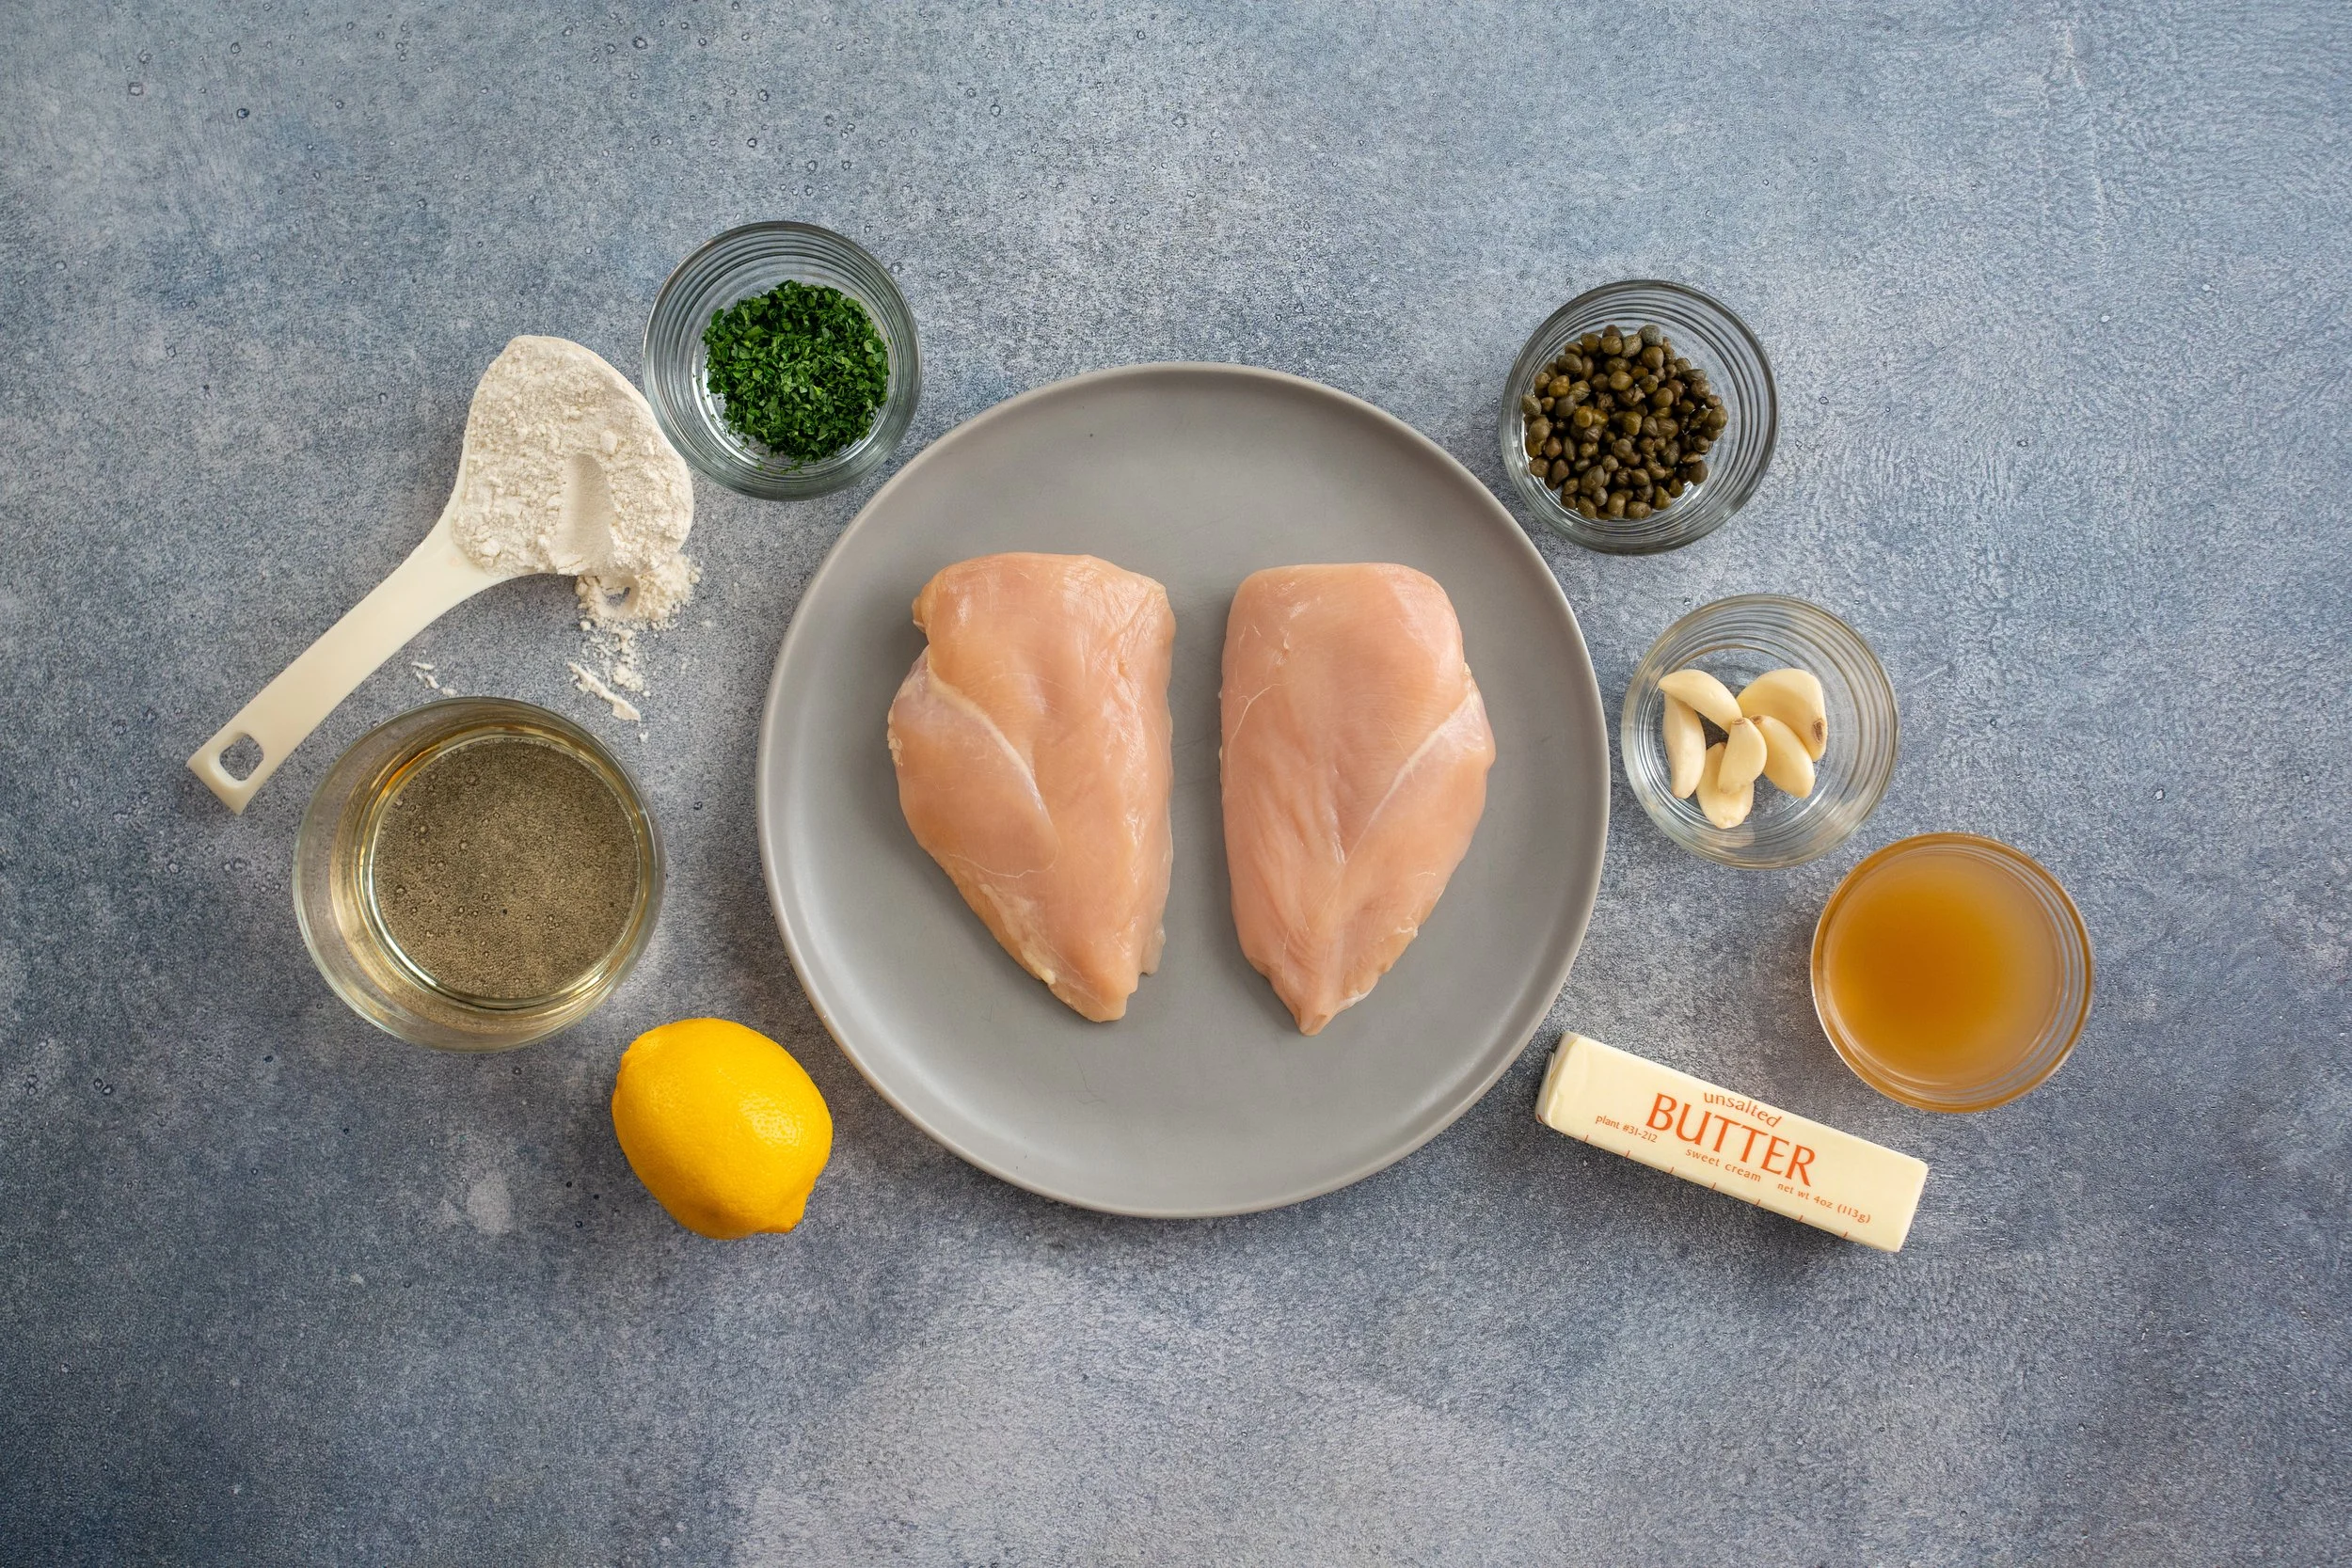
Key Ingredients
Chicken Breasts
This dish is built for breasts, not thighs. Thighs are harder to pound into an even cutlet because they’re made up of multiple smaller muscles that can tear apart when being pounded. Plus the extra fat and juiciness you usually get from thighs also isn’t needed here. The butter sauce already brings plenty of richness, and the combo of a quick dry brine AND a flour dredge keeps the breast incredibly moist.
White Wine (Dry)
Go with something dry like Chardonnay, Pinot Grigio, or Sauvignon Blanc. Avoid anything sweet like Moscato or Riesling. Instead of a vibrant sauce with lively acidity, you’ll end up with a sweet one, which isn’t bad, but it’s not piccata.
If you don’t cook with wine, chicken broth with a touch of extra lemon juice (2-3 grams) is your best substitute. You’ll lose a little depth, but it still works.
Unsalted Butter (Cold, Cubed)
The butter MUST be cold and cut into roughly tablespoon-sized cubes. Cold butter melts slowly into the reduced sauce, letting the fat and liquid blend into one smooth, glossy emulsion. Room temperature or melted butter will just pool on top as a greasy slick — the sauce won’t come together. This is a non-negotiable. Keep it cold, add it off heat, and whisk constantly.
Capers
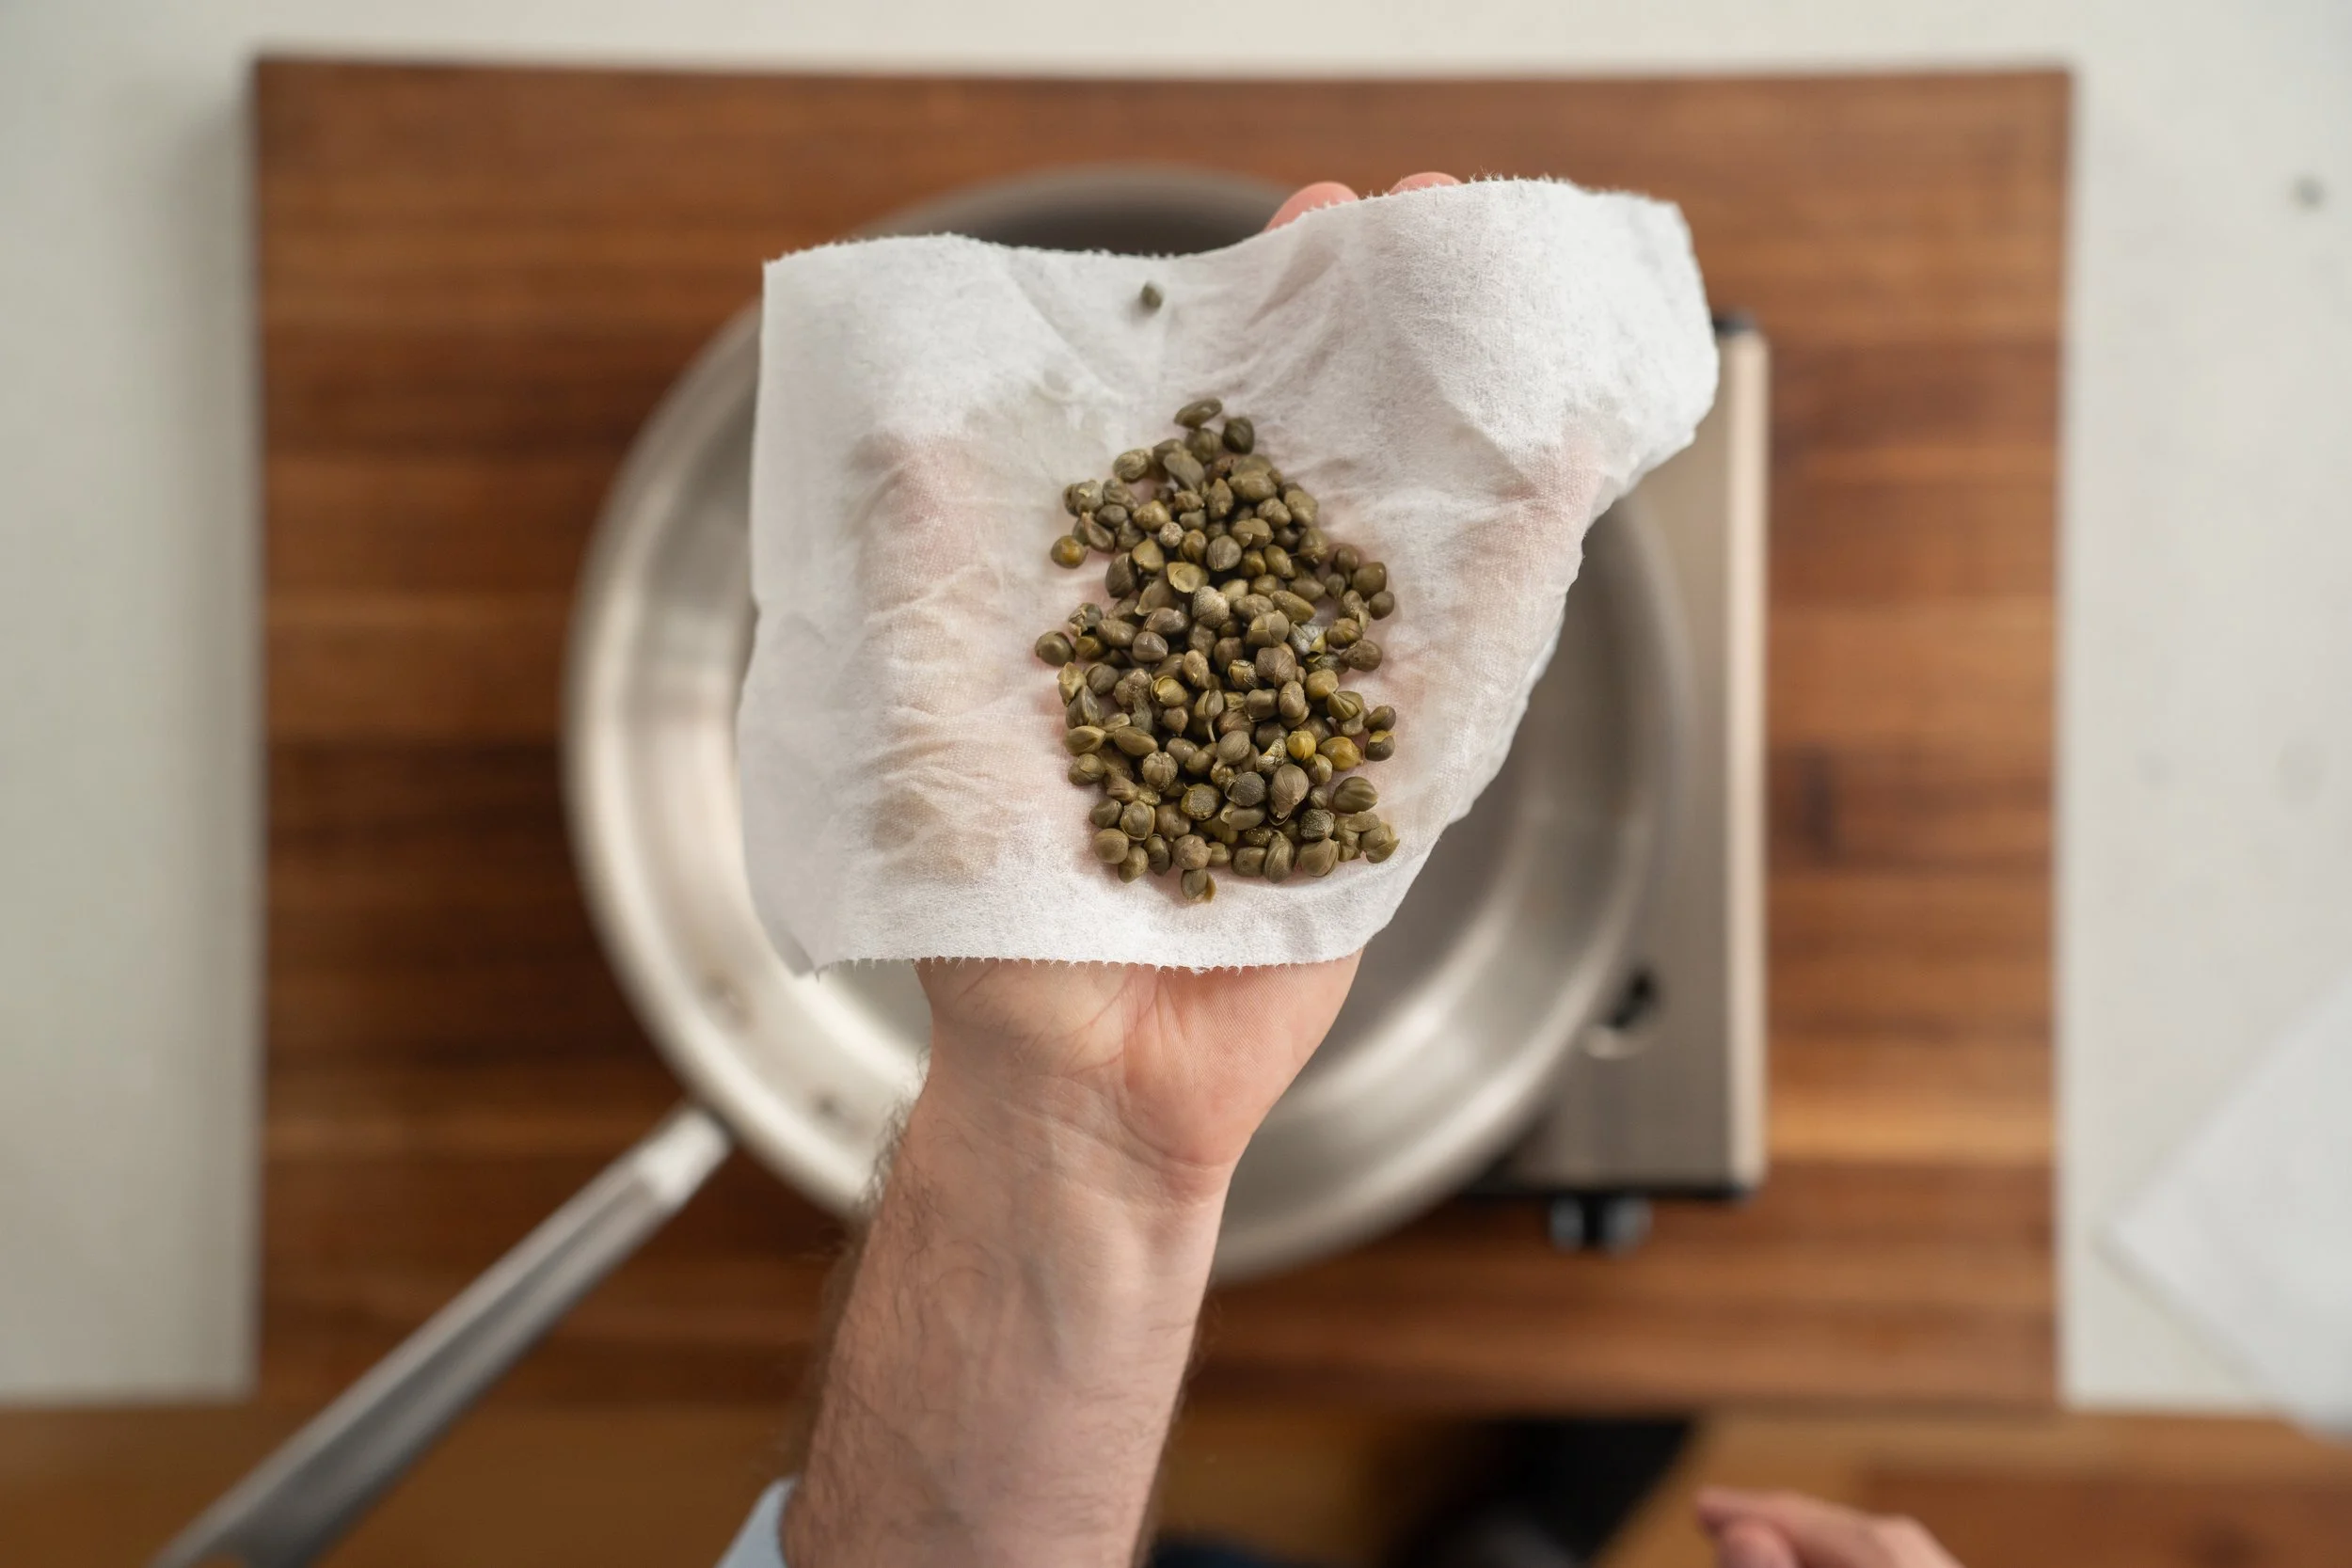
Use capers packed in brine (small size is ideal) instead of salt packed. Those are WAAAAY too salty for this application IMO. Drain and pat the capers dry before blooming in the pan to avoid dangerous oil splatter.
Lemon (Juice + Zest)
You need BOTH juice and zest, and they do completely different things. The juice goes into the sauce early and provides bright, punchy acidity that balances the richness of the butter. The zest gets added at the very end to anchor the lemon flavor without adding extra acid, which can easily throw the sauce out of balance. About ⅙ of a lemon’s worth of zest (zested on microplane or fine holes of box grater) is perfect. Don’t skip it. It makes a massive difference.
Storage & Make-Ahead
Reheating: Chicken piccata is an à la minute dish thats meant to be eaten immediately after plating and it does not reheat SUPER well because of the nature of the emulsified butter sauce.
BUT, if somehow you have leftovers… To reheat, warm the chicken and sauce together in a skillet over medium-low heat with a splash of chicken stock to loosen the sauce back up. If its broken, add in a pad of butter and swirl to emulsify. If you use the microwave, the sauce will break for sure. This wont be silky vibrant piccata, but it will taste good.
Make-Ahead Tip: You can butterfly, pound, salt, and dredge the cutlets ahead of time and hold them on a sheet tray in the fridge for up to 4 hours. The sauce MUST be made fresh — there’s no shortcutting an emulsified butter sauce. But having the chicken prepped and ready to go makes this an incredibly fast weeknight dinner or a last minute dinner party entree.
RECIPE
CHICKEN PICCATA
COOK TIME 20 min | YIELD 4 cutlets (2 servings)

INGREDIENTS
450 g / 1 lb (2 pieces) boneless, skinless chicken breasts
Salt to taste
30 g (1/4 cup) all-purpose flour (for dredging)
28 g (2 Tbsp) olive oil
25 g (6-8 cloves) garlic, finely minced
30 g (2 Tbsp) capers, drained
3 g (1 tsp) all-purpose flour (for sauce)
200 g (3/4 cup + 1 Tbsp) white wine, preferably Chardonnay
100 g (scant 1/2 cup) chicken stock
10 g (2 tsp) lemon juice
75 g (5 Tbsp) unsalted butter, cold, cut into tablespoon-sized cubes
5 g (1/4 cup loosely packed) flat-leaf parsley, chopped
Lemon zest (1/6 of a lemon)
Pinch of salt to finish
INSTRUCTIONS
1. Butterfly and pound the chicken. Slice each breast in half horizontally so you have two thin pieces, or 4 in total.

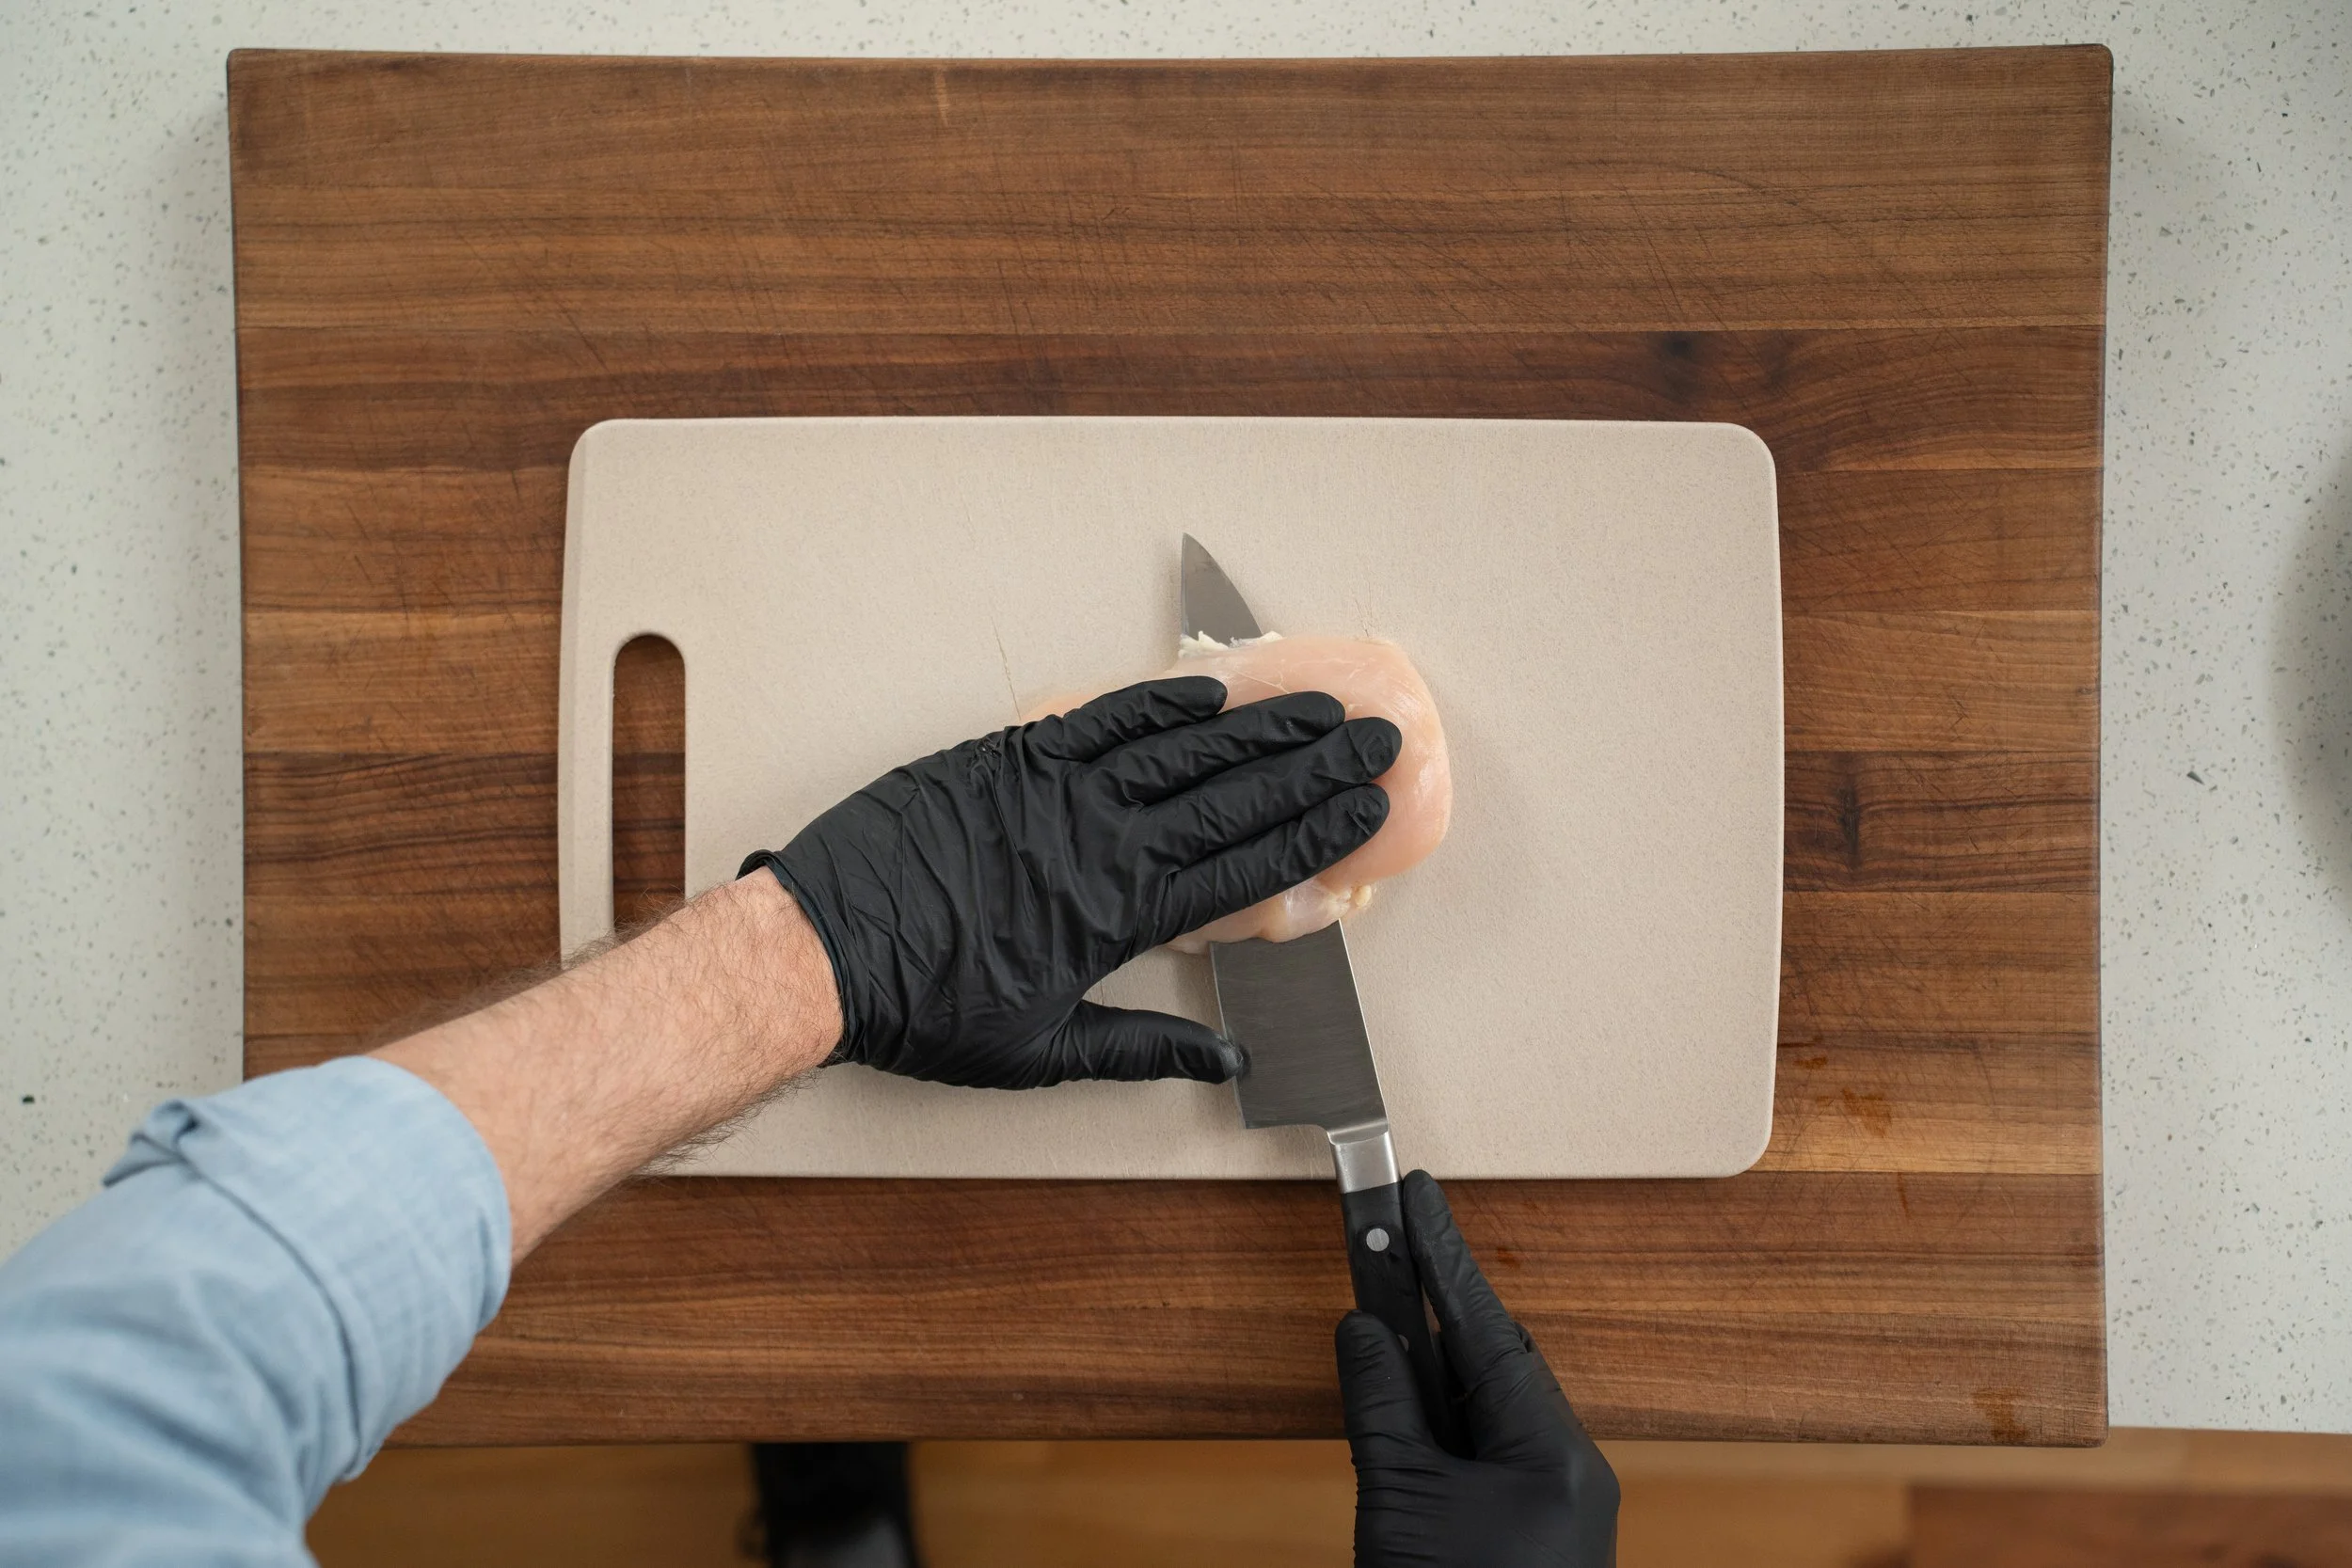
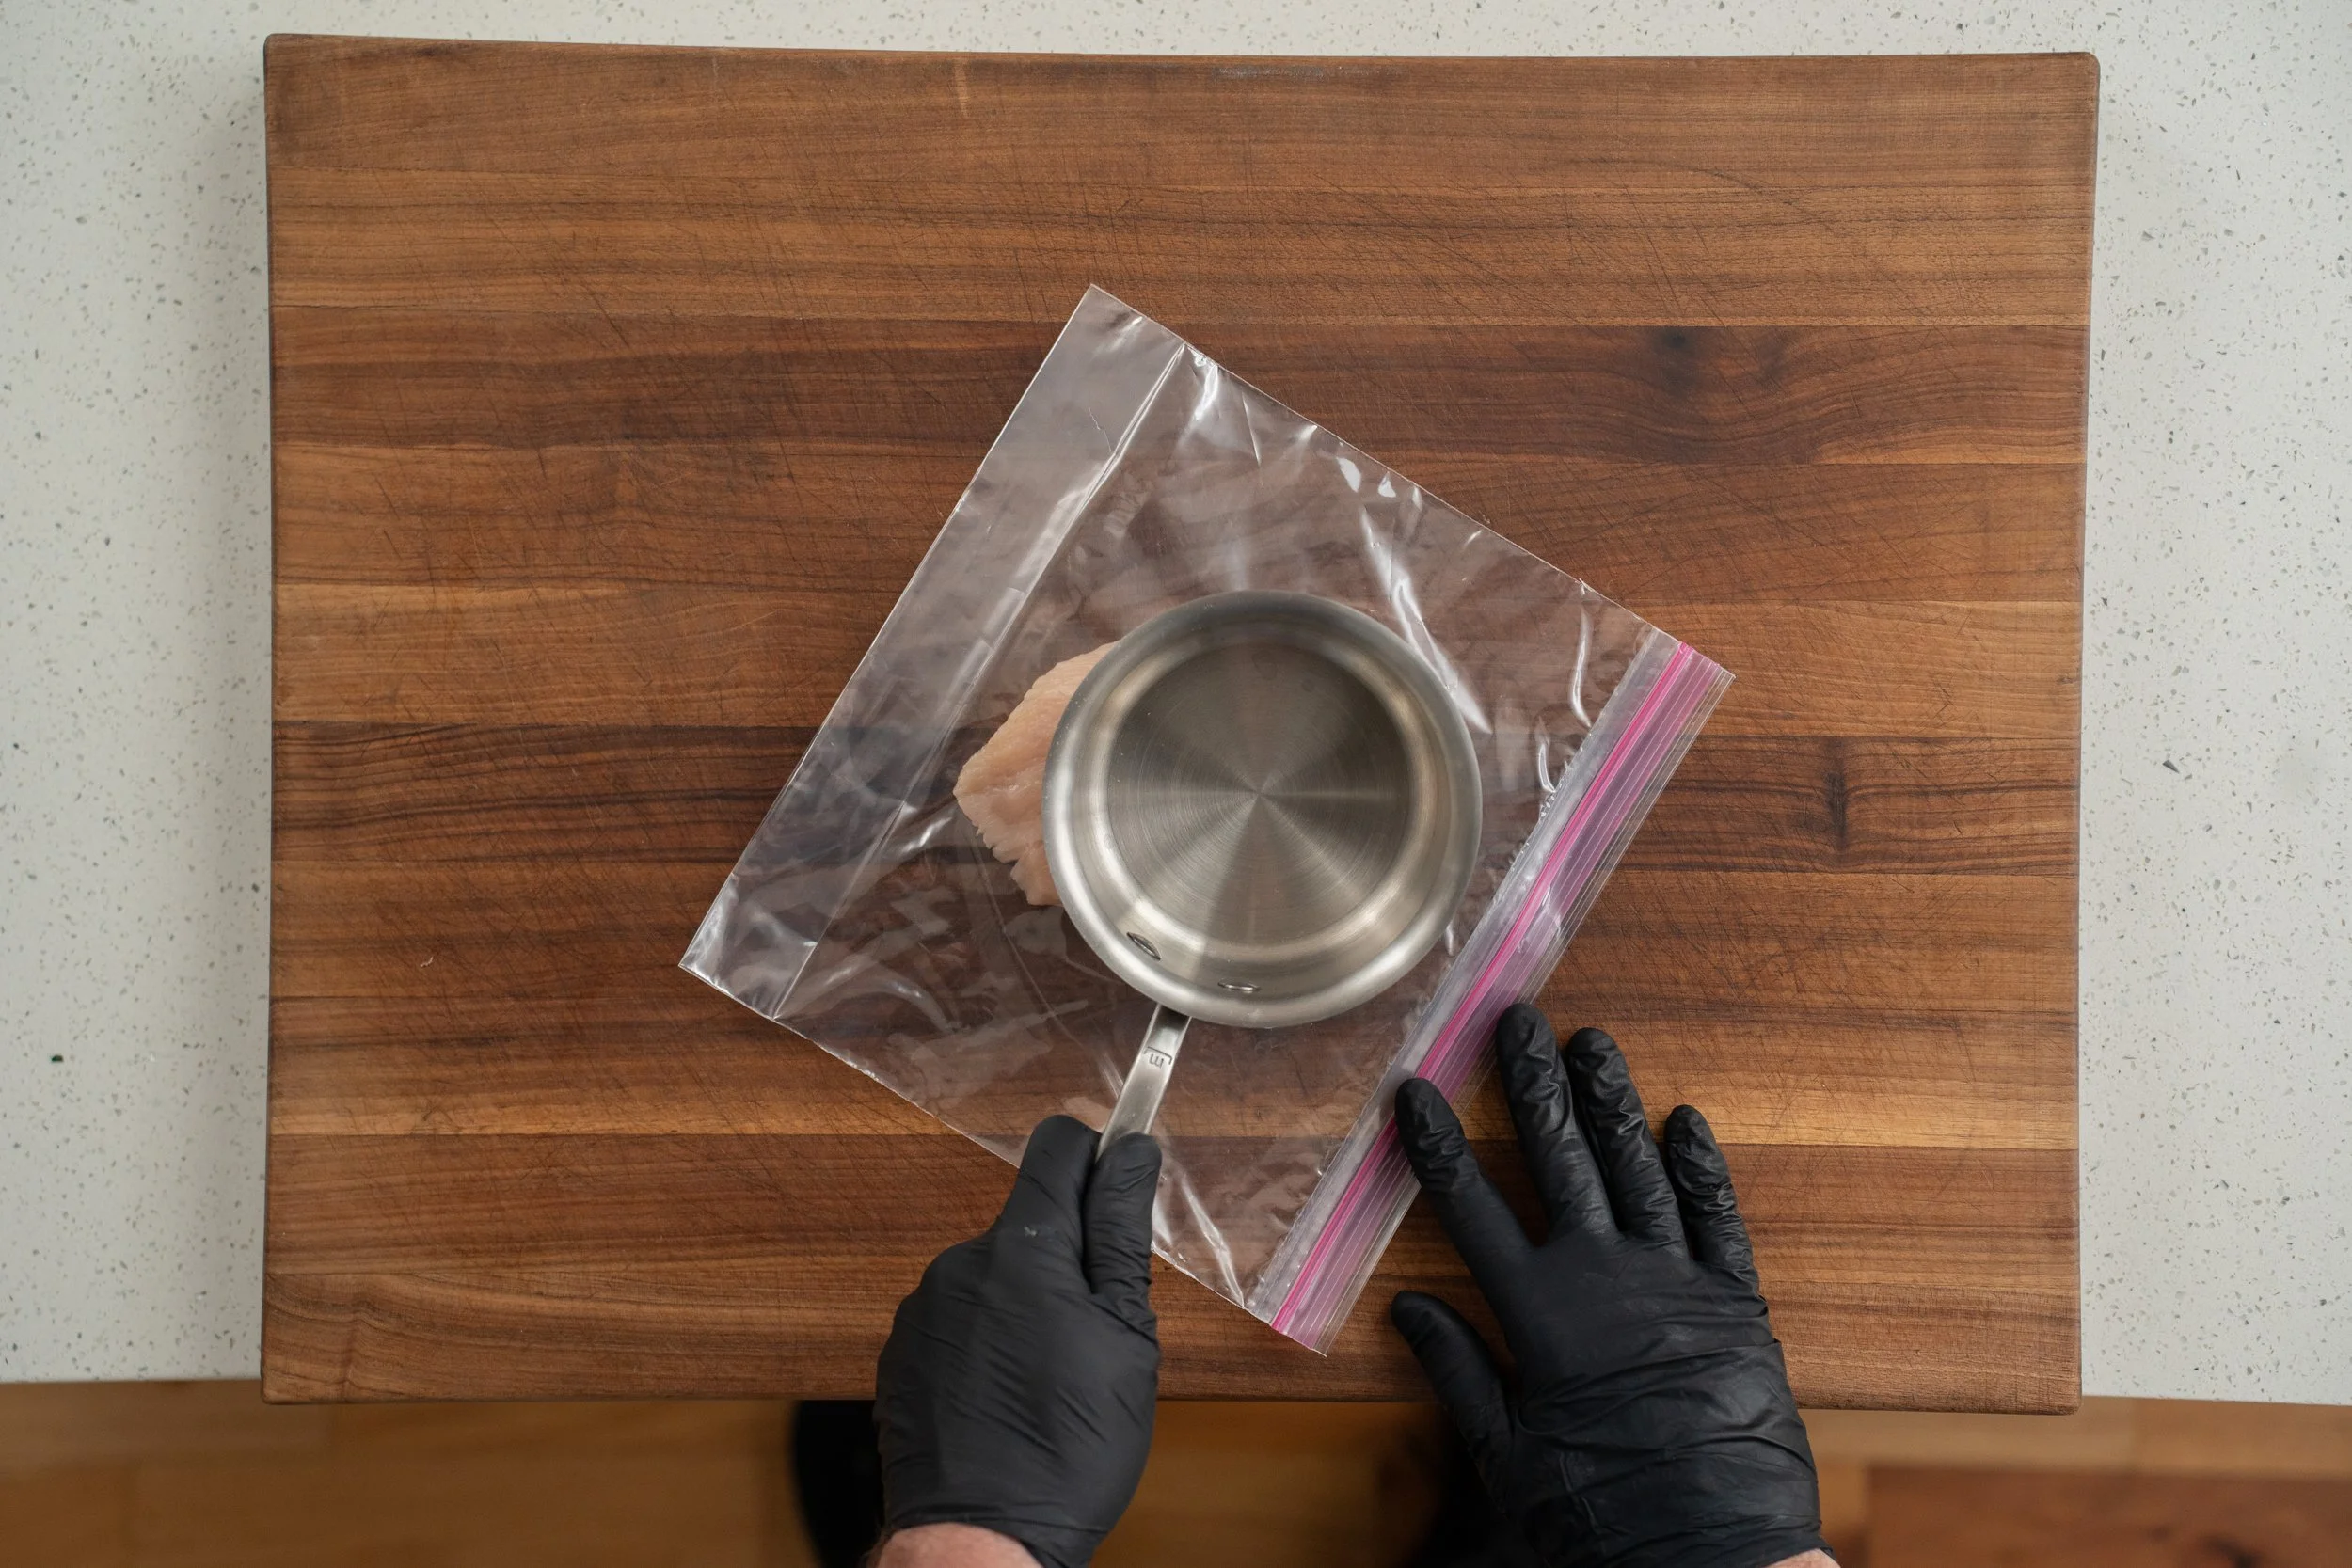
2. Pound into cutlets. Working one at a time, slide the sliced breasts into a freezer bag and pound the thicker end gently with the bottom side of a saucepan to make them thinner. Ideally you want ¼” thick.
3. Seasoning the Chicken. Lay the sliced chicken breast on a plate or wire rack and season generously with salt and pepper on both sides, and let them sit for 5–10 minutes. This short dry brine seasons the meat through and helps it hold moisture.
4. Dredge in flour (twice). After the salt cure, dredge each cutlet in AP flour, shaking off excess. Let them sit for 5 minutes — the first coat absorbs surface moisture. Then dredge again right before cooking. This double dredge gives you a thicker, crispier coating that browns much more evenly and holds sauce better as well.
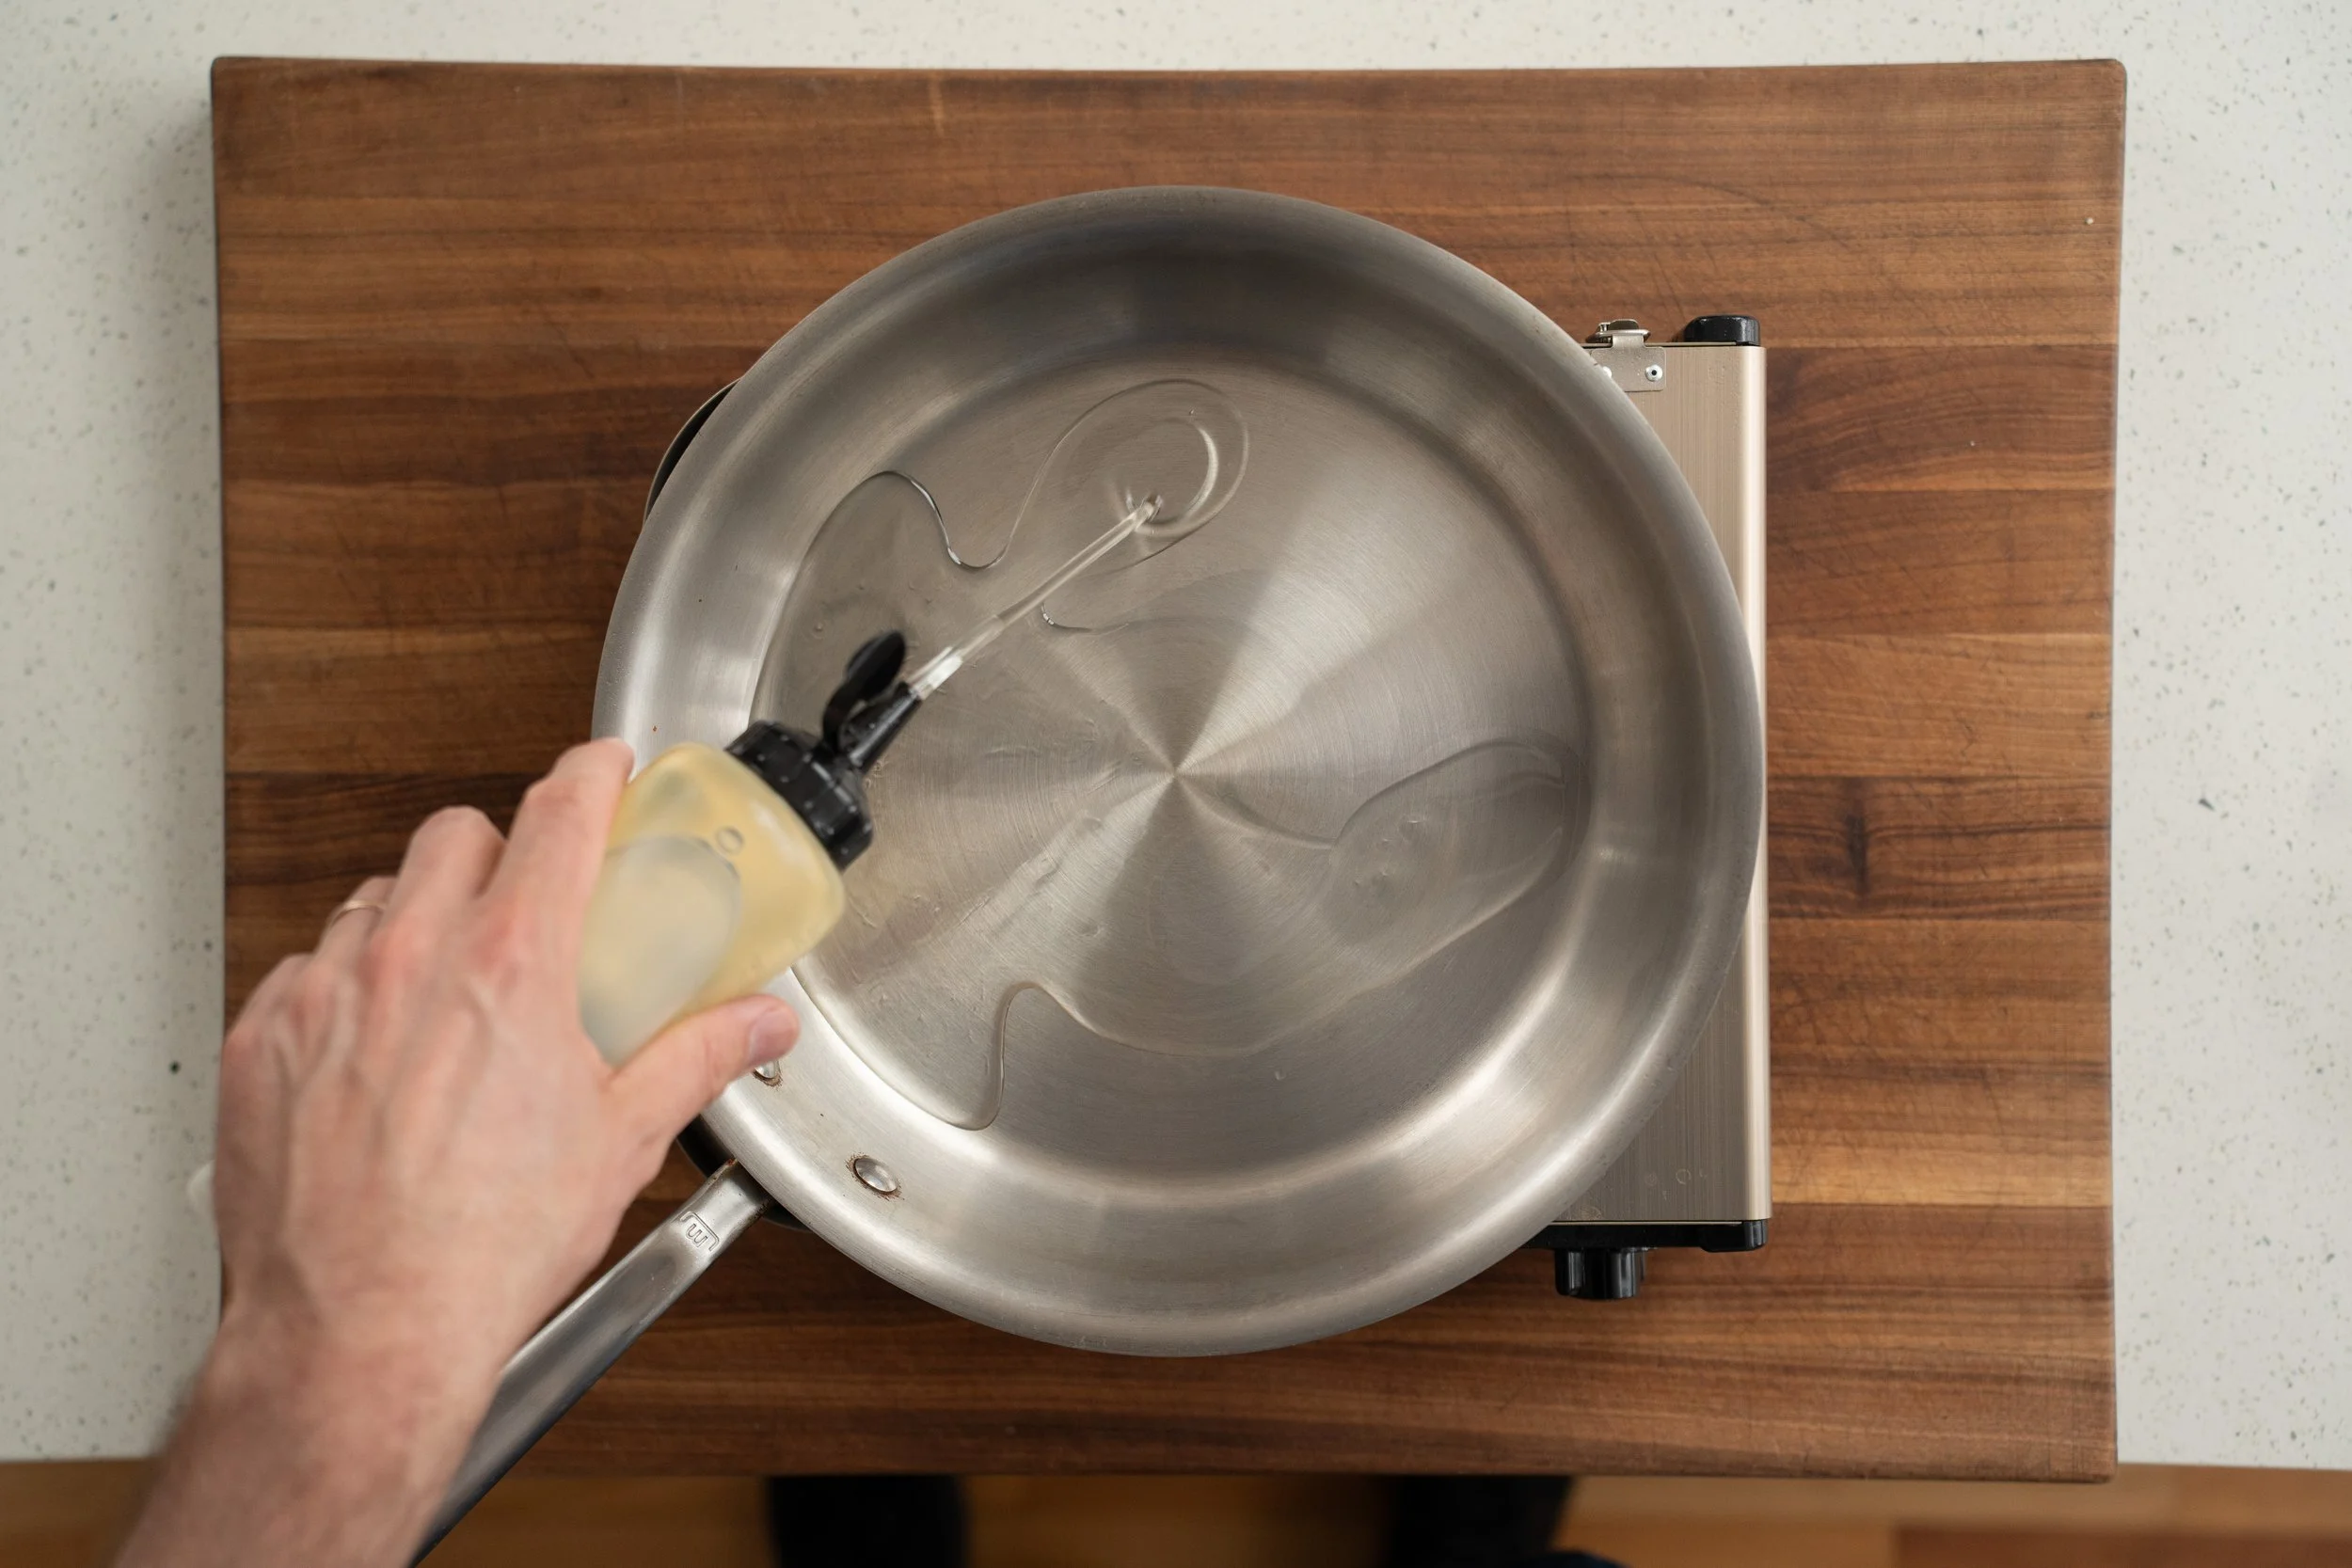
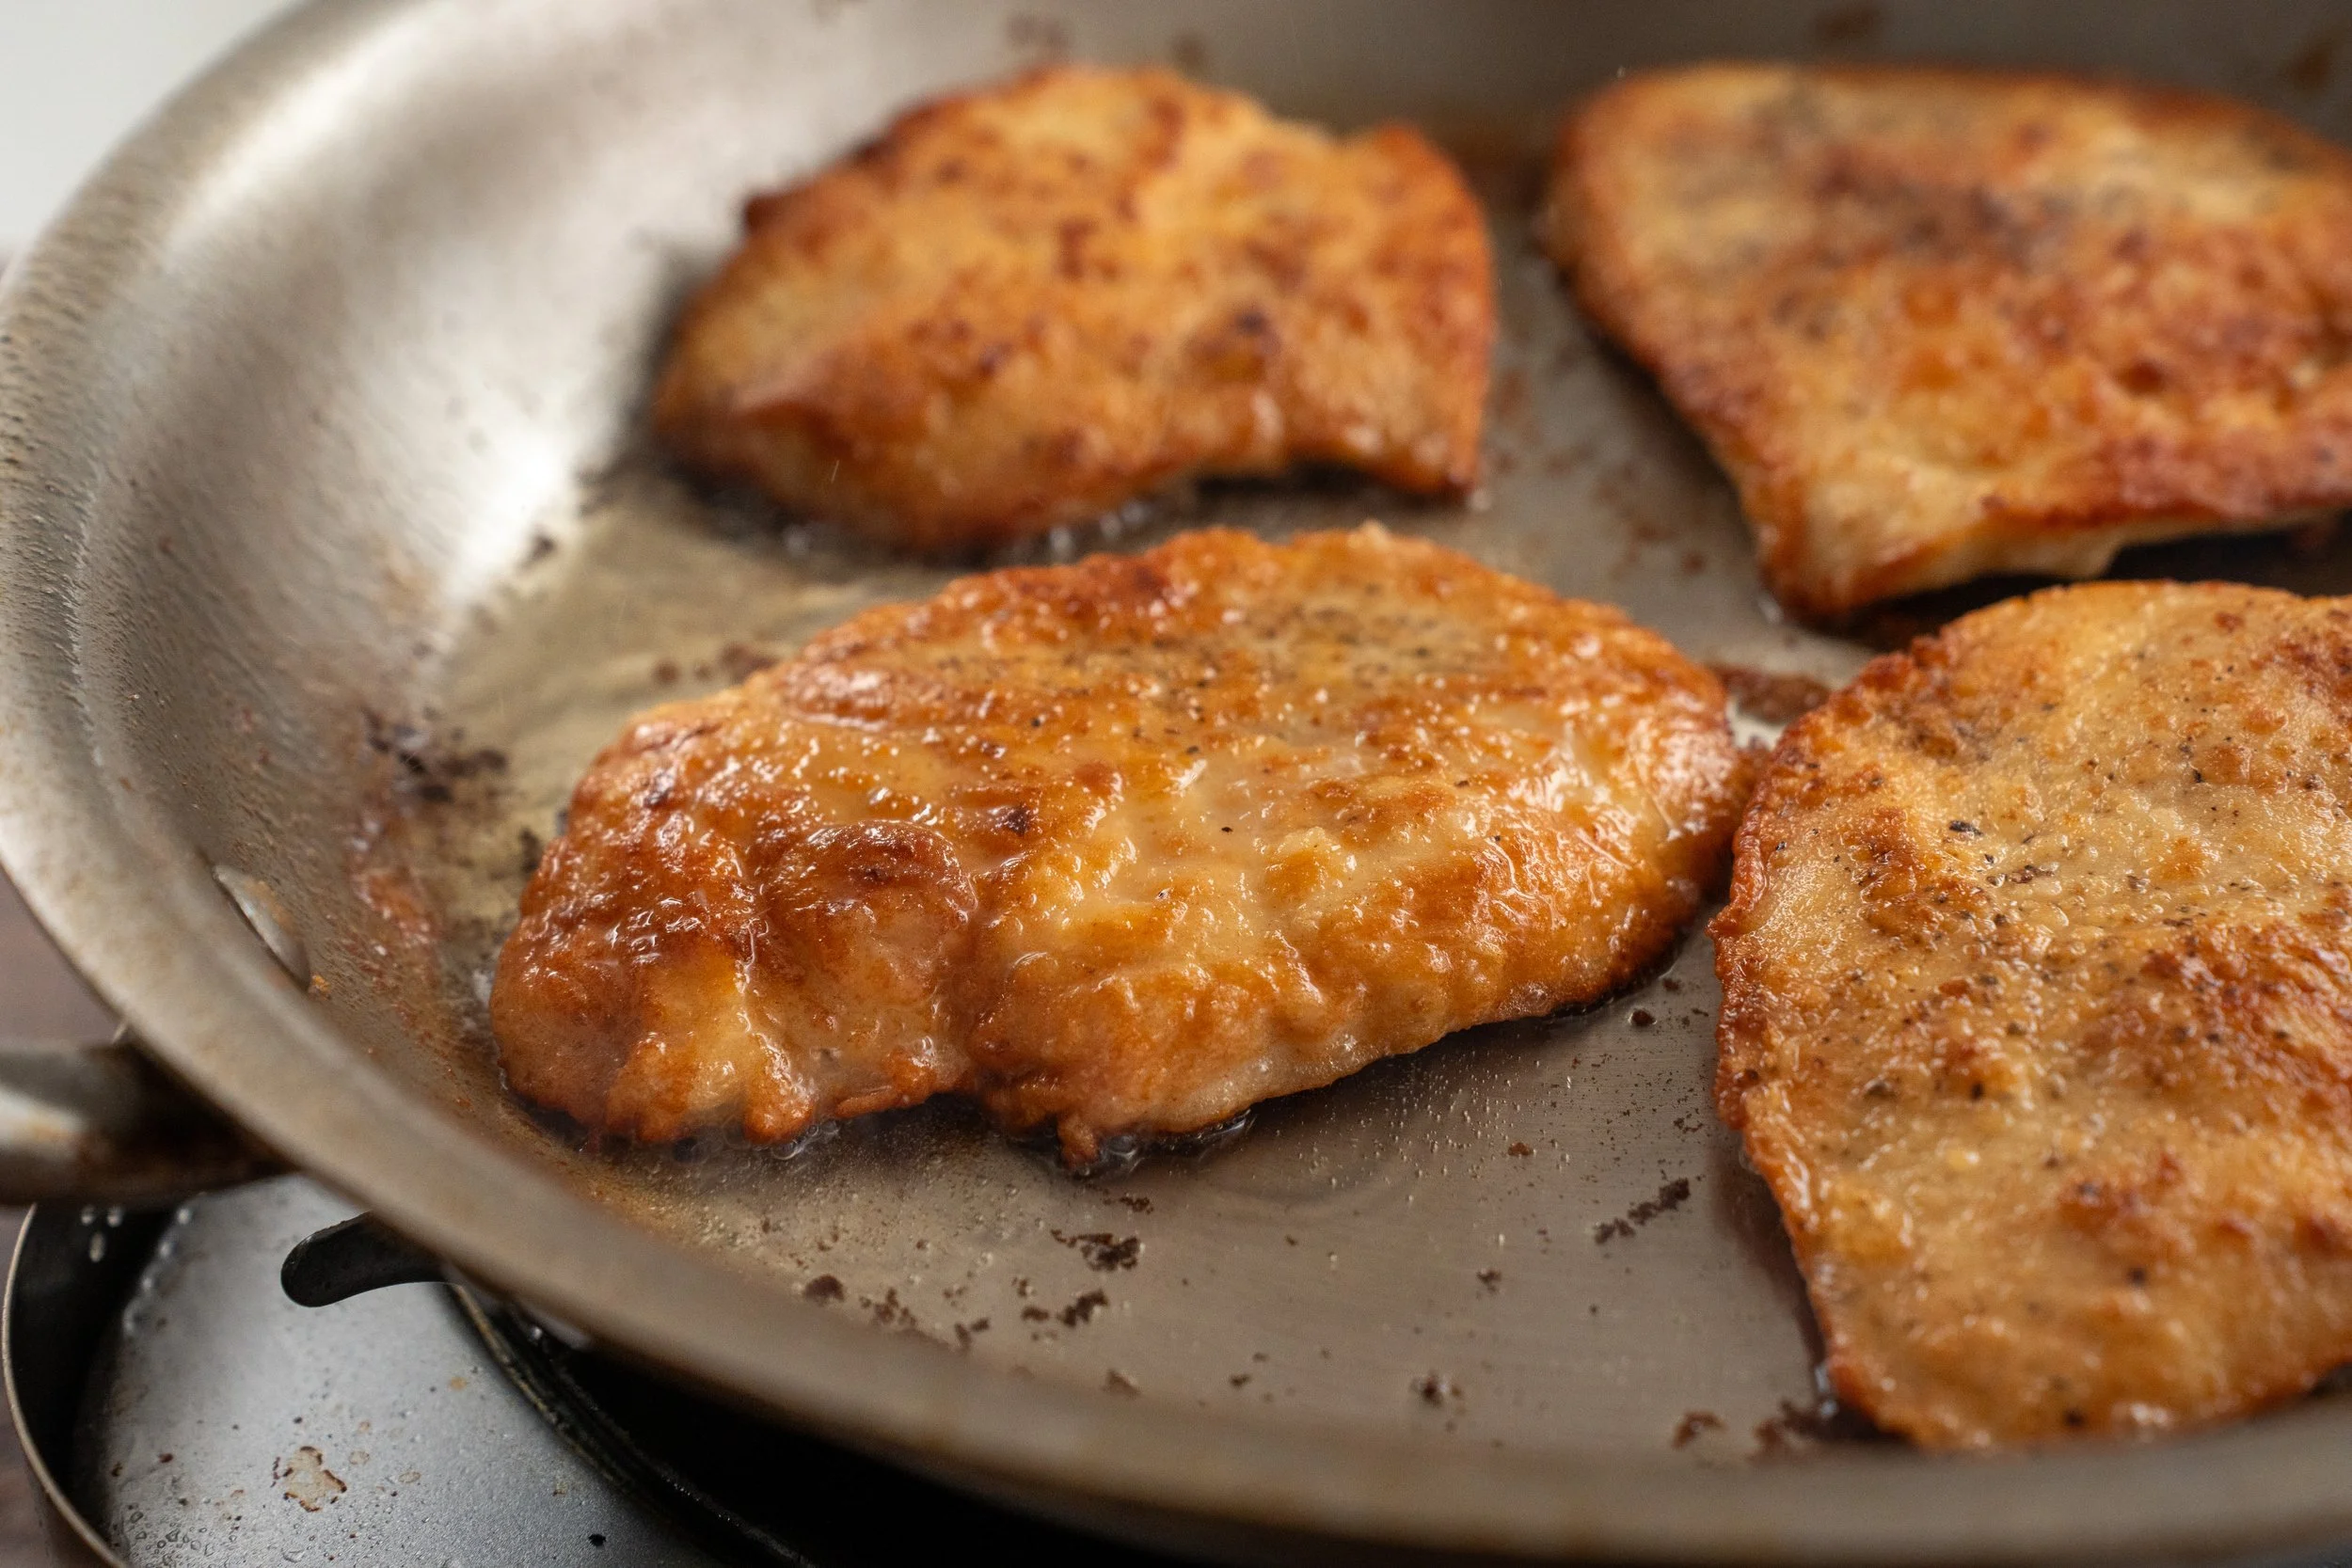
5. Pan-fry the cutlets. Heat about 3 tablespoons of amount of neutral oil (olive oil also works) in a large sauté pan (preferrably 12”) over medium high heat. Once the oil shimmers, lay the cutlets in and cook undisturbed for about 3 minutes until the first side is the color of golden toasted bread with a nice crust. During the fry on the first side make sure to press the cutlet into the pan with a spatula for 15-20 seconds to ensure as much surface area is in contact with the hot pan as possible.
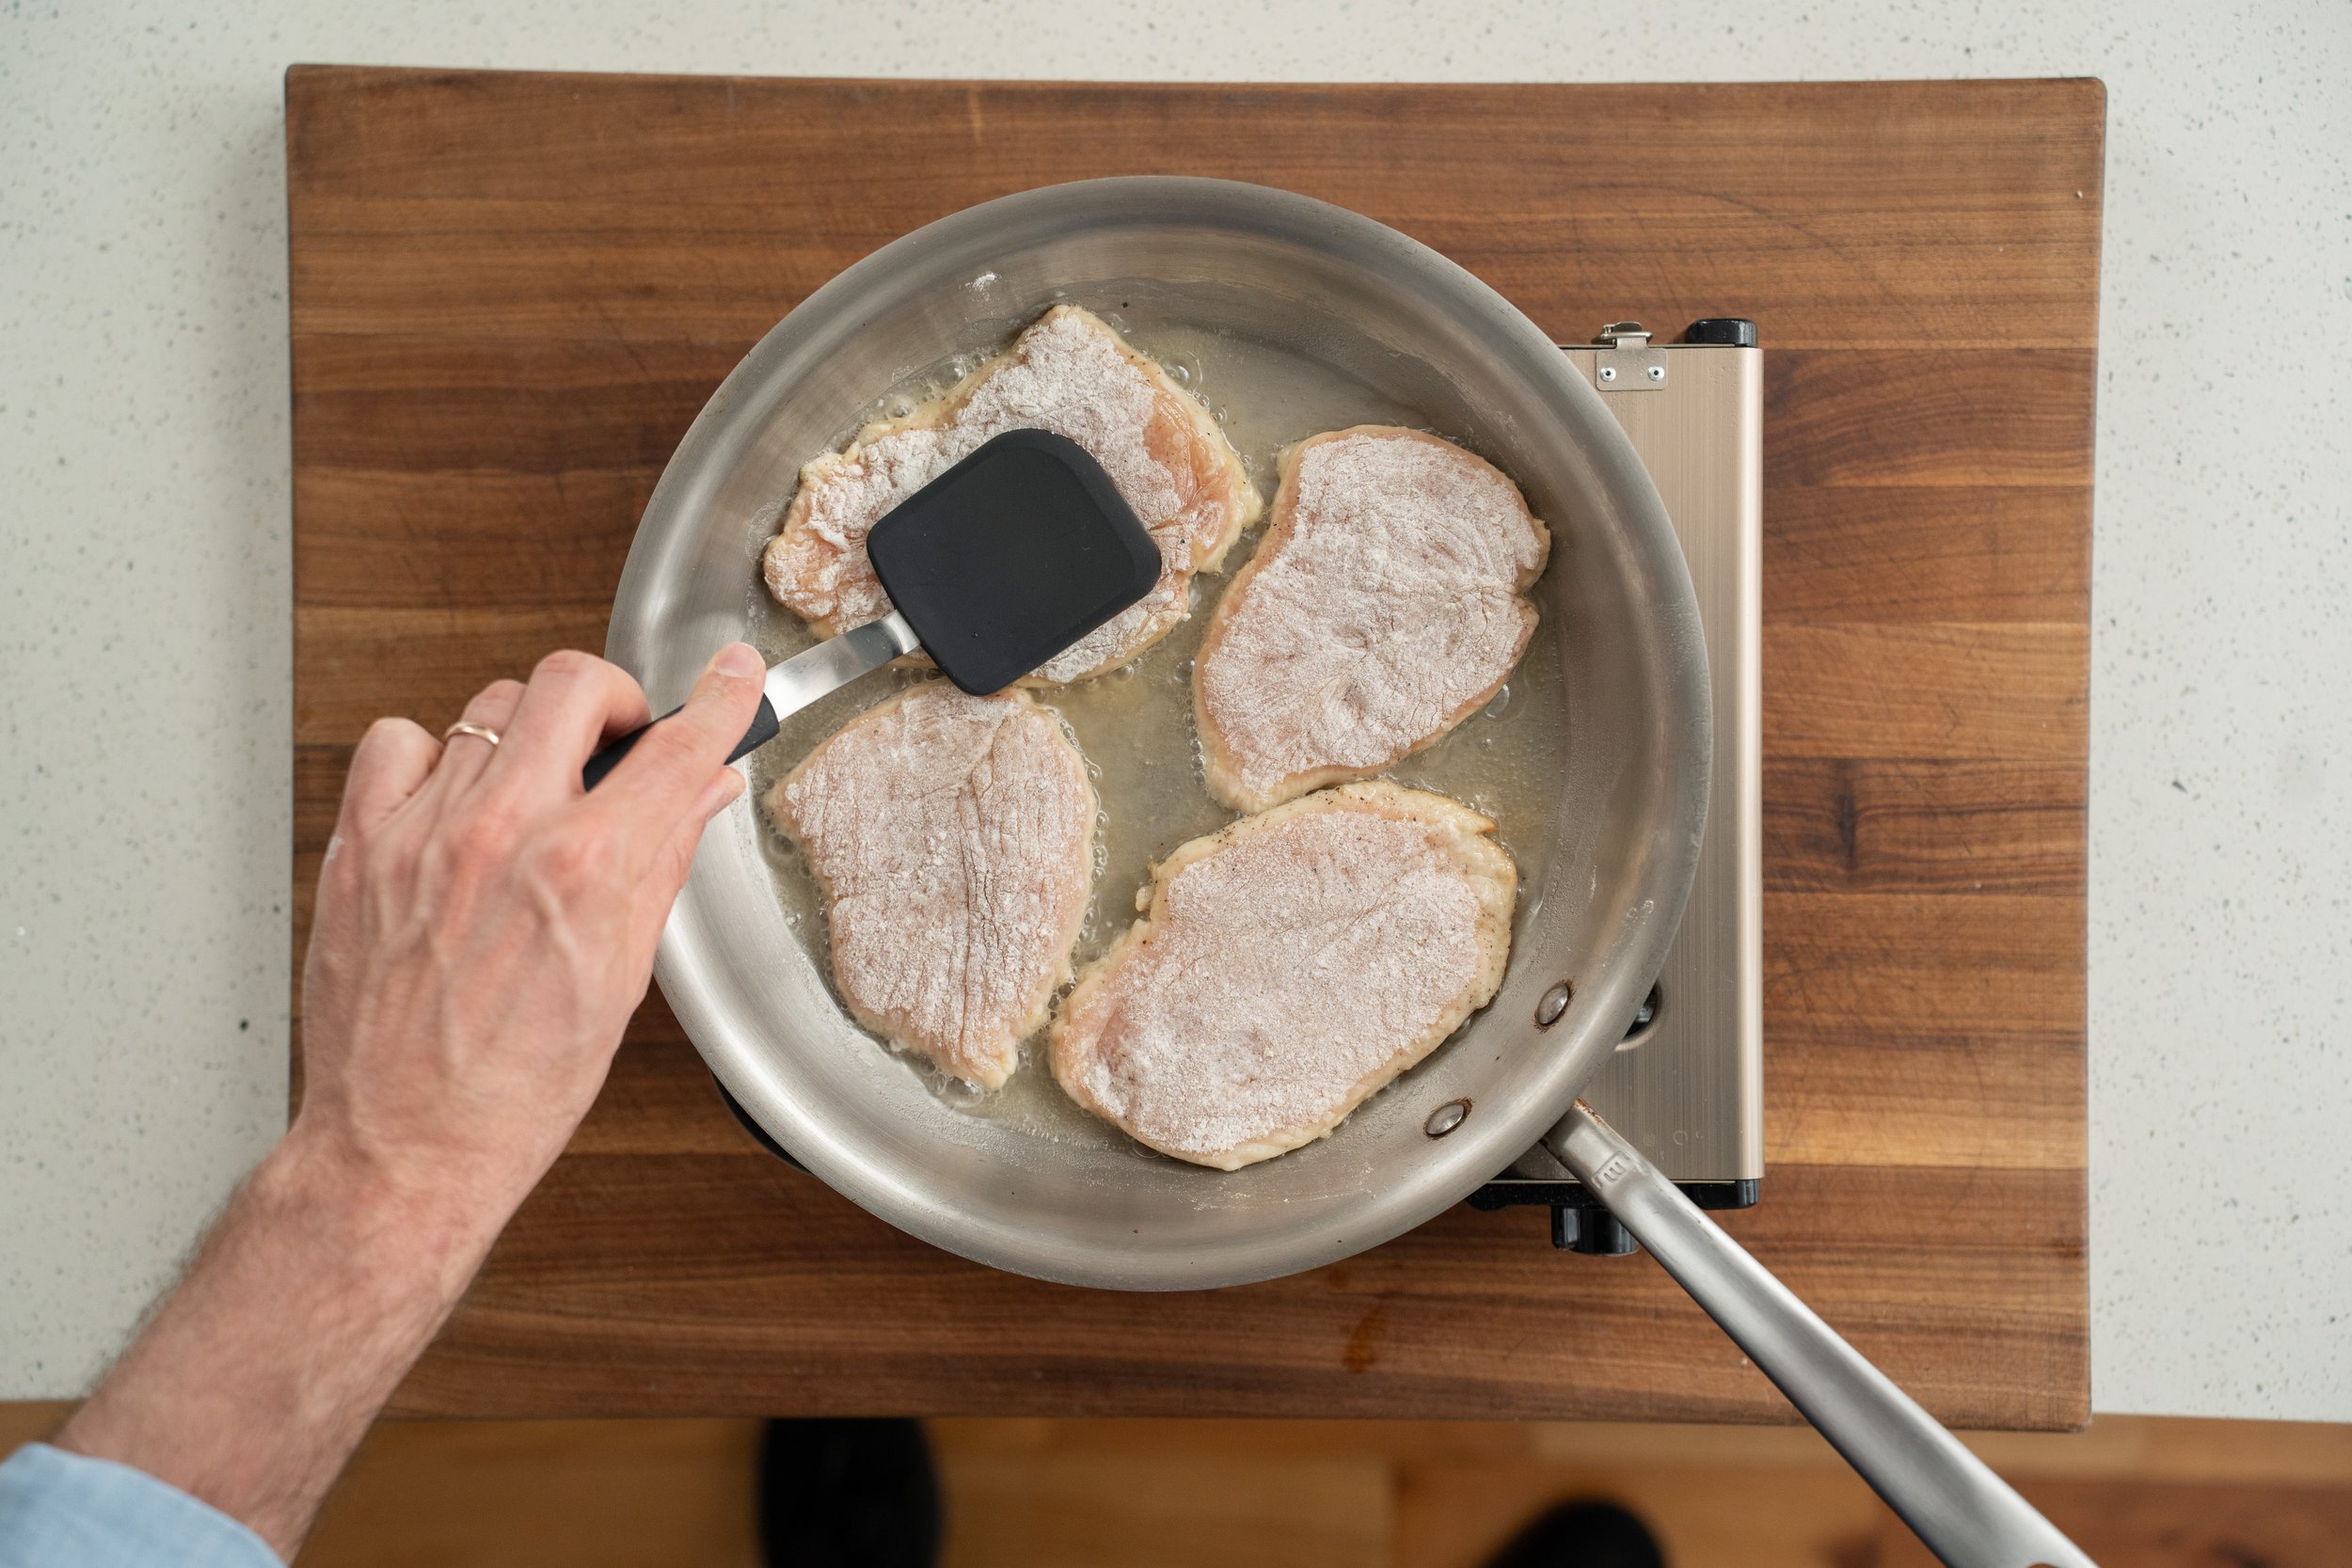
Flip and cook the second side for about 45 seconds to 1 minute. Remove the chicken to a plate and pour off the excess oil and any dark bits — that’s mostly toasted flour, not flavorful fond.
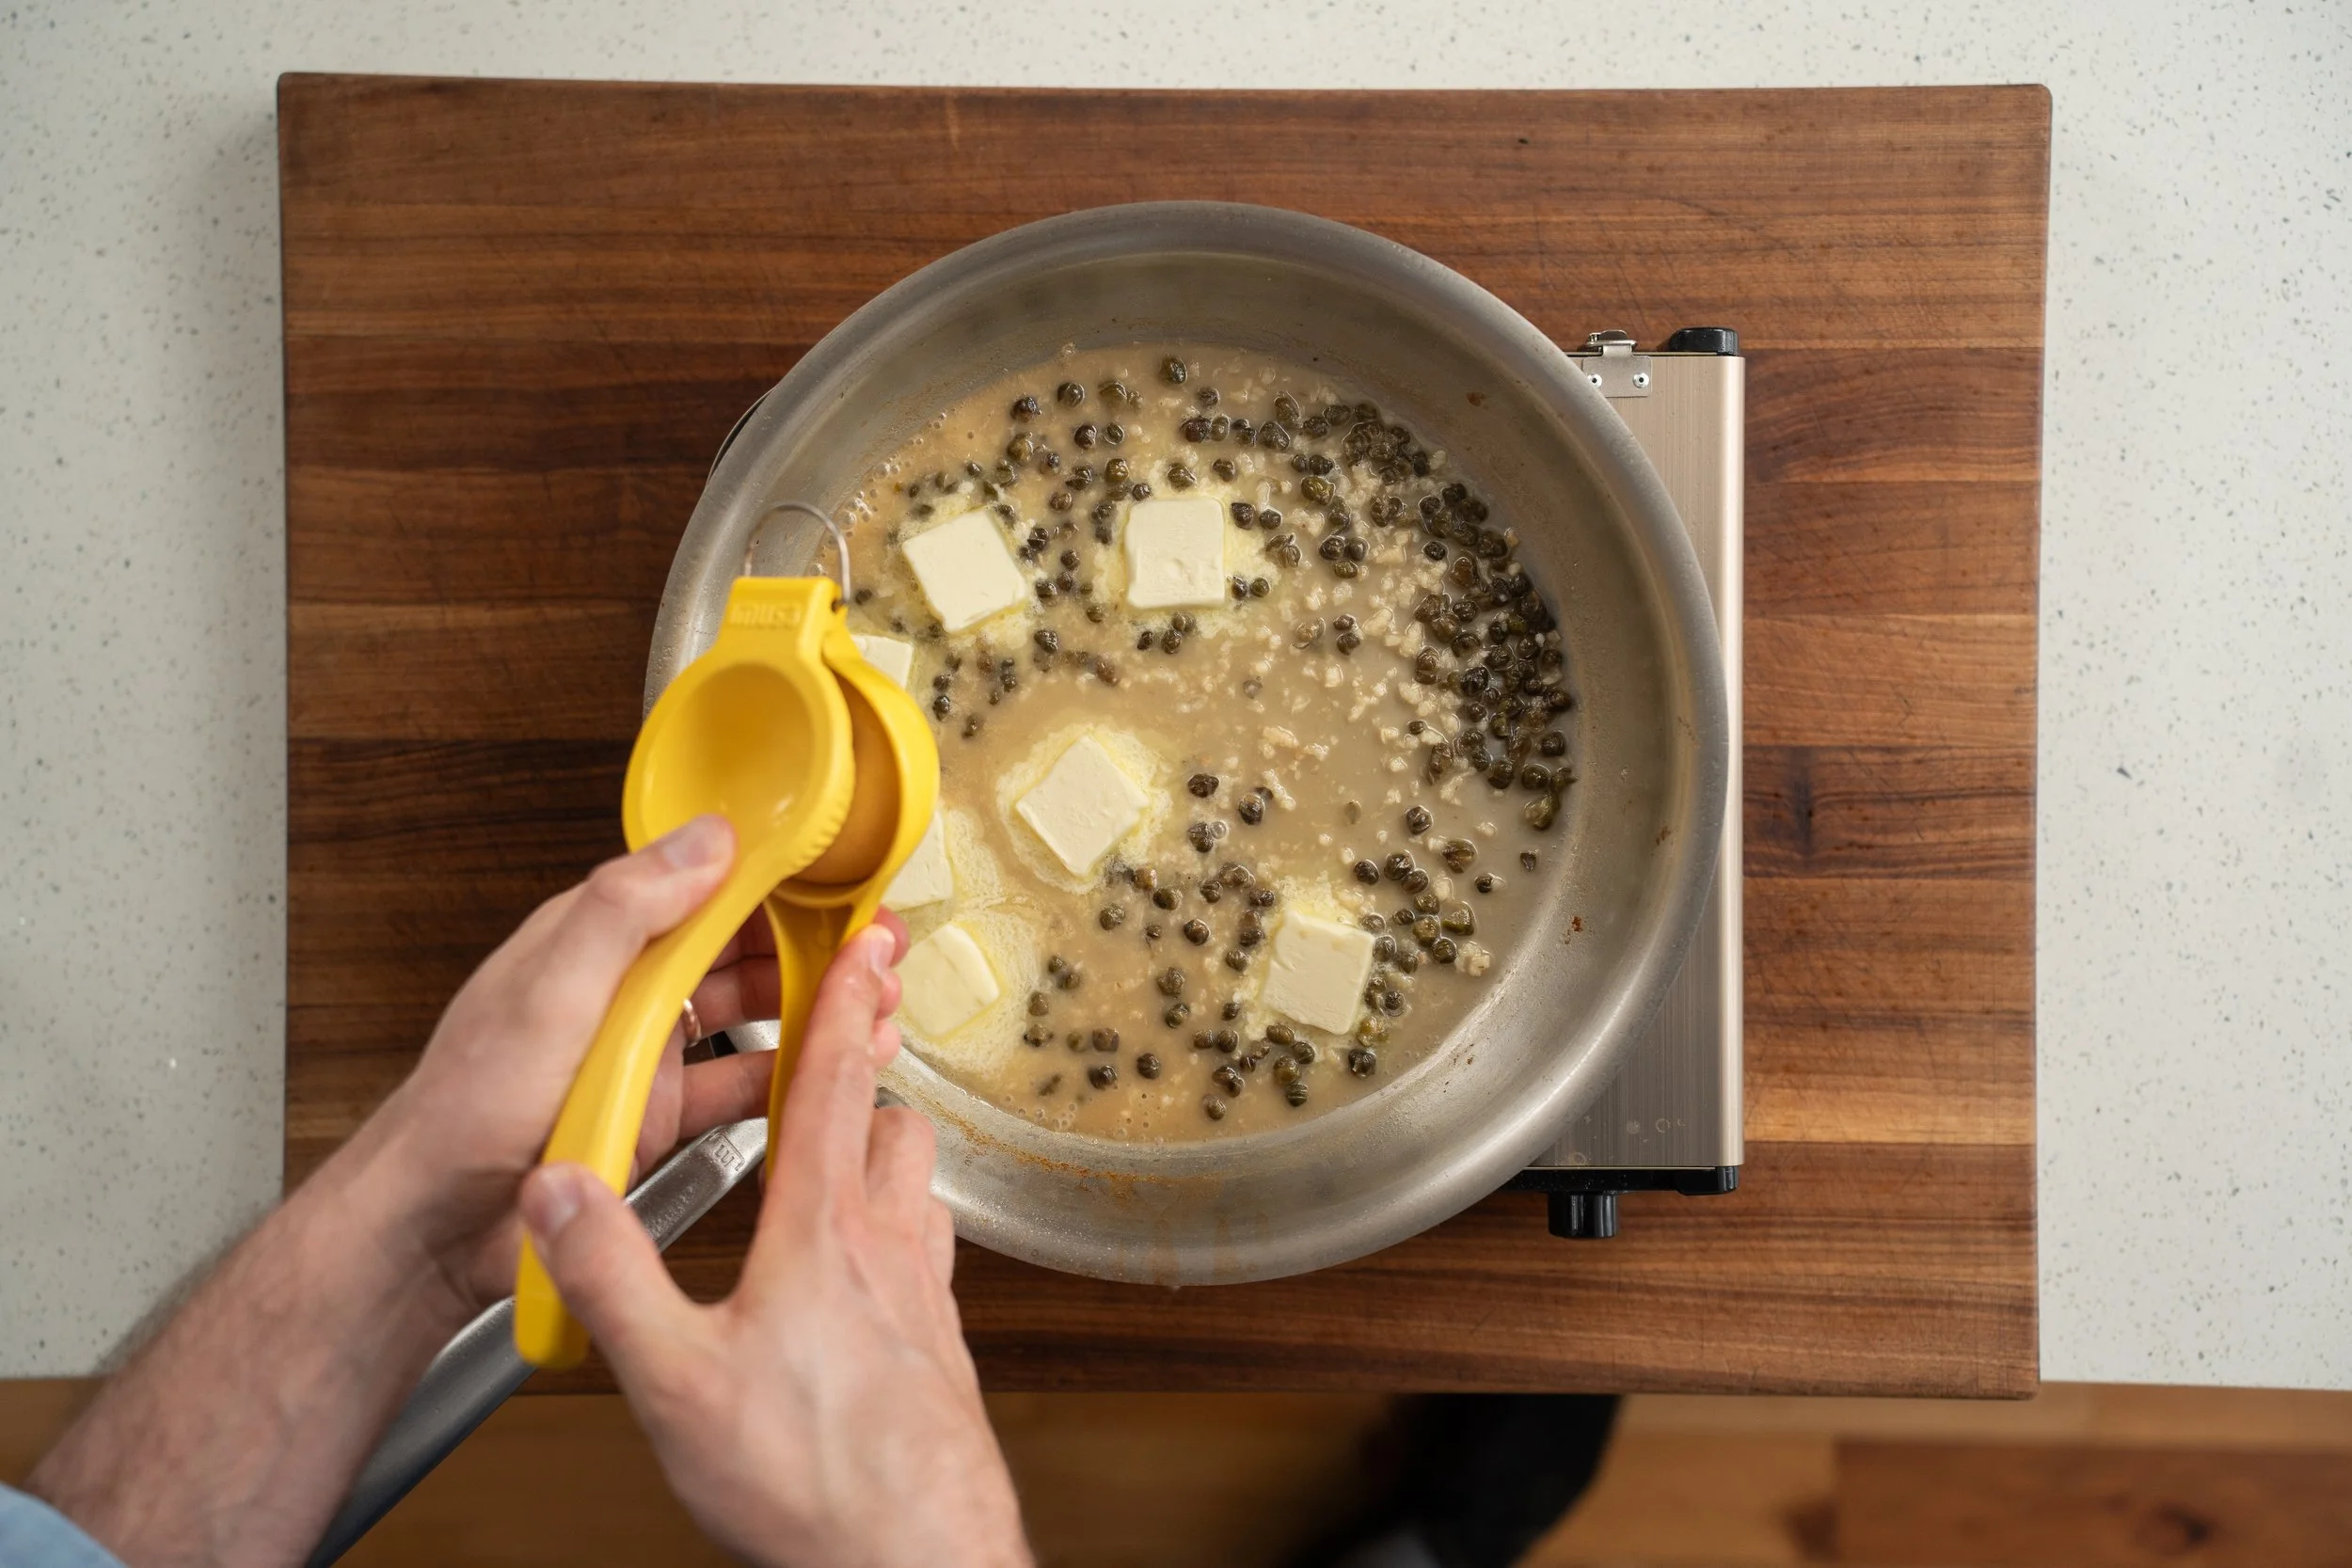
6. Bloom the capers. Return the wiped out pan to medium-low heat, then add the dried off capers and let them sizzle for about 1 minute or until they are softer and taking on a little bit of color. . They’ll pop and sputter a little at first… that’s good. Blooming opens up their flavor and softens them so they integrate into the sauce instead of standing out as salty little pellets.
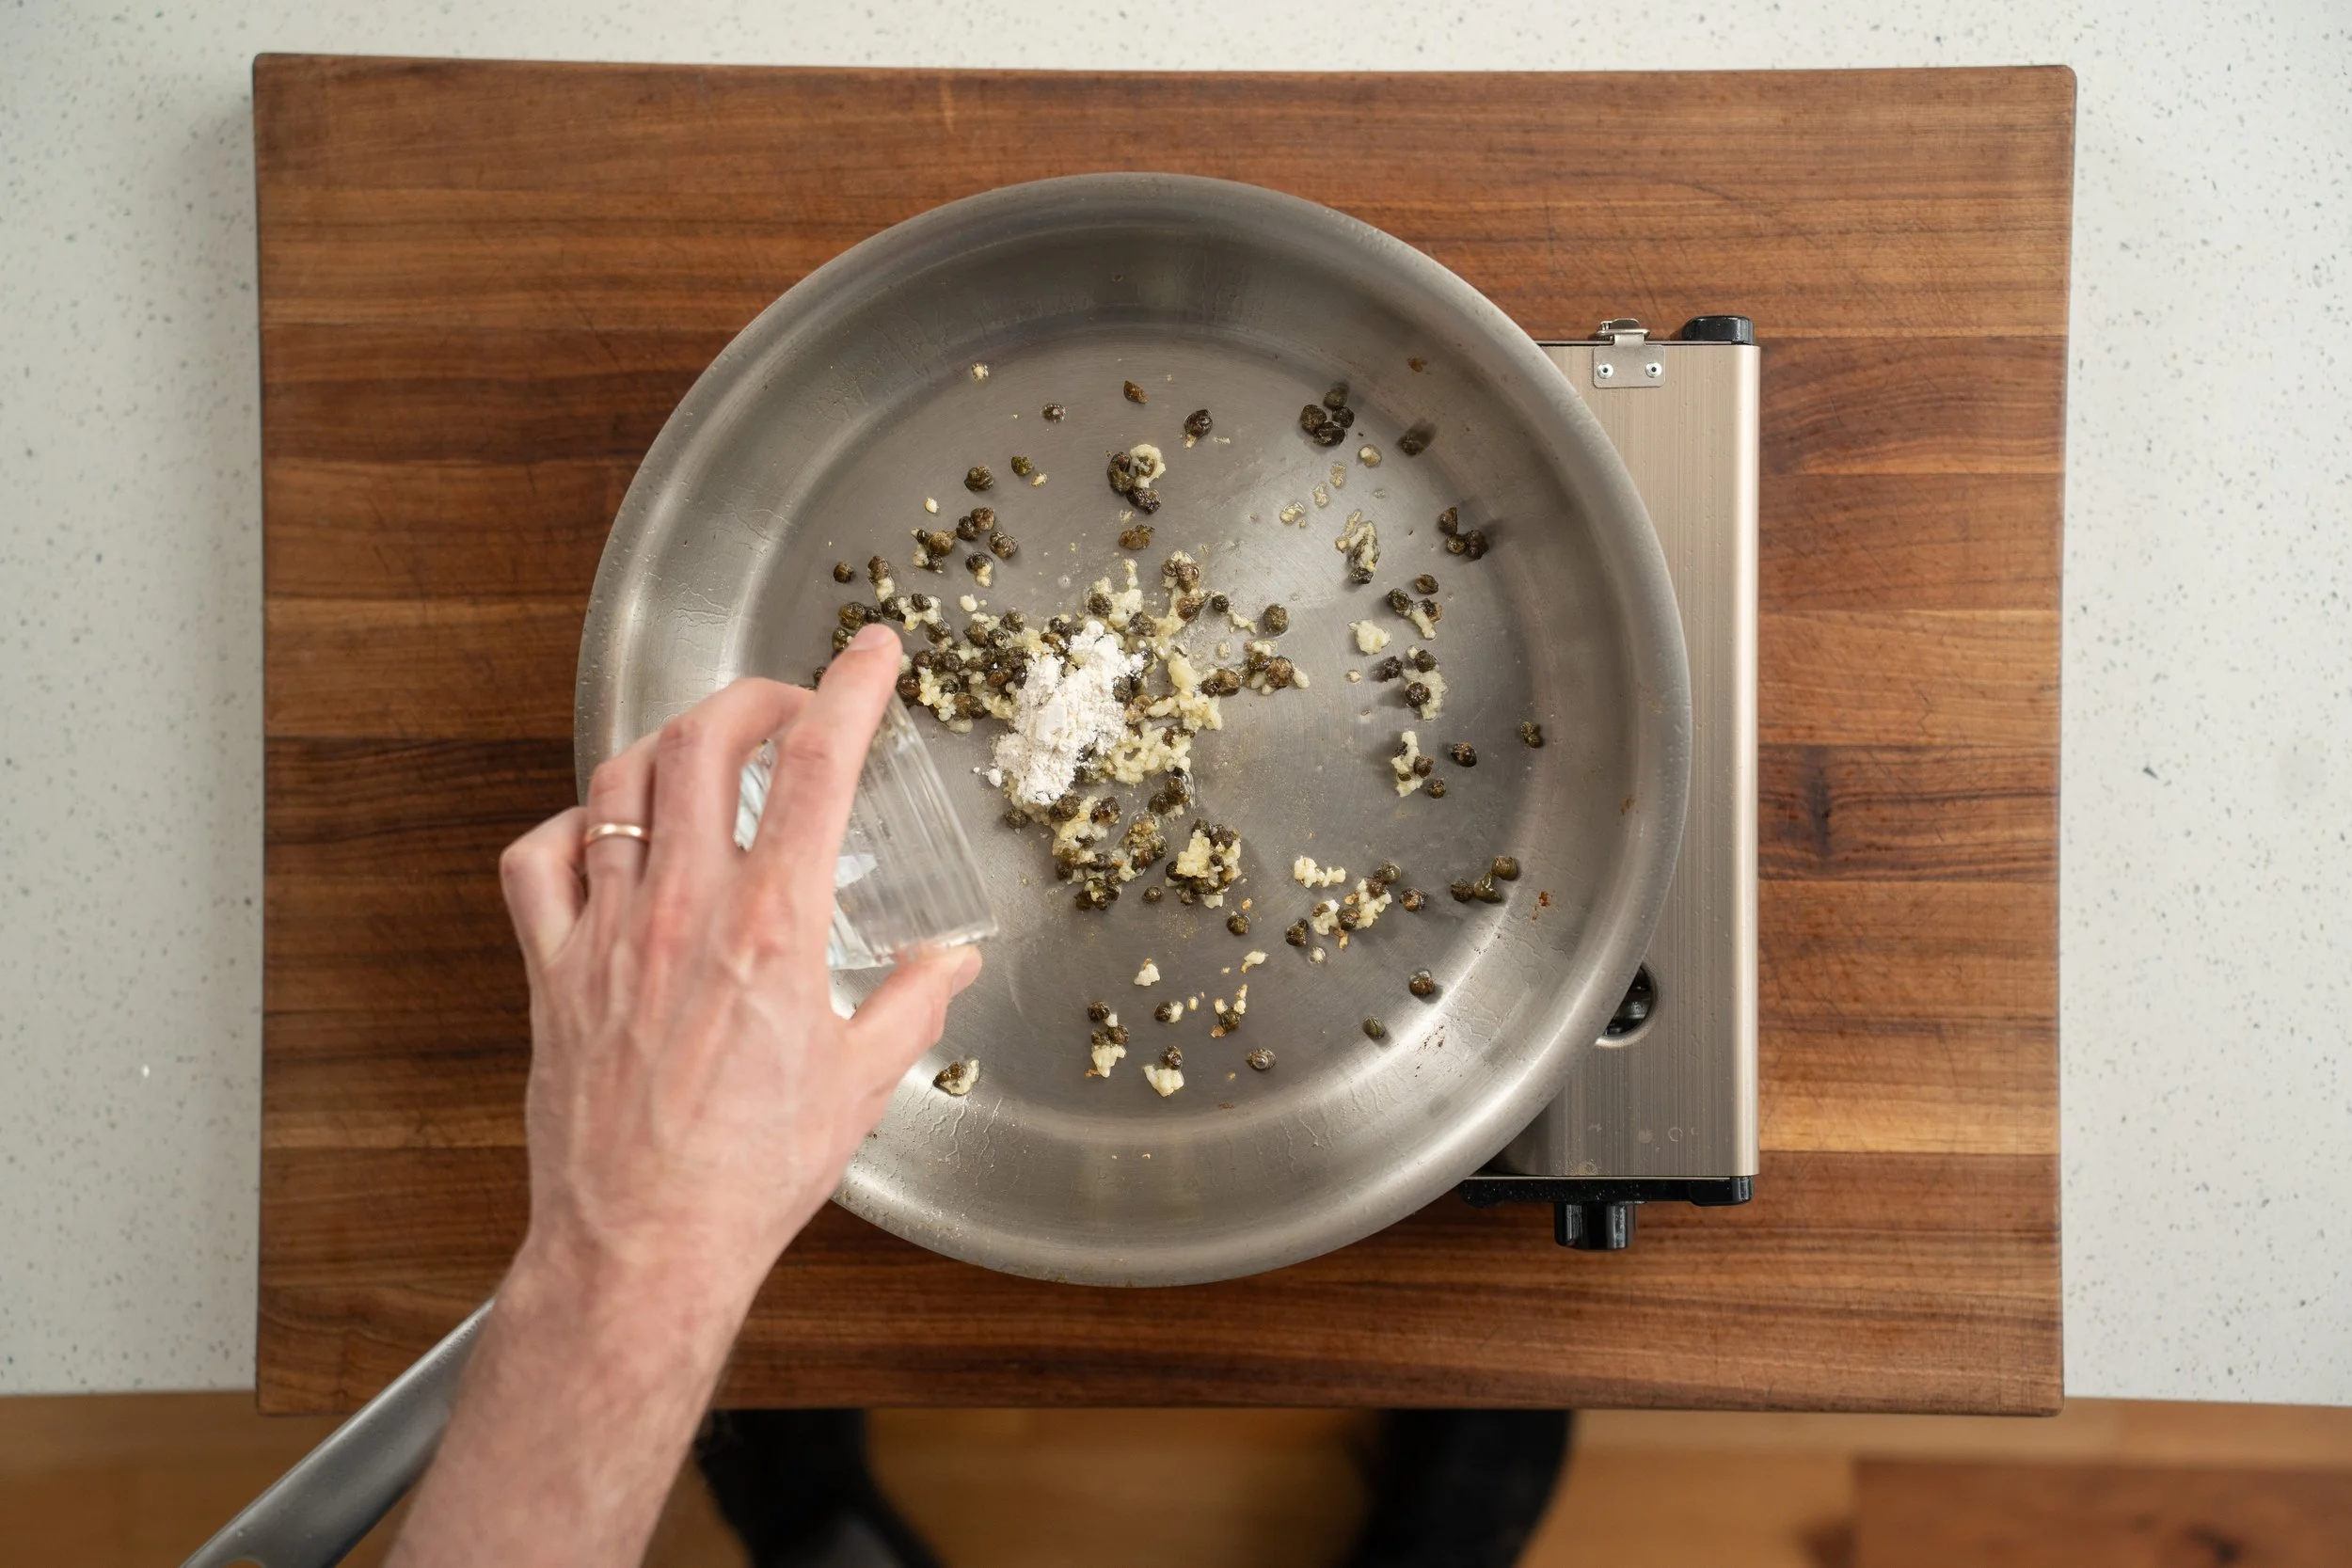
7. Add garlic. Stir in the minced garlic with maybe a little more oil and cook gently for about 90 seconds over medium low heat until it’s fragrant and just starting to take on a kiss of color…be careful here. There is a ton of hot surface are in the pan and not alot of garlic, this make the brun risk high, so keep it moving and monitor heat religiously. If the garlic is starting to turn brown, add tiny splash of water to cool pan and steam things up;
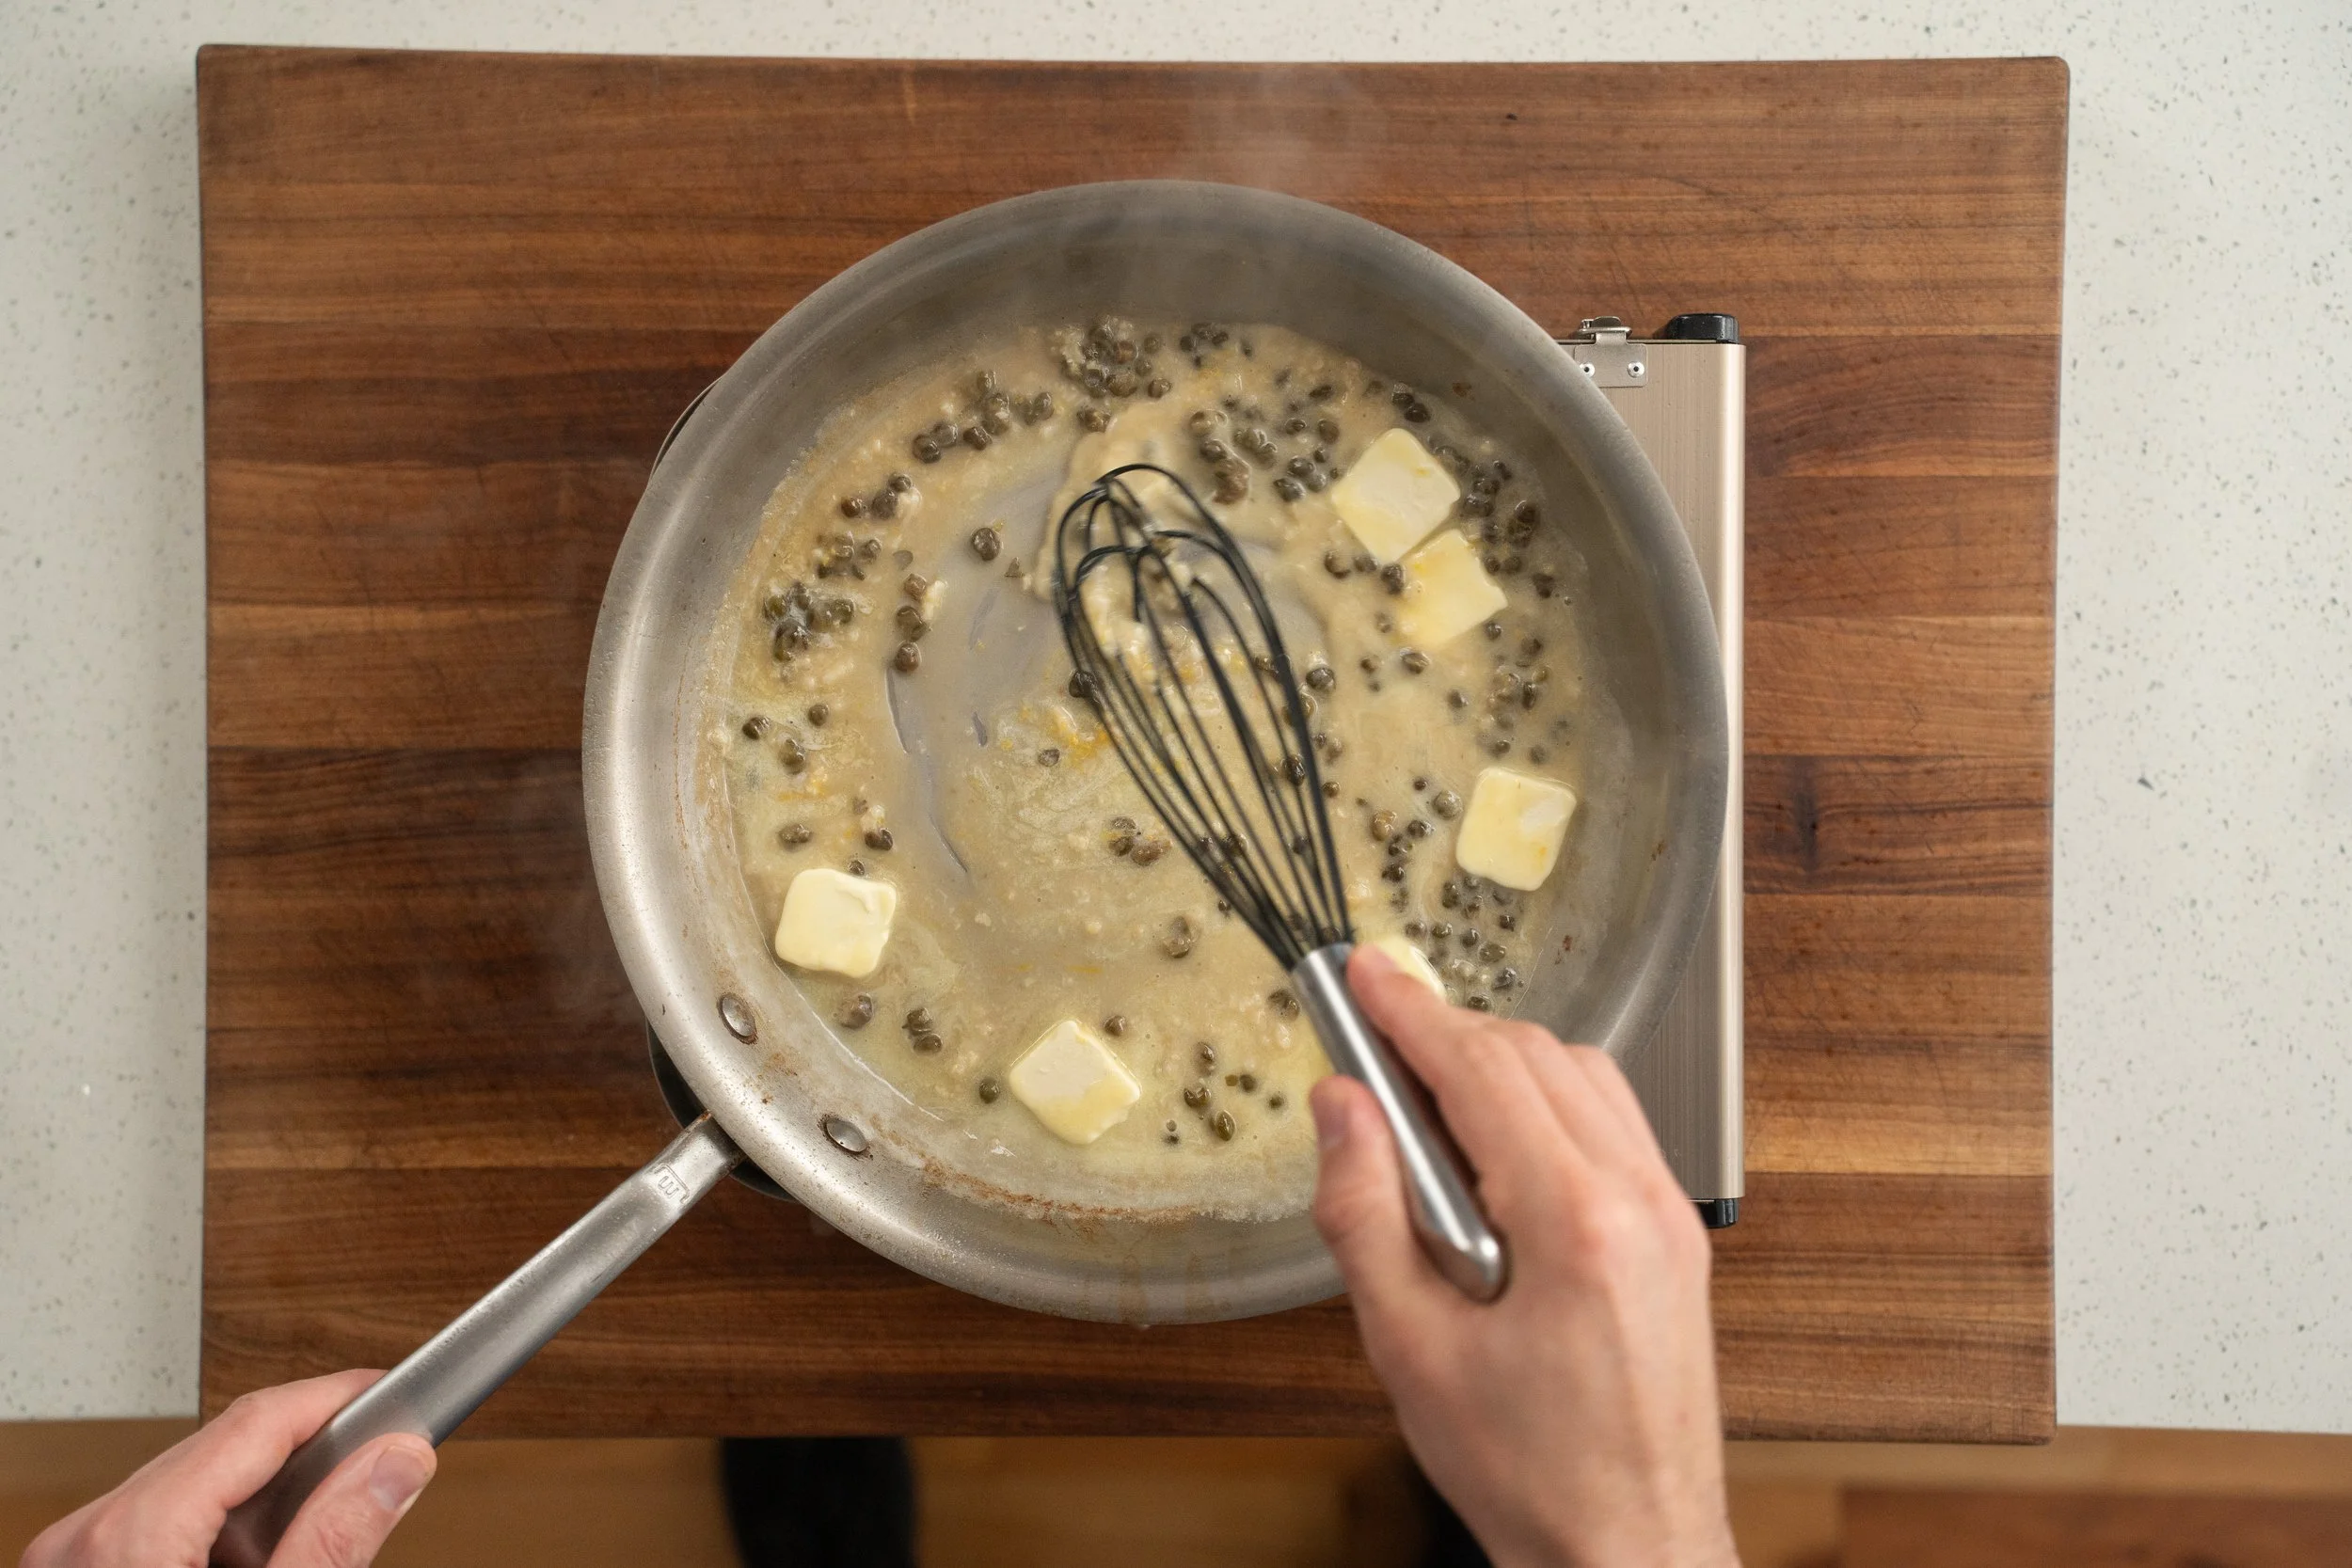
8. Add the flour. After 1 minute… sprinkle in the 3g of AP flour and stir immediately to combine. This tiny bit of flour thickens the sauce just enough to give it body and helps the butter emulsify easily later. This isn’t gravy though, this is just enough to turn up the silkiness by about 50%.
9. Deglaze and reduce. Pour in the white wine and scrape up anything stuck to the pan. Let it reduce over medium heat until nearly dry. After about 90 seconds, it’ll go from bubbly and sloshy to thick and syrupy-looking, and the smell shifts from sharp alcohol to something rounder and more aromatic. When your spatula leaves a wide trail thats your queue.
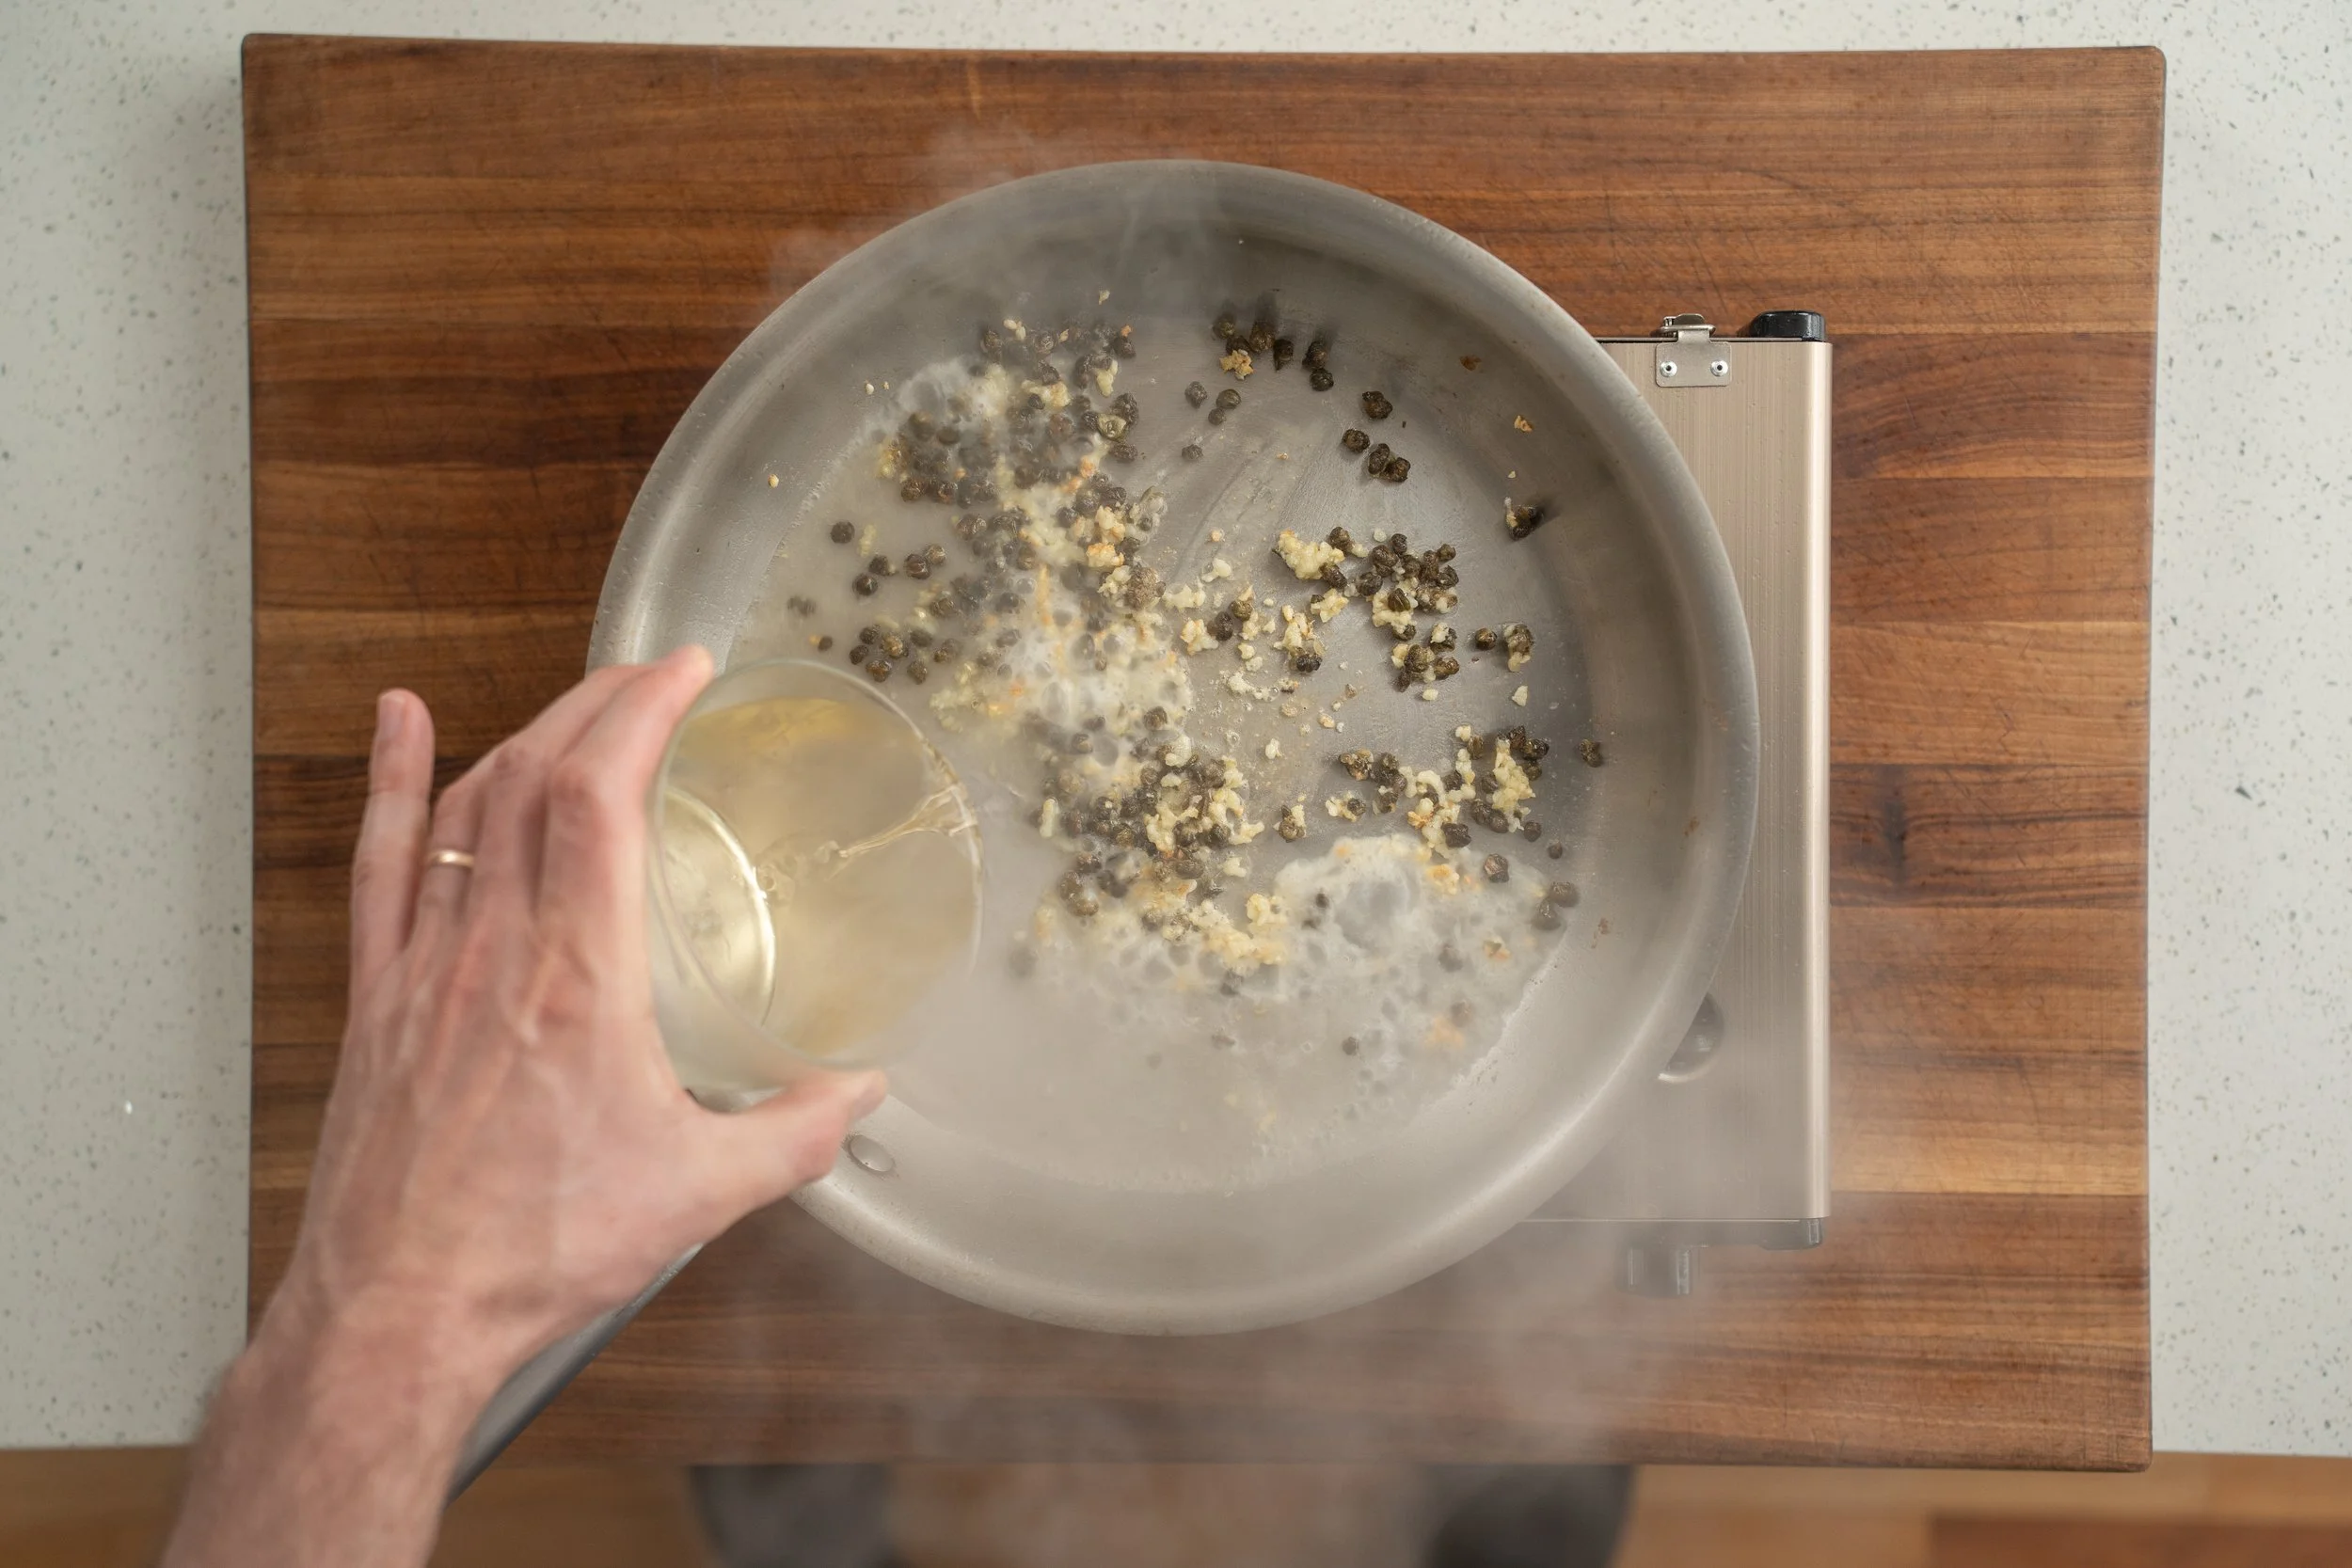
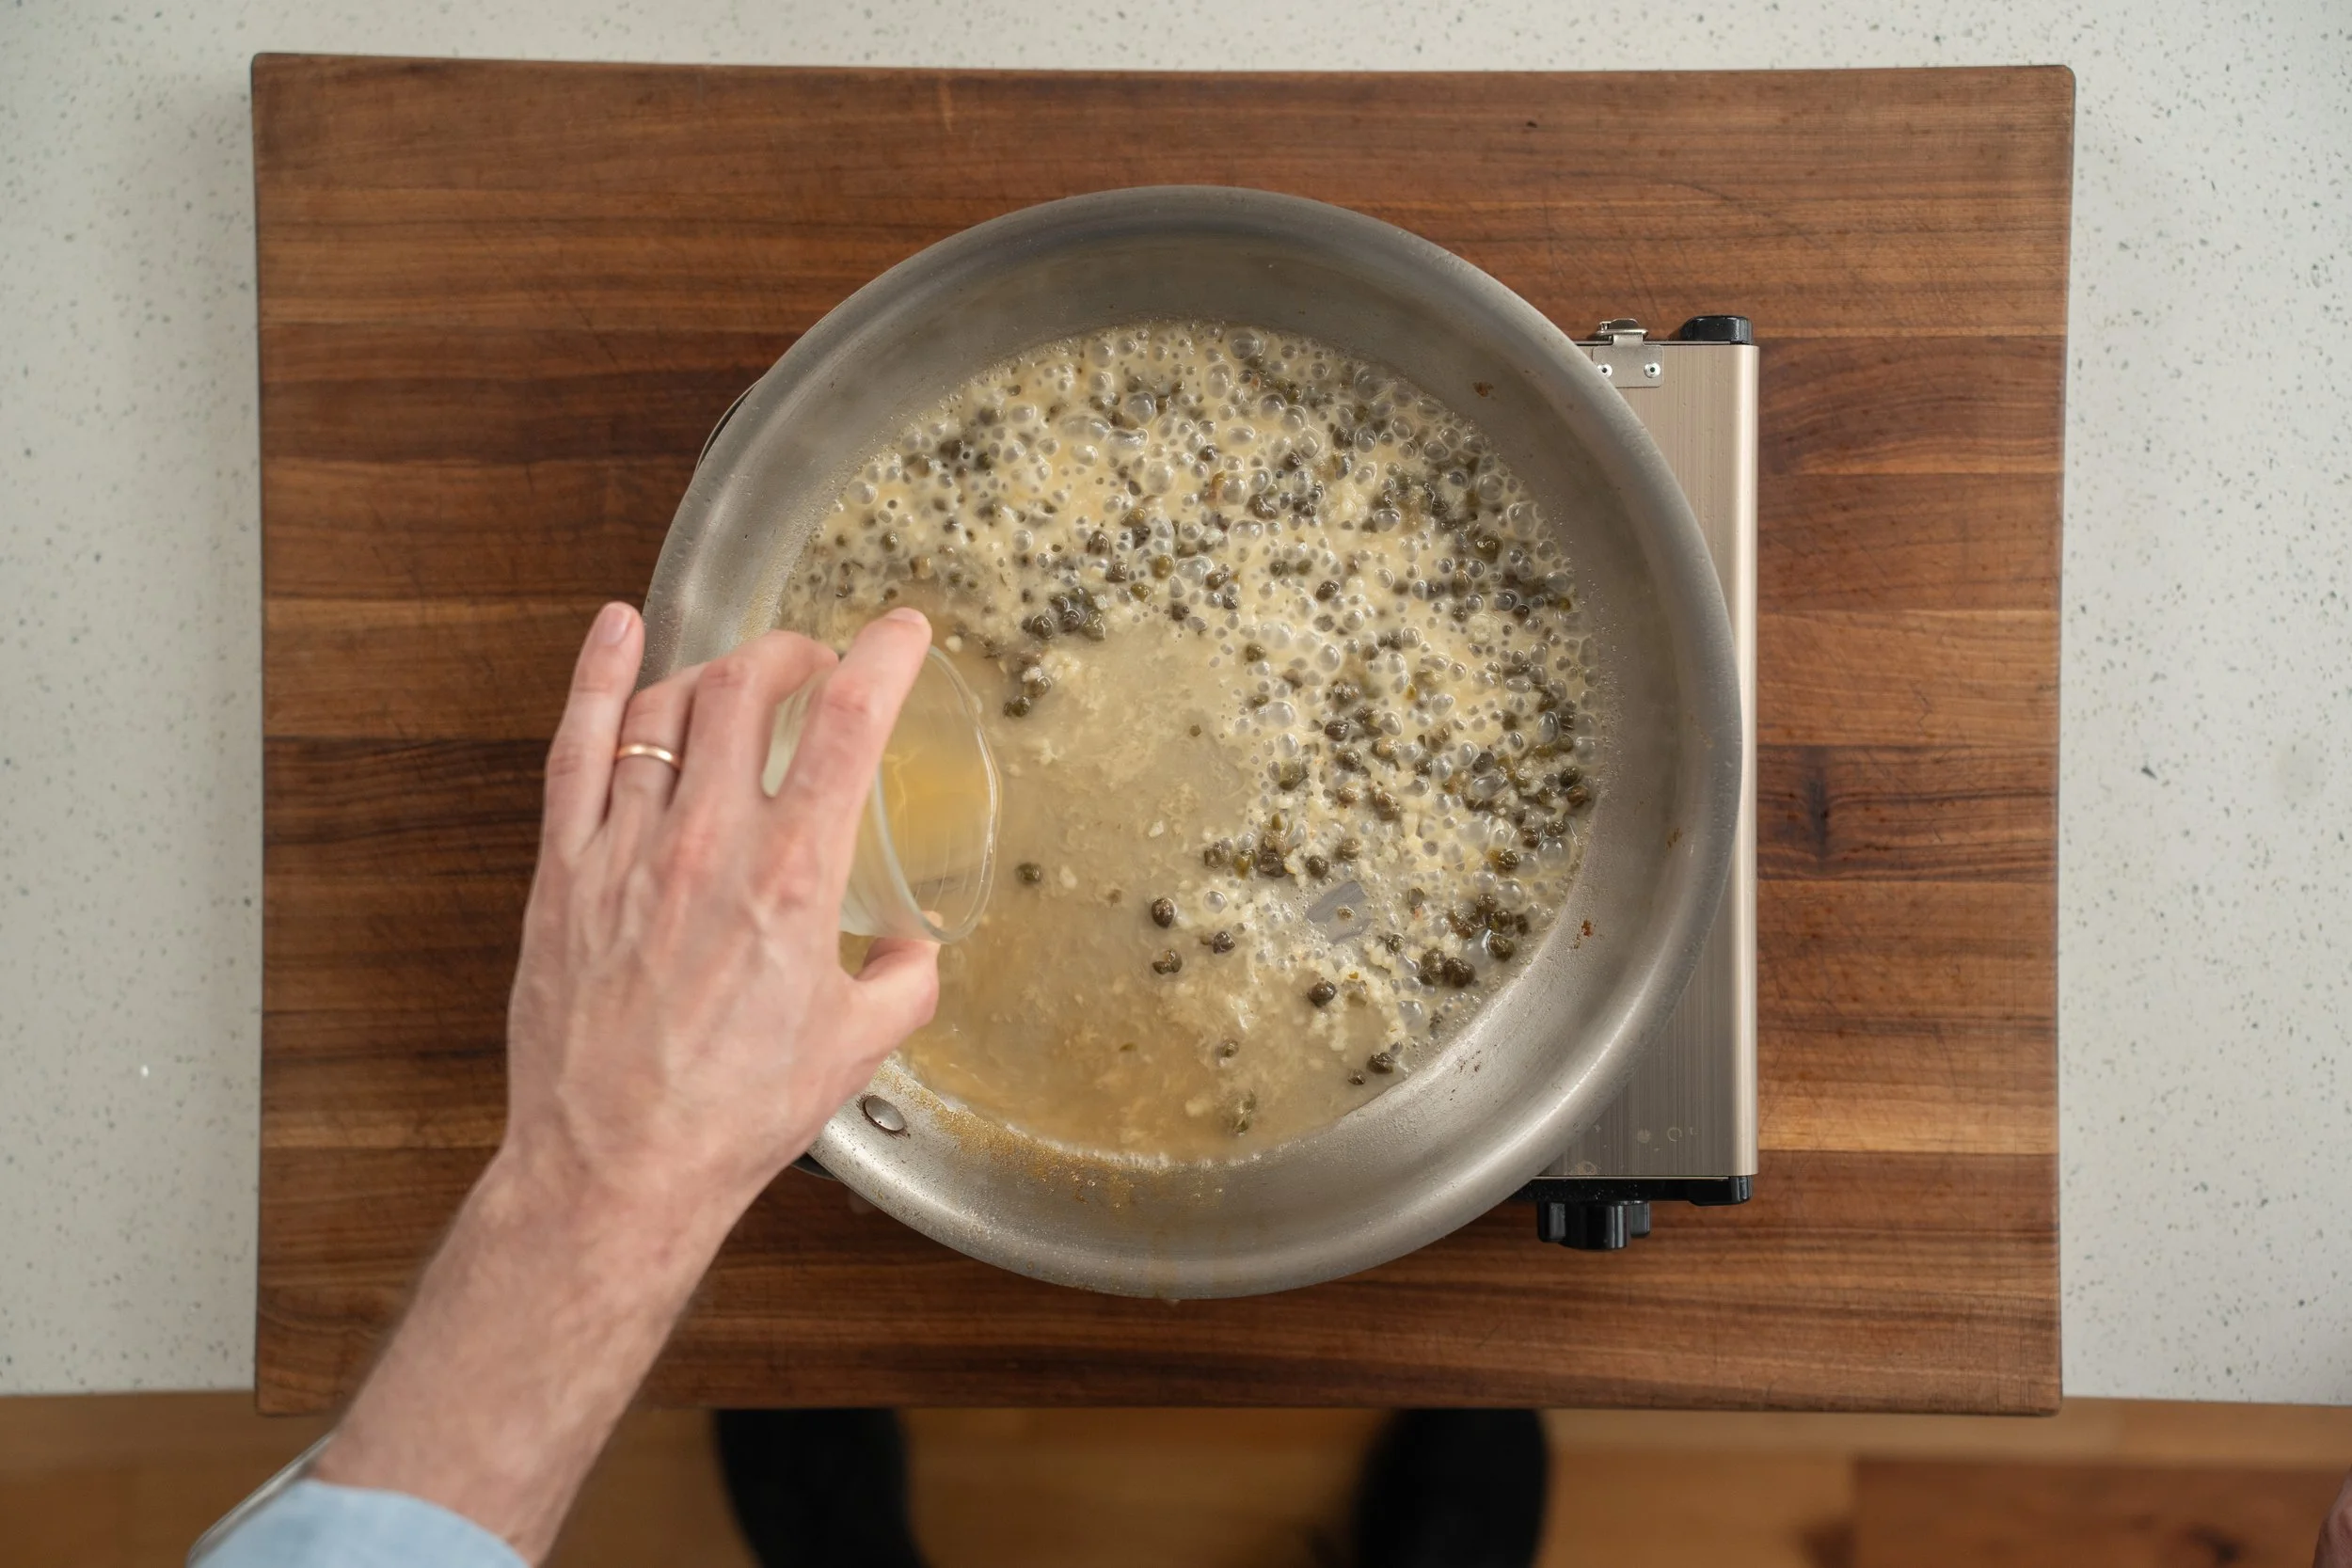
10. Add in Stock. Once wine is almost totally reduced and te garlic and capers are soft, add the chicken stock and reduce by about 50% or until it’s slightly thickened, lets say about 2–3 minutes.
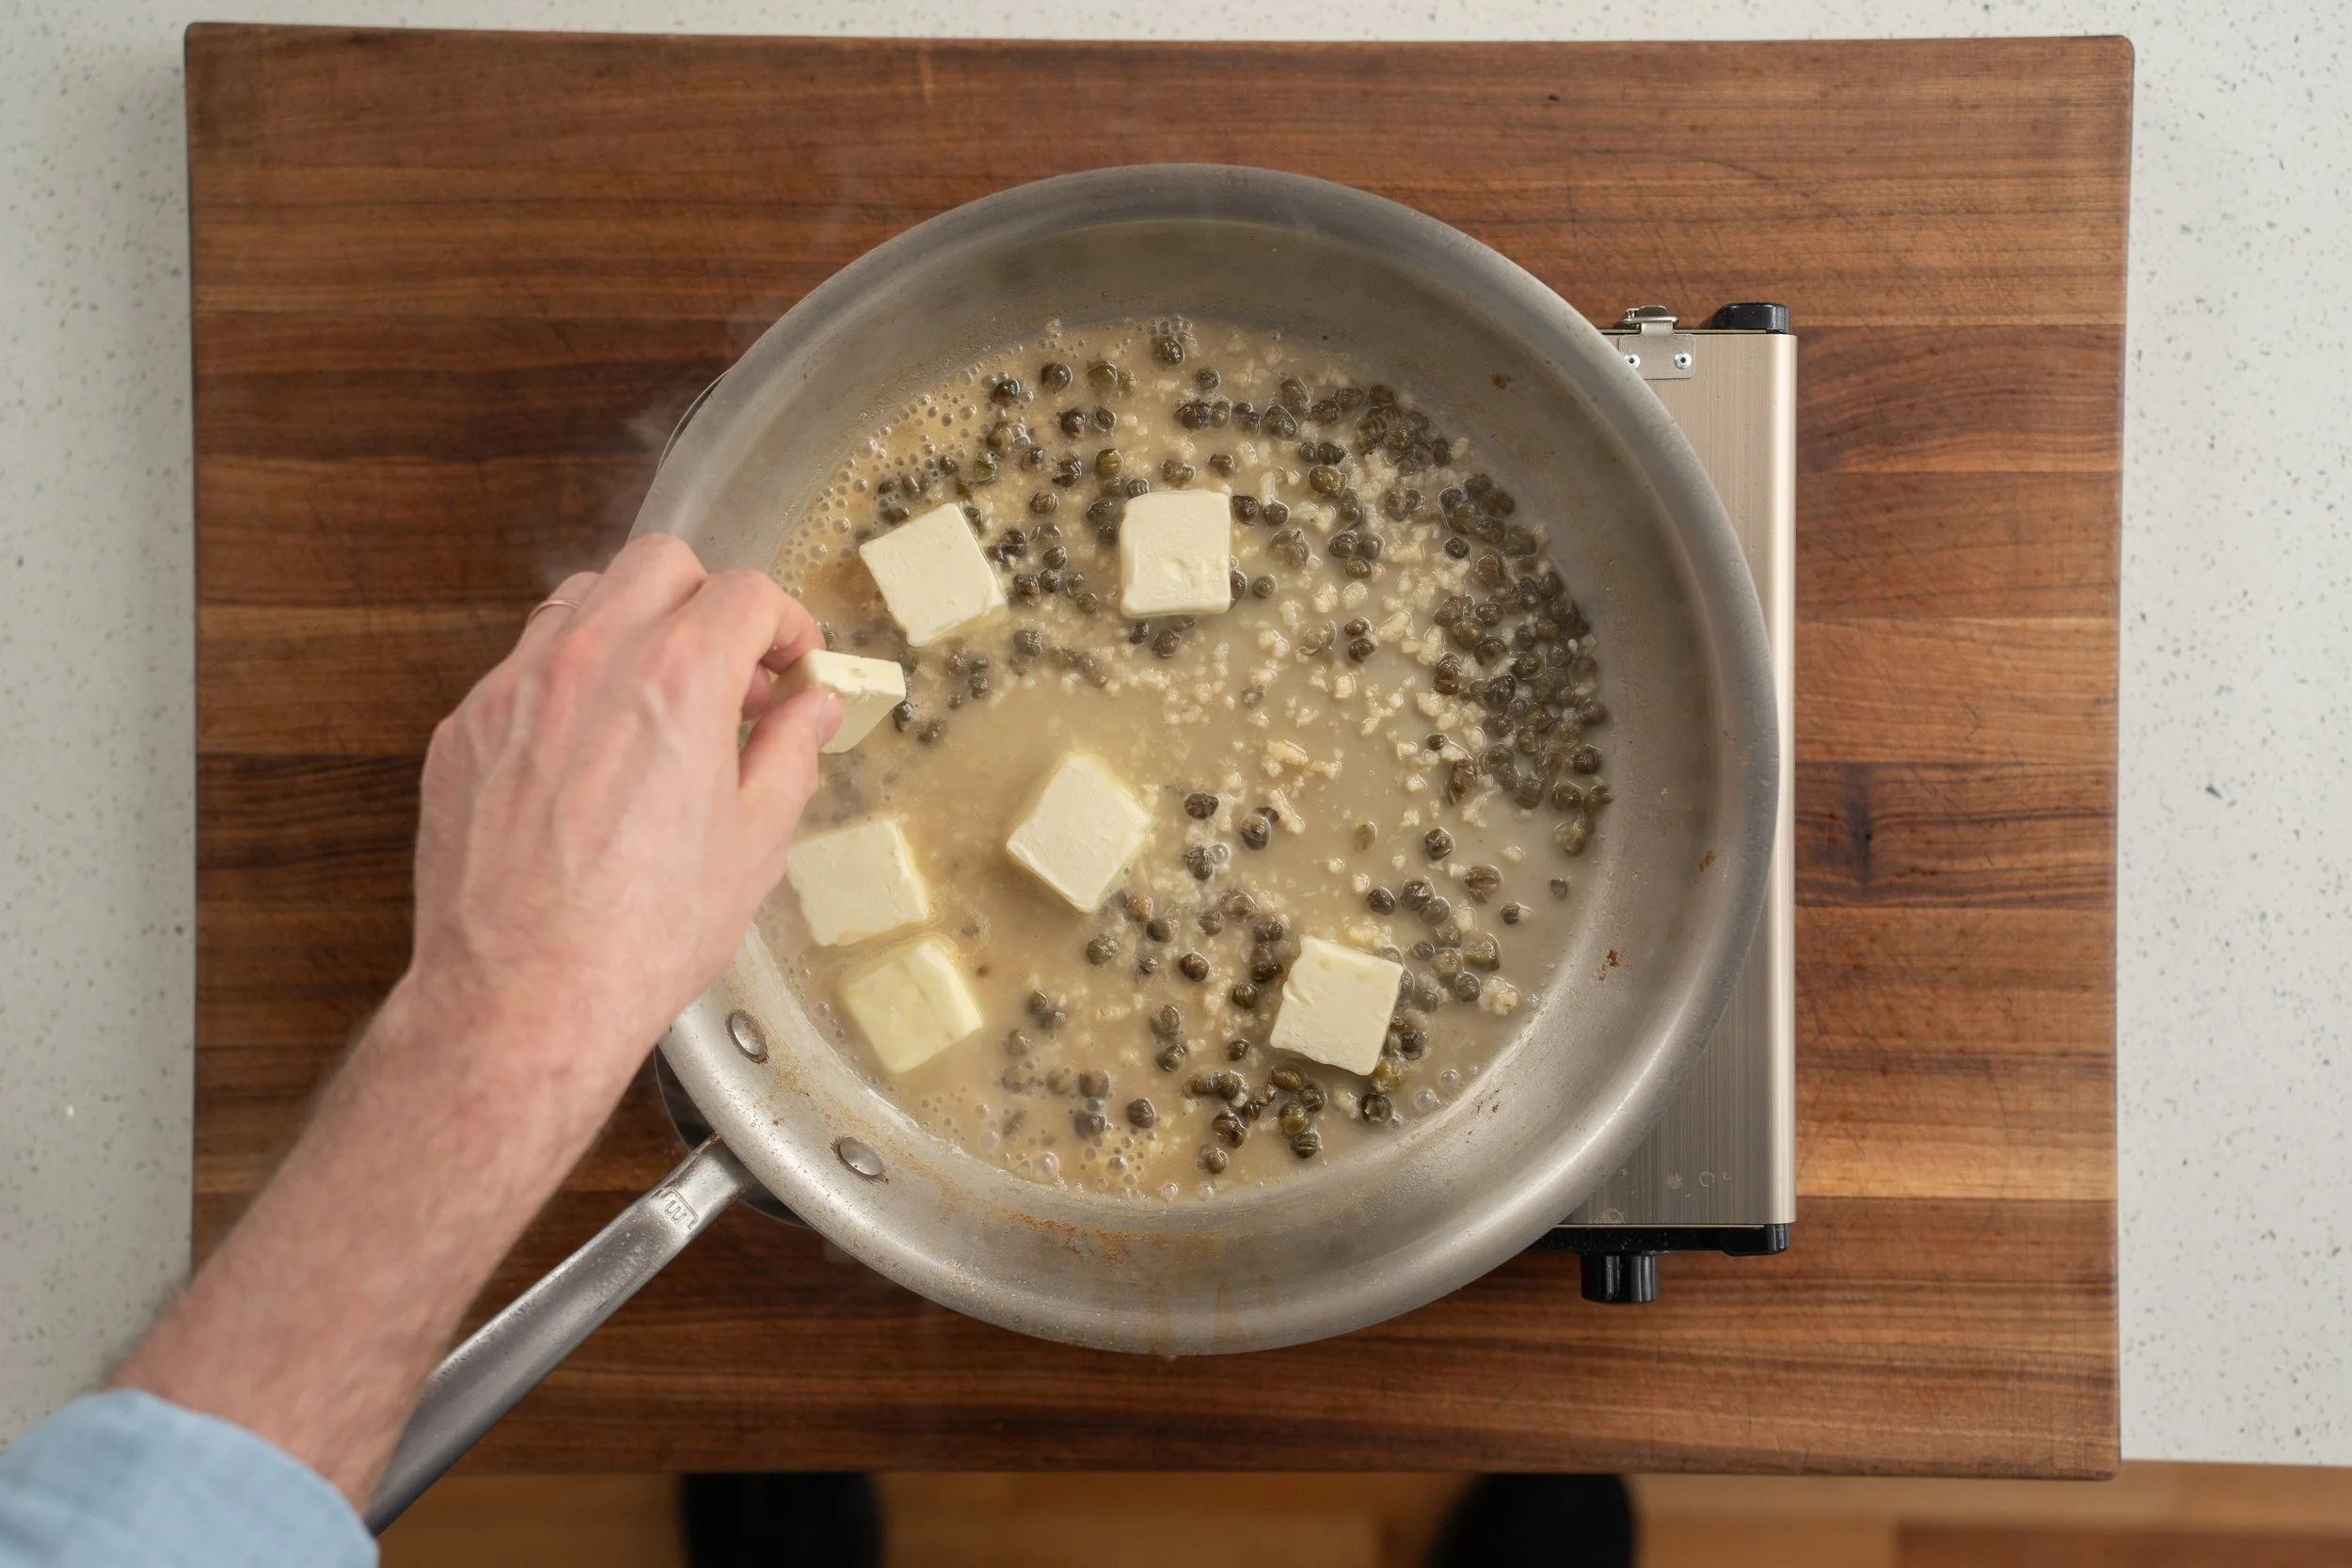
11. Finish the sauce off heat. Once stock is starting to thicken slightly, remove from heat then add the cold cubed butter a few pieces at a time, and the lemon juice, whisking constantly until each addition is melted and incorporated before adding more. The sauce should become glossy, creamy, and smooth. If it looks greasy or broken, add a small splash of water, pull it off the heat completely, and whisk in a bit more cold butter, it’ll come back together.
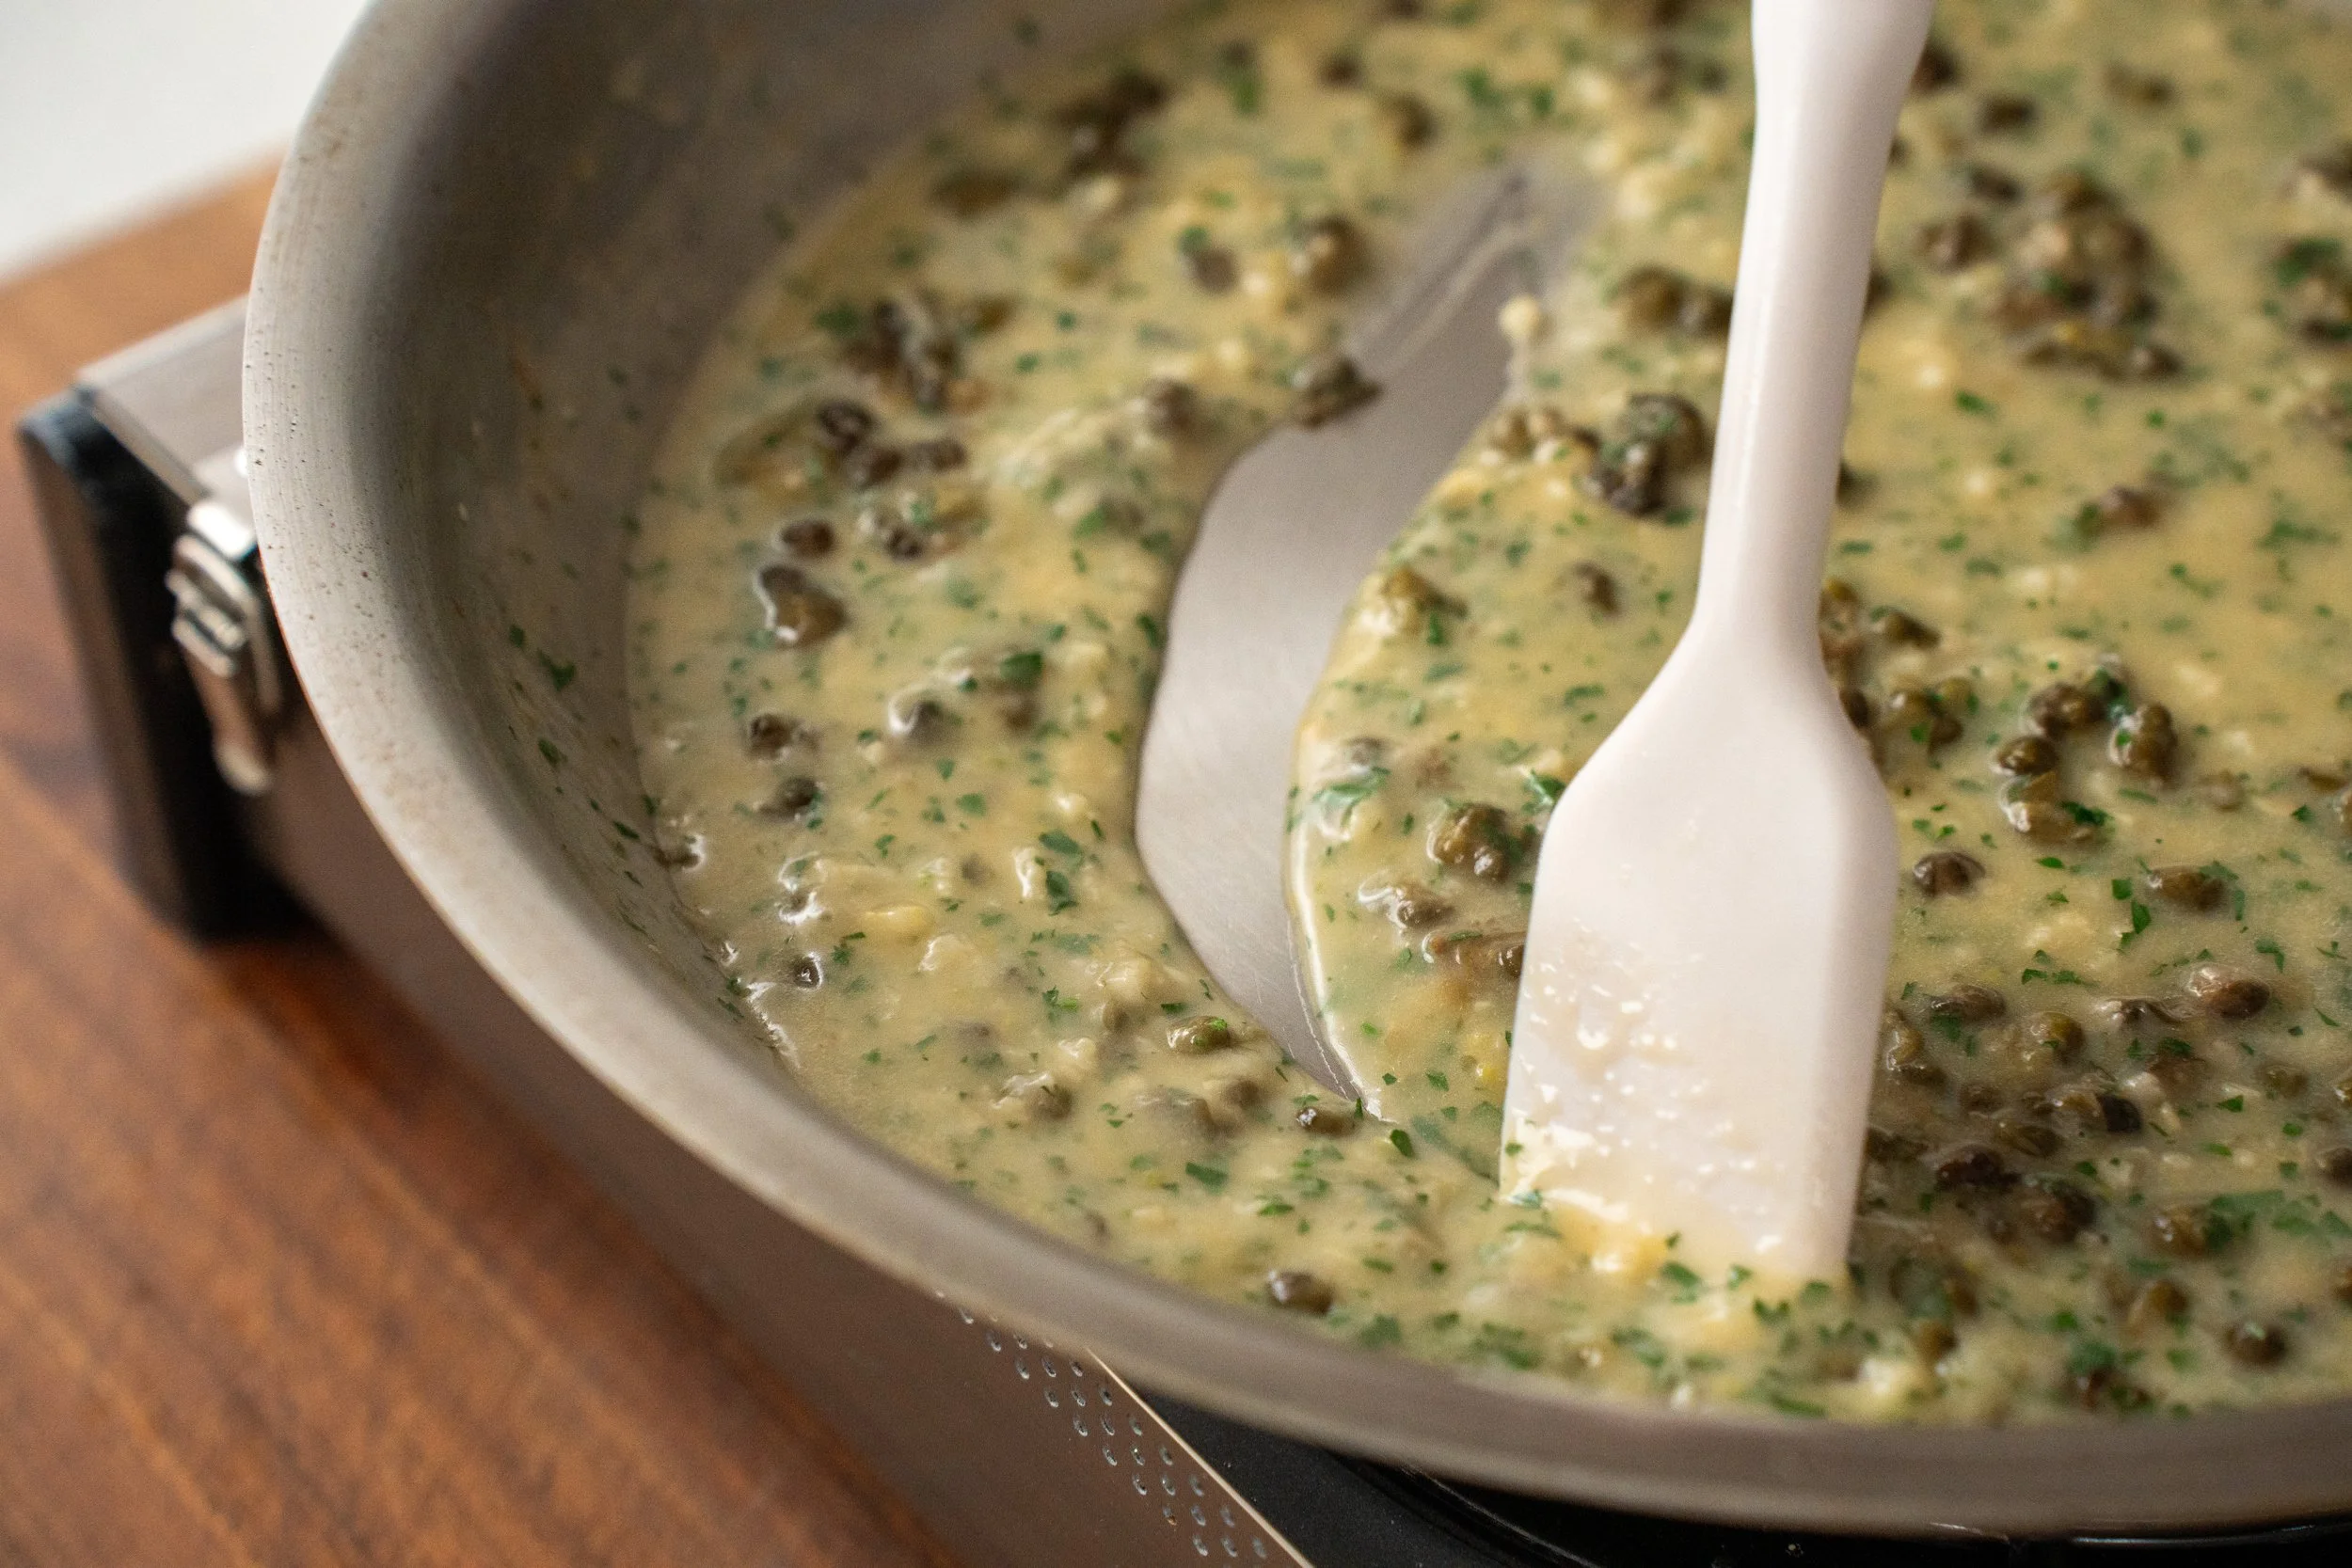
12. Finish and serve immediately. Stir in the chopped parsley and lemon zest. Taste for salt and adjust. Spoon the sauce generously over the chicken cutlets. Don’t put the chicken back in the sauce — it’s already cooked and you’ll just risk overcooking it. Serve right away. This dish is at its peak the second it’s plated.
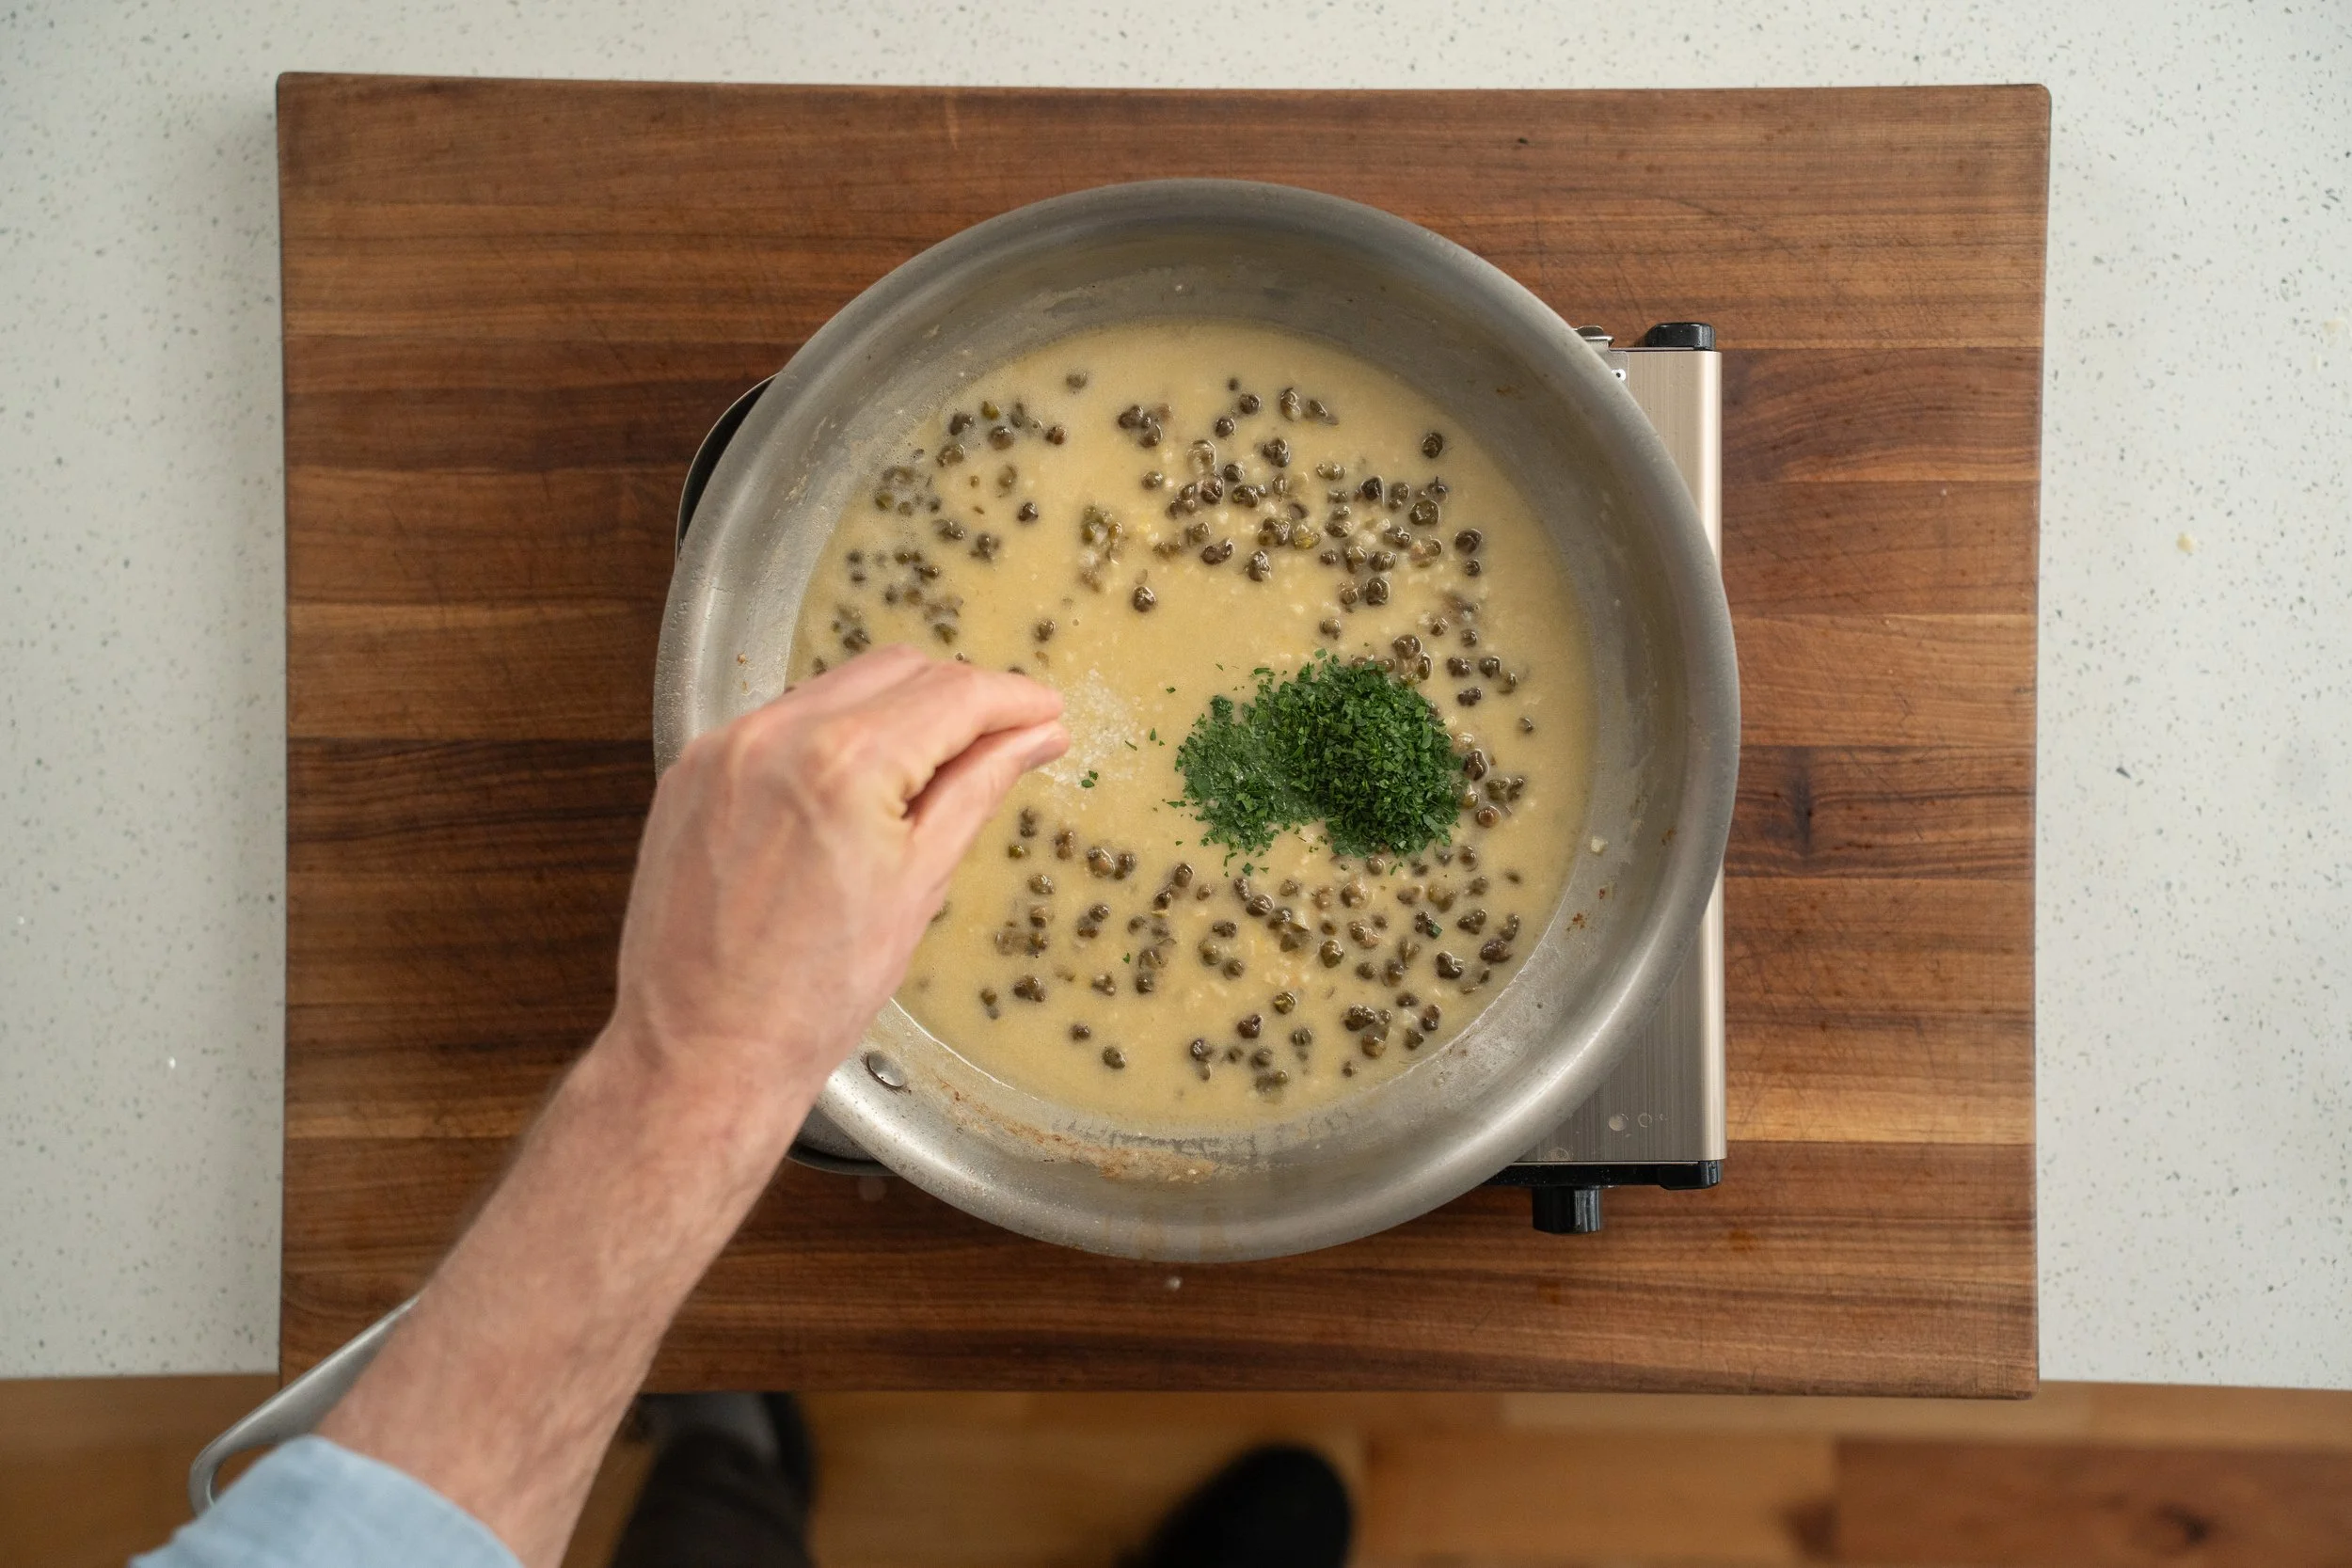
Garnish with more parsley and lemon zest grated on a microplane.
NOTE: If the sauce is too sour, add more butter. Fat tempers acidity. You can also add a tiny splash of stock to dilute. Don’t panic…this is an easy fix.

My Go-To Gear For Chicken Piccata:

The most essential kitchen tool for chicken piccata is a good, large stainless saute pan. You need a pan that can get very hot, hold heat, and give you a great sear. A big 12-incher also lets you cook 4 halved breasts at once.
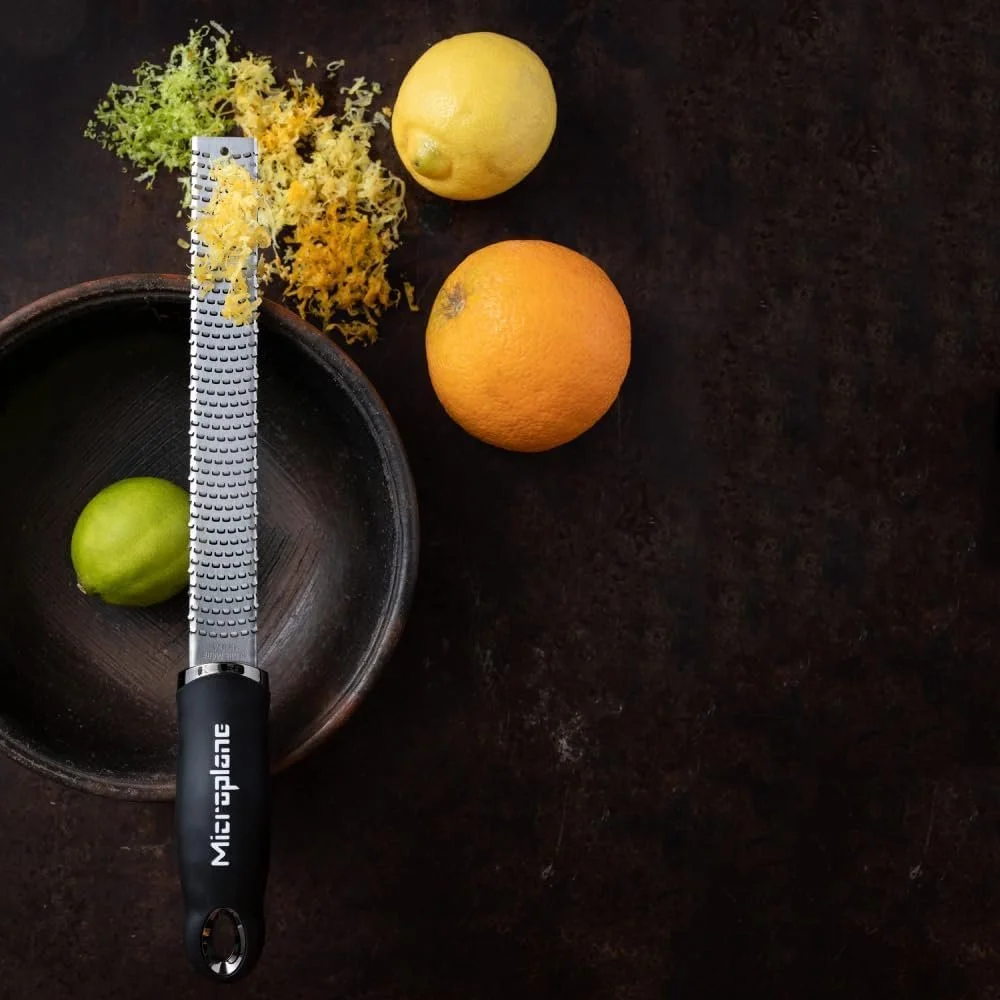
A good zester is a “nice to have” item for this meal. Microplane is my zester of choice. I reach for it whenever I need to zest citrus, fine grate parmesan, or grate ginger or garlic.
As an Amazon associate, I earn from qualifying purchases
FREQUENTLY ASKED QUESTIONS
Can I use chicken thighs instead of breasts?
You can, but breasts are the better choice here. Thighs are made up of multiple smaller muscles that pull apart rather than flattening evenly when pounded, so you won’t get a clean, uniform cutlet. The extra fat from thighs also isn’t needed — the butter sauce already brings plenty of richness. And because the breast is dredged and pan-fried, it stays incredibly moist anyway.
What if I don’t have white wine?
Chicken broth with a squeeze of extra lemon juice is your best substitute. You’ll lose a little of the depth and complexity that wine brings, but the dish still works. Whatever you do, avoid sweet wines like Moscato or Riesling — the sugar concentrates as it reduces and you’ll end up with a cloyingly sweet sauce instead of a bright, acidic one.
My sauce broke — can I fix it?
Yes. If you see pools of melted grease floating on top instead of a smooth, glossy sauce, it means the butter separated. Pull the pan completely off the heat, add a small splash of cold water, and whisk in a few more small pieces of cold butter. The water gives the fat something to emulsify into, and the cold butter helps stabilize it. It’ll come right back together. The key going forward: always add the butter off heat, always use cold butter, and whisk constantly.
Can I make this gluten free?
Absolutely. Substitute the AP flour for your favorite 1:1 gluten-free flour blend for both the dredge and the sauce thickener. Since the flour is just creating a thin crust and adding minimal body to the sauce, a GF blend works perfectly here. King Arthur and Bob’s Red Mill are both solid options.