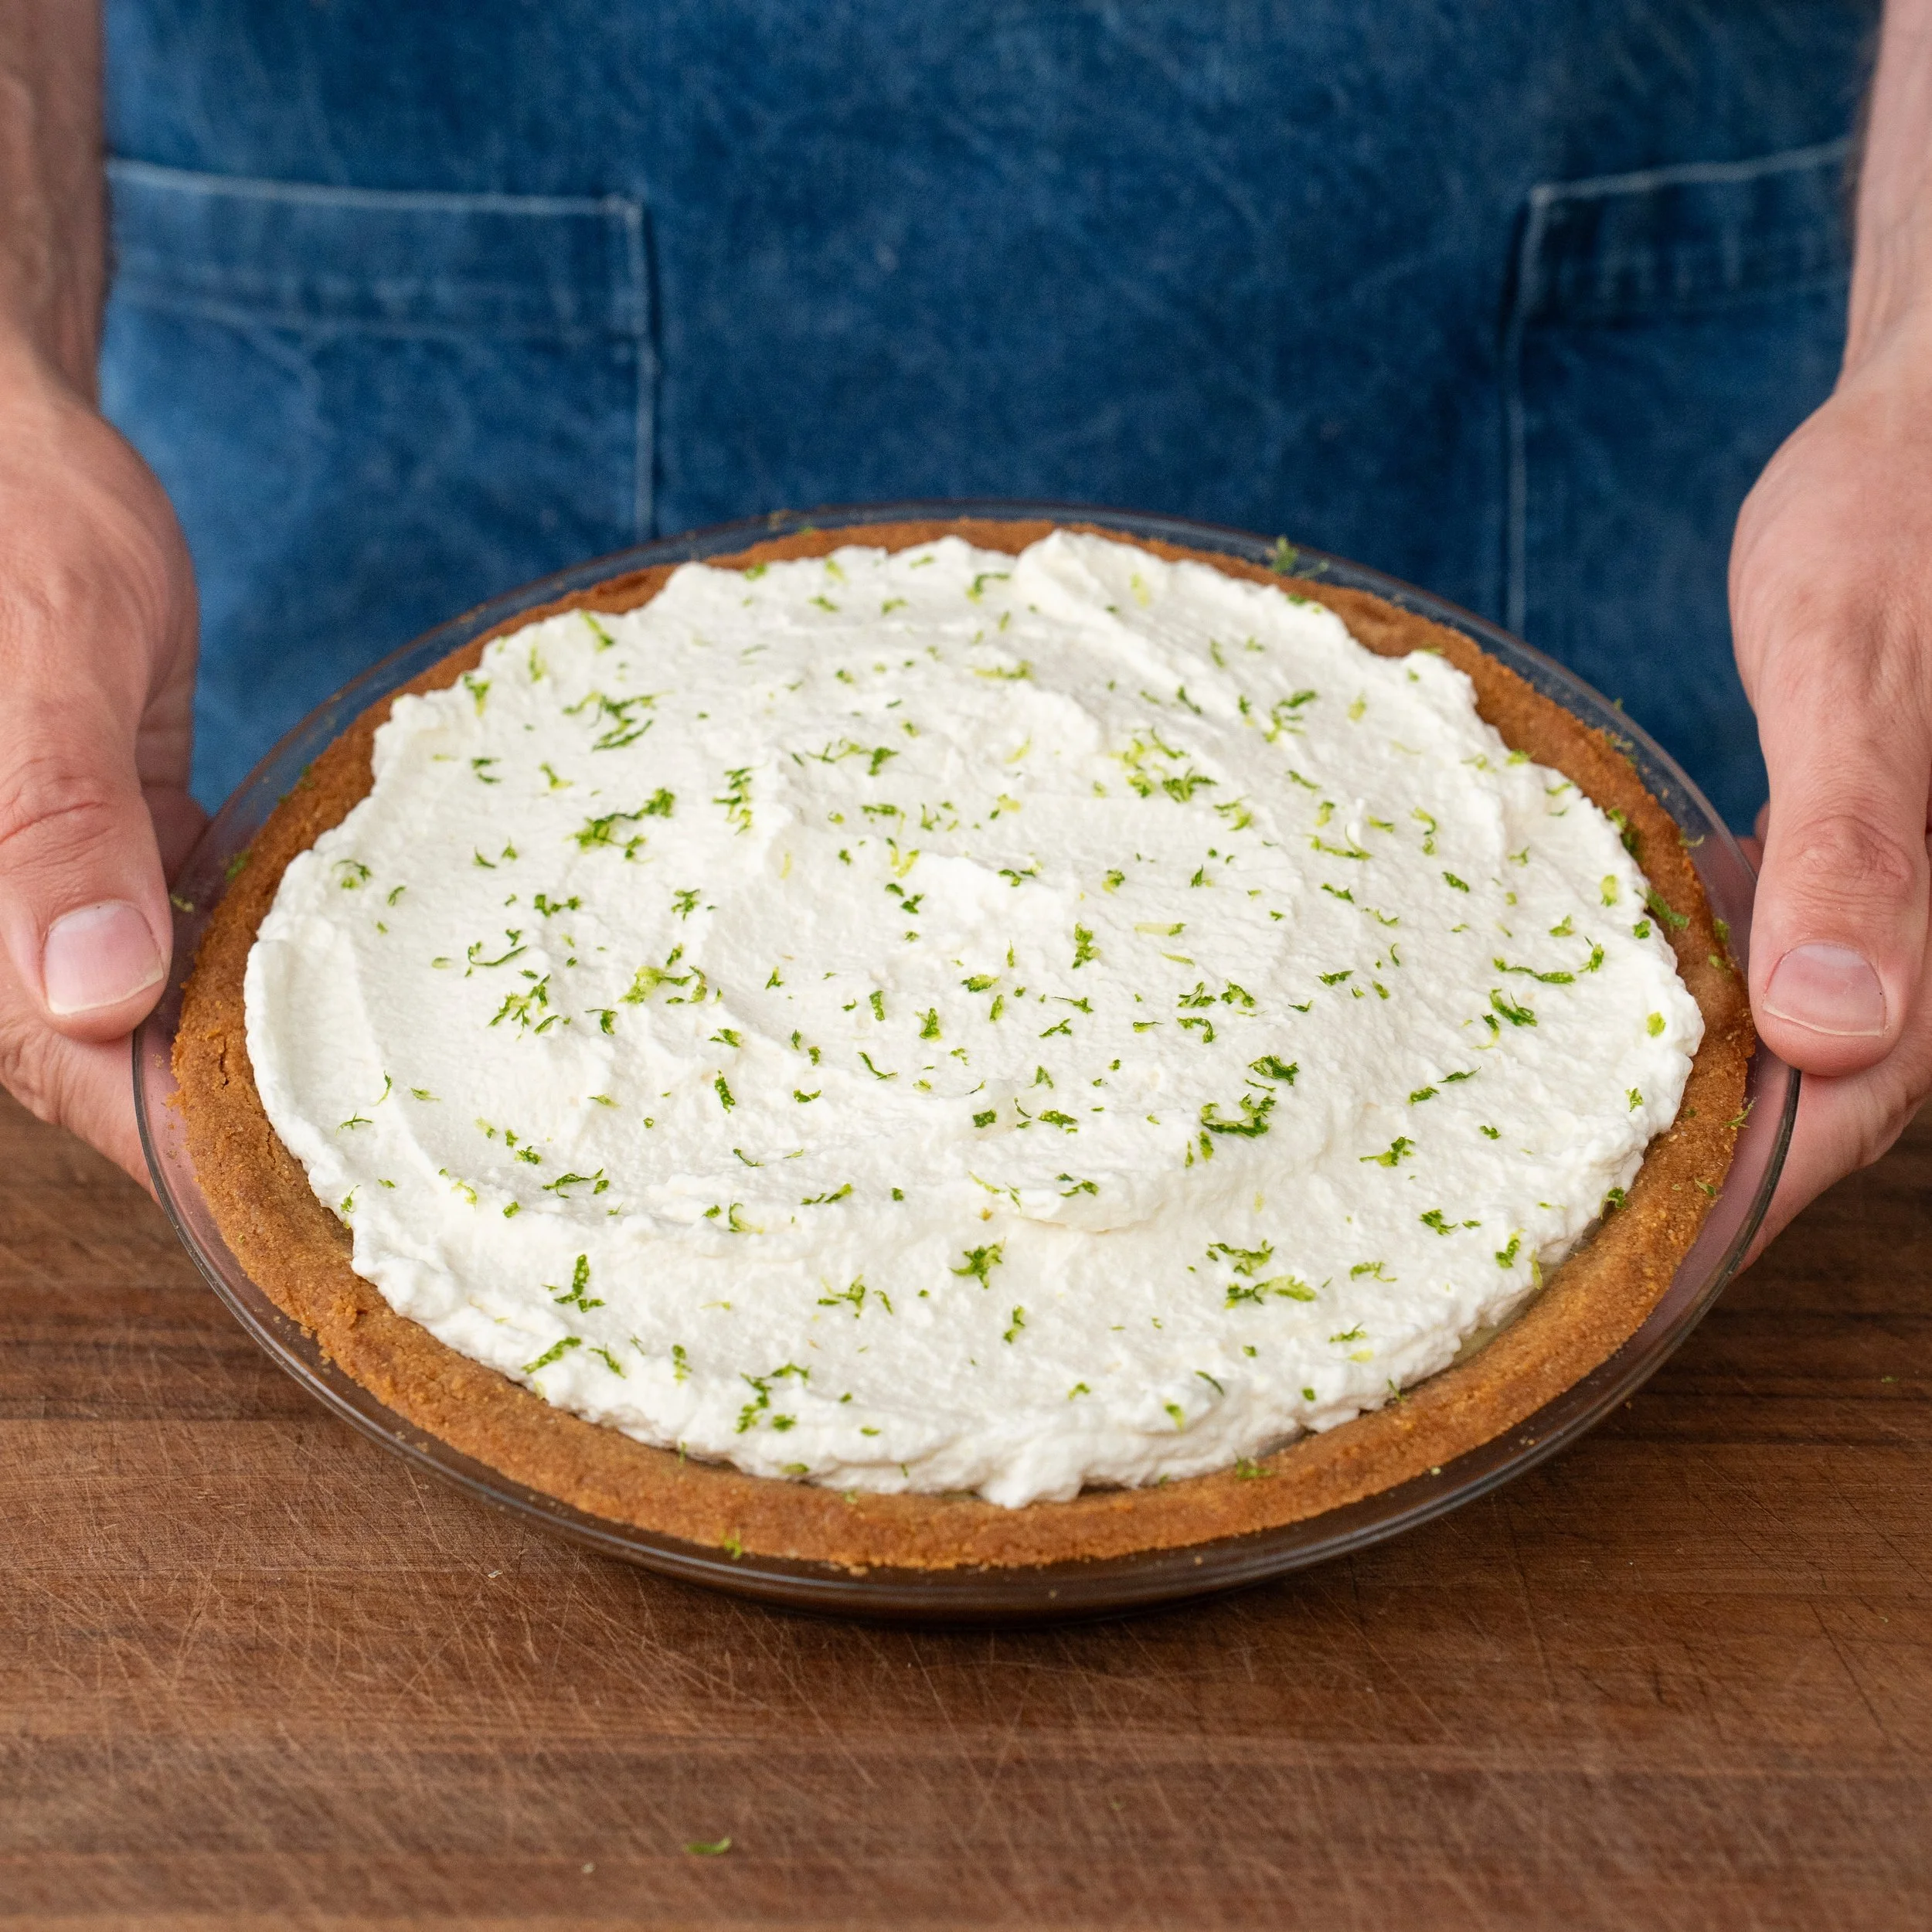
Classic Key Lime Pie
A rich, tart key lime custard set inside a graham cracker crust with a cookie like crunch, topped with fluffy vanilla whipped cream. The platonic ideal.
This post contains affiliate links. If you click and make a purchase, I may earn a commission at no extra cost to you
WHY THIS KEY LIME PIE RECIPE DELIVERS
Most key lime pies miss the mark in two places: the filling is too loose and aggressively tart, and the graham cracker crust is coarse, crumbly, and falls apart when you slice it. So instead of eating like a clean piece of pie, the whole thing can feel more like a granola-and-yogurt parfait.
For this version, I made a few small structural changes that make a big difference. The crust is designed to compact more easily into the pie plate. This gives it a tighter, crispier texture and helps it hold together when sliced. For the custard, I use extra egg yolks for a firmer, silkier set, plus sour cream to add richness and soften the sharp edge of the key lime juice.
The result is a key lime pie that still has that bright, punchy lime flavor, but with enough fat, structure, and sweetness to keep the whole bite in balance. It’s still tart, but pleasantly tart.
BRIAN’S PRO TIPS
Level Up The Crust with Cream AND Milk Powder – These are the secret ingredients that make this pie special. Shout out to STL Pastry Chef Mathew Rice of Pink Door Cookies – this isn’t my original idea. The cream and milk powder collectively have more protein, a little less fat, and more moisture. It’s like deconstructed butter. That extra moisture helps the crust pack tightly into the pan instead of crumbling, while the extra protein helps it stay set after baking. The milk powder also toasts in the oven, giving the crust a deep, cookie-like flavor that goes way beyond a standard graham cracker base. And losing a little fat here actually helps the crust structurally, without making it taste less rich, because there’s plenty of fat in the custard and topping to balance the lime.
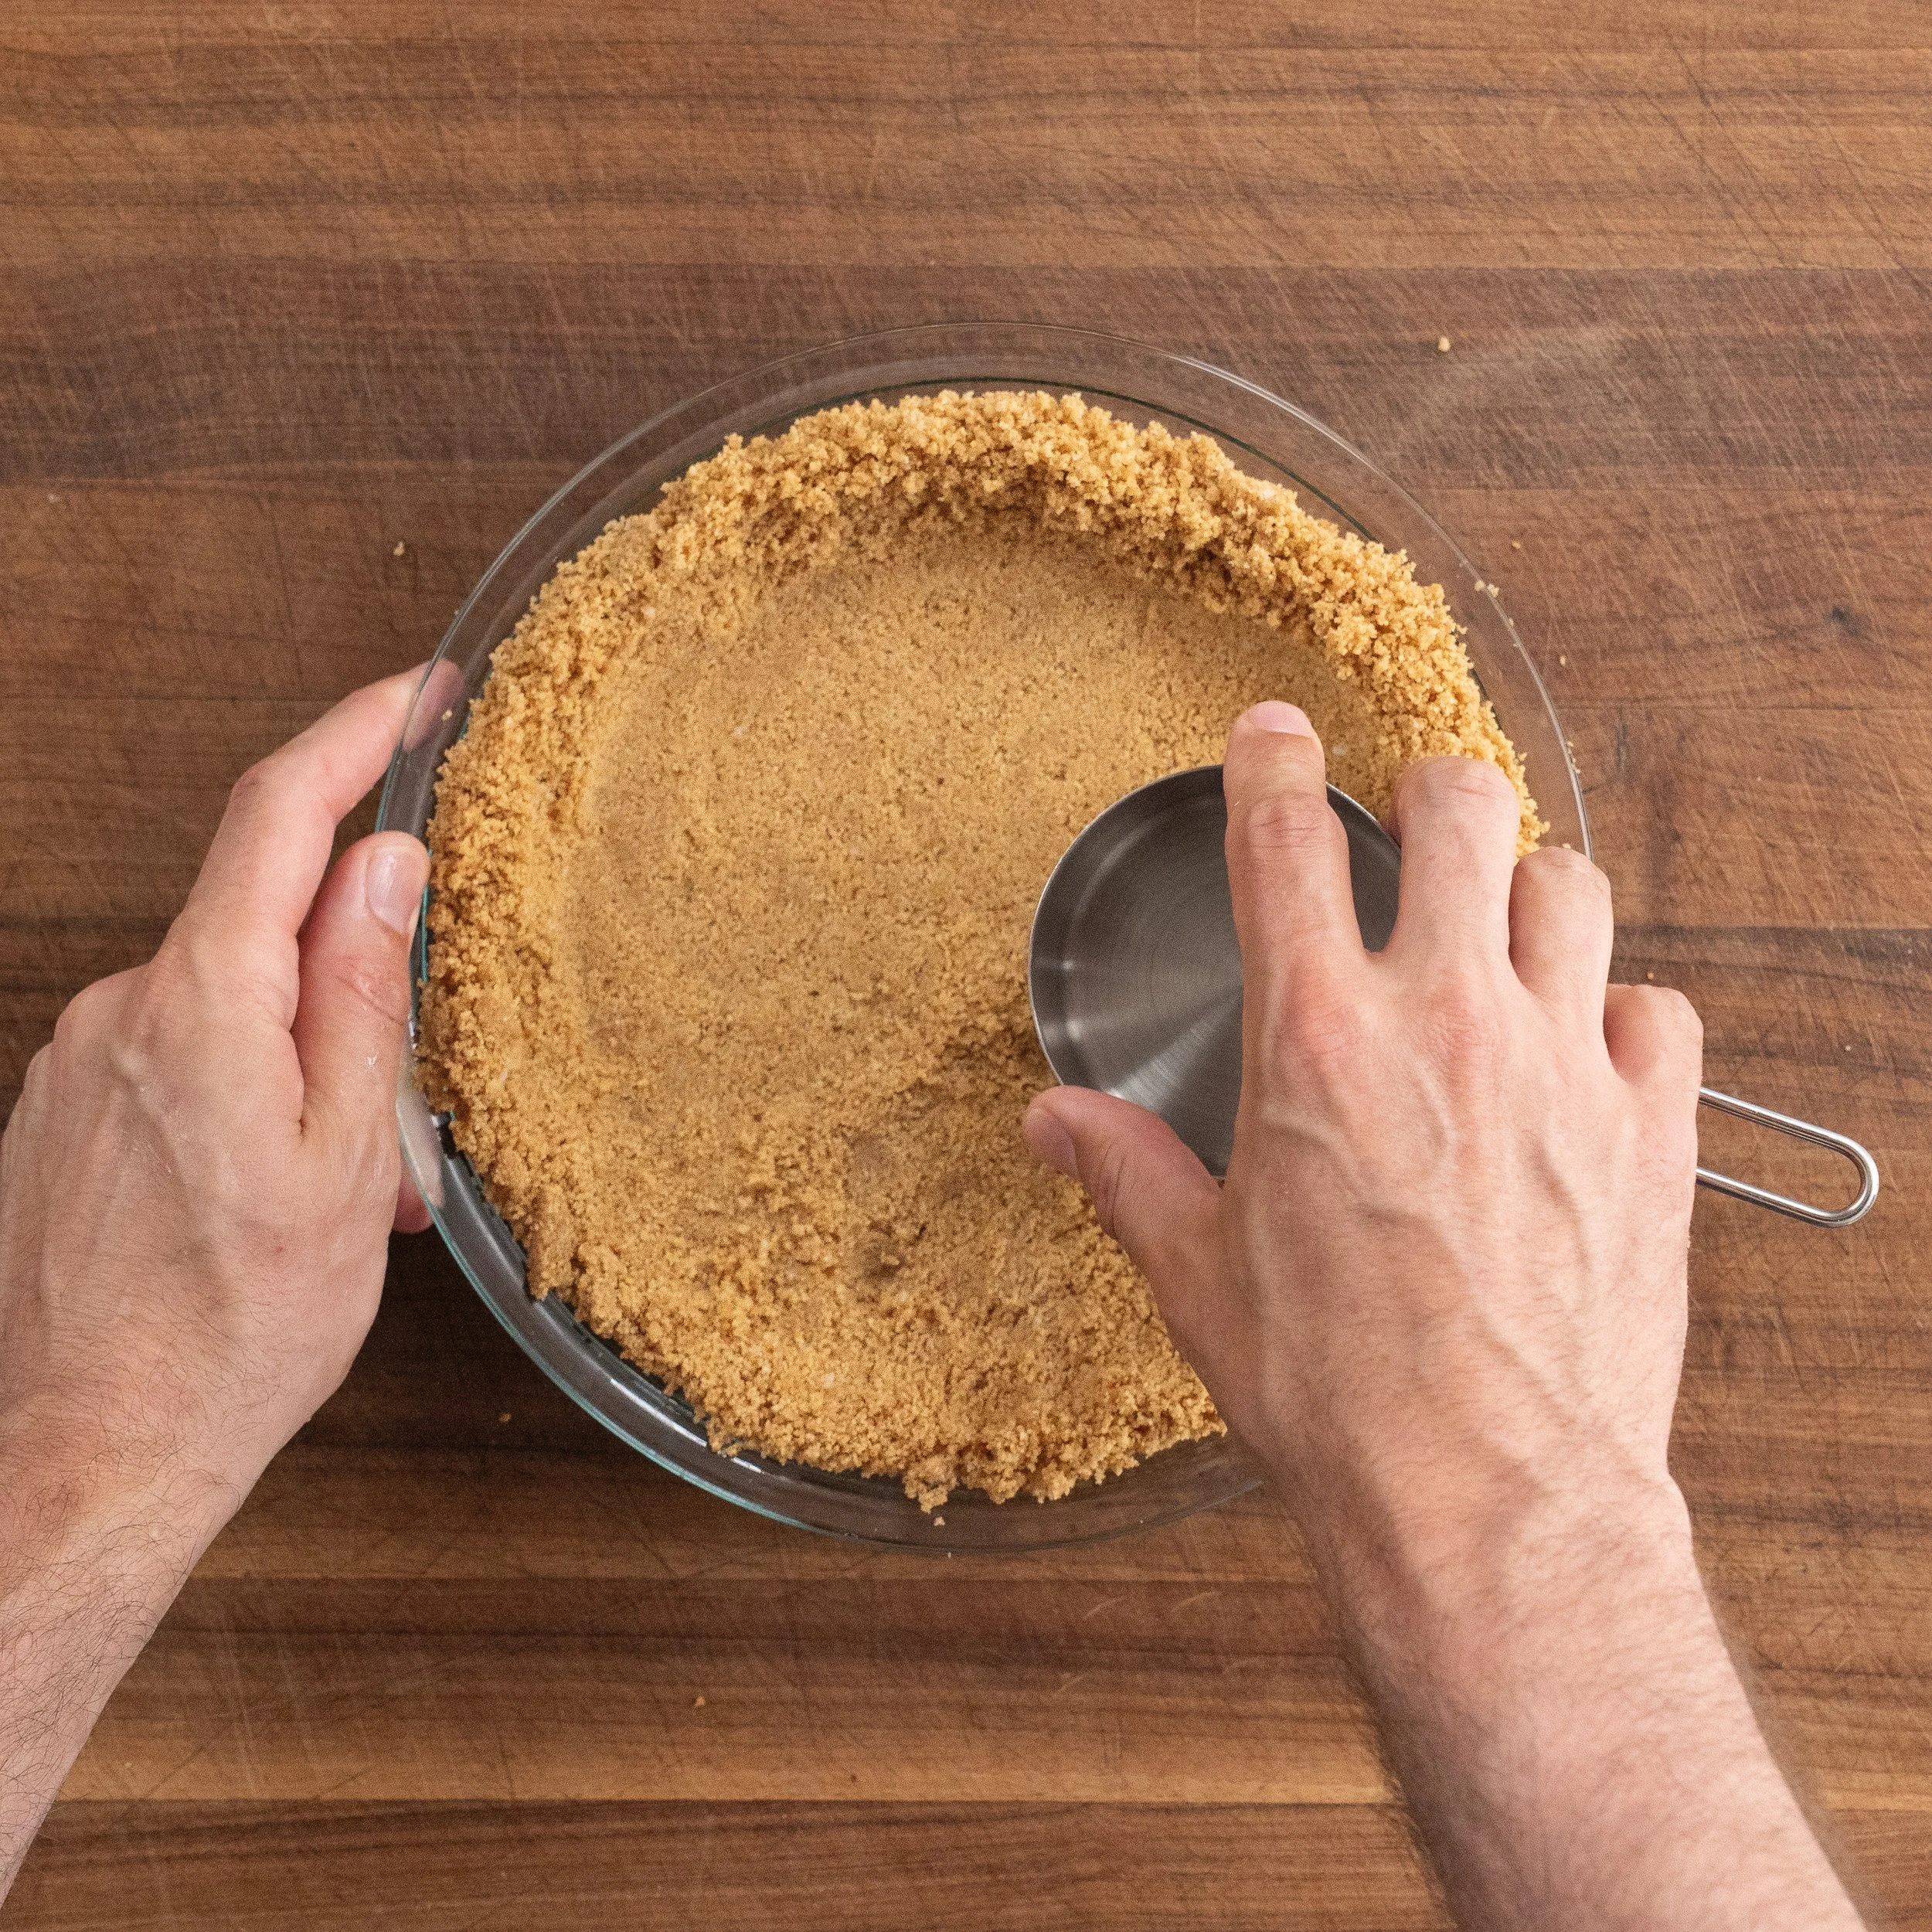
Compress the Crust – For a crisp crust that actually holds together, you have to pack it tighter than you think. Loose crust equals crumbly crust, and crumbly crust falls apart the second you cut into it. Use the bottom of a measuring cup to press the crumbs firmly into the base, then press them up the sides with a little less force. Finish by pinching the top edge TIGHTLY so it stays intact when you slice.
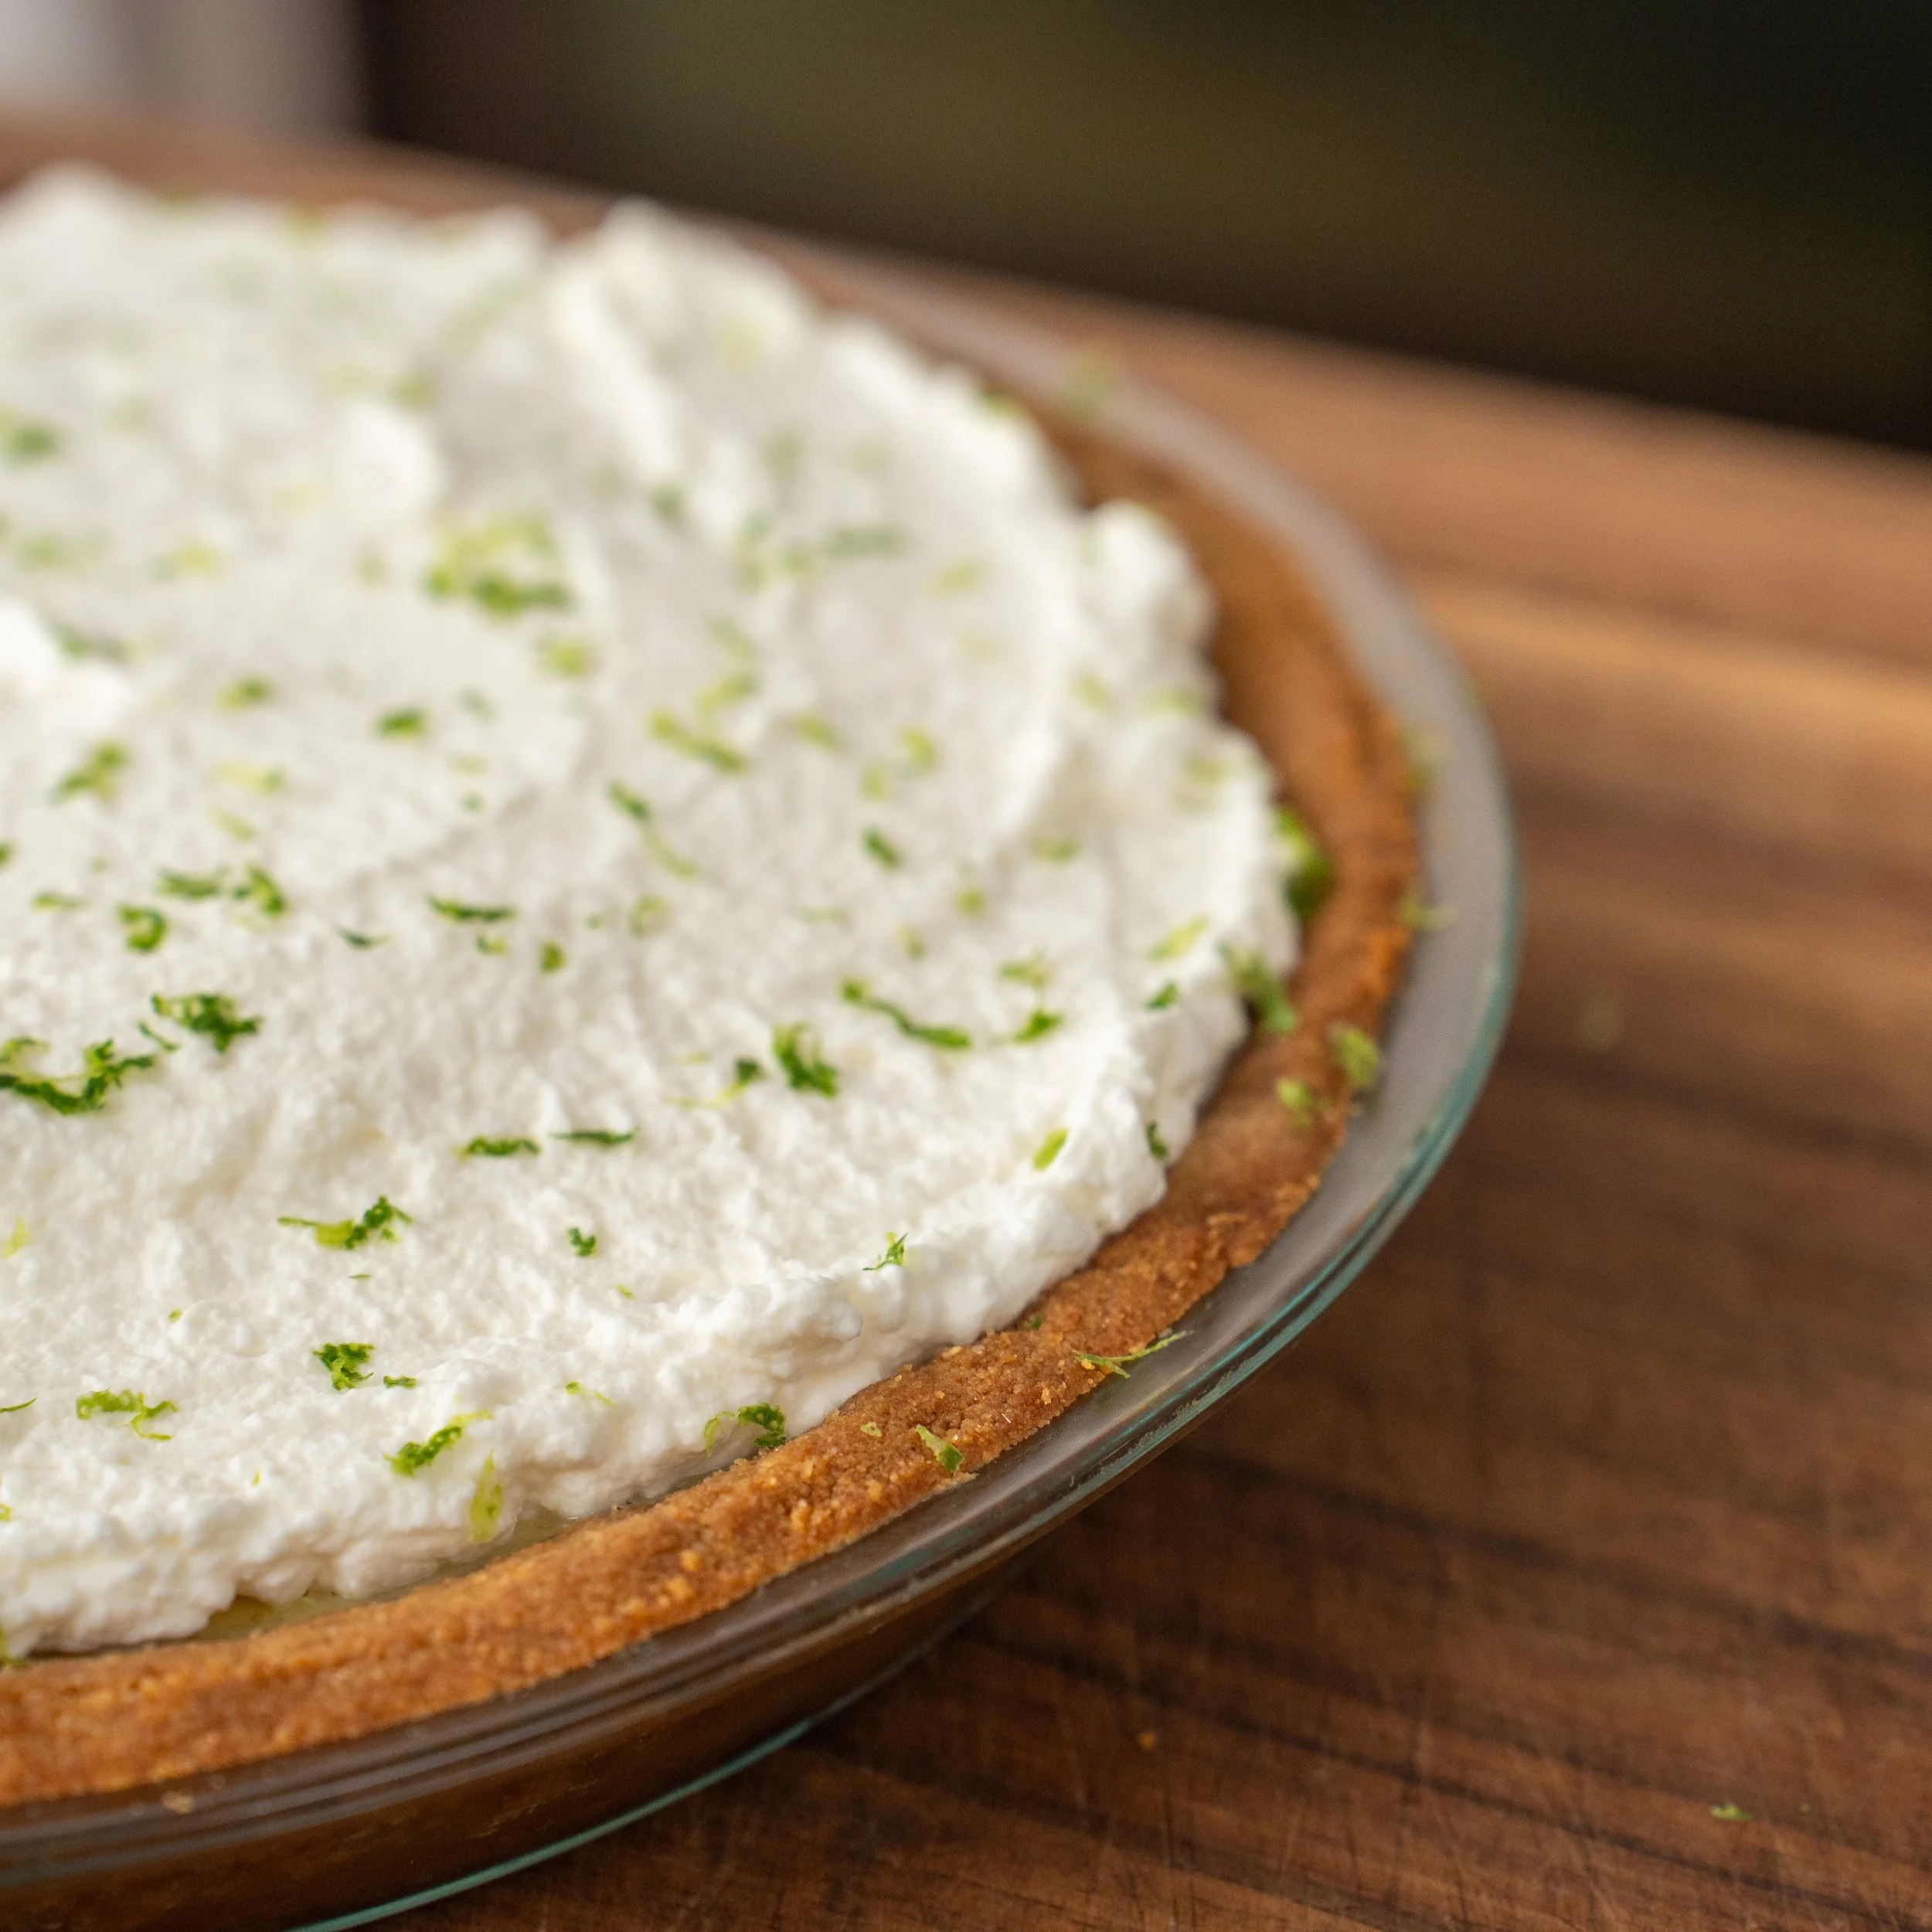
Fresh Lime Zest On Top, Not In the Custard – A lot of recipes fold lime zest into the custard to increase limey-ness. I tested it many times and I don’t like it. Cooked zest loses its fresh, pungent aroma, and turns brown in the bake which looks bad. Microplaning fresh zest over the chilled, finished pie keeps the lime sharp, aromatic, and visually clean .
KEY INGREDIENT NOTES & SUBSTITUTIONS
Nellie & Joe’s Key Lime Juice –I tested this recipe 8 or 9 times with fresh lime juice, both Persian and key lime. In my opinion it’s just not better than Nellie & Joe’s. The fresh juice is just more sour, the flavor and acidity is inconsistent, and it makes a harsh tasting custard. Nellie & Joe’s gives you that bright, tropical, almost vanilla-like key lime thing consistently. Also most of the Key Lime we grew up eating was probably made with this product or something like it, so what we all define as “Key Lime” flavor is actually something like Nellie & Joe’s. This is one of the rare cases where the bottled stuff is not just acceptable, it’s actually what I prefer. You can get it on Amazon, but I also found it in my local Walmart.
If you can’t find Nellie and Joe’s you can use fresh key lime juice, just use 100g (instead of 120g that the recipe calls for) and add a pinch of vanilla extract.
Cinnamon Graham Crackers – Cinnamon grahams give the crust a warmer, slightly more complex flavor than plain. They make the finished crust taste like a snickerdoodle in a good way. Plain graham crackers work fine if you can’t find cinnamon. Gluten-free graham crackers are a fine sub here too.
Yolk Heavy Custard – Classic key lime pie is usually just yolks, sweetened condensed milk, and lime juice, which tends to be too loose for me. I want a custard that slices clean and holds its shape. Extra yolks give me more set without diluting the intensity of the lime flavor.
Nonfat Milk Powder – If you only buy milk powder for one thing, this is it. It toasts in the oven, deepens the crust flavor, and adds protein that helps the crust set up rather than crumble. Don’t skip it. Look for it in the baking aisle near the powdered sugar.
Full ingredient list and amounts listed in the recipe below.
STORAGE & MAKE-AHEAD
The pie itself keeps covered in the fridge for 3–4 days. The custard actually improves on day 2, it tightens up further and the lime flavor mellows just slightly into something more rounded.
Freezing key lime pie works in a pinch but the texture takes a hit on thaw, the crust softens and the custard loses some of its silky set.
RECIPE
COOK TIME 1 hour active + overnight chill YIELD 1 9-inch pie (8 slices)
GRAHAM CRACKER CRUST
230g (2½ cups) cinnamon graham crackers (abut 14 sheets)
25 g (3 tbsp) nonfat milk powder
30 g (2½ tbsp) sugar
4 g (¾ tsp) salt
65 g (4½ tbsp) butter, unsalted
65 g (4½ tbsp) heavy cream
pan spray or oil, for pie pan
KEY LIME CUSTARD FILLING
7 egg yolks
75 g (⅓ cup) sour cream, full fat
396 g / 14 oz can sweetened condensed milk
120 g (½ cup) key lime juice, Joe & Nellie's brand
2 g (¼ tsp) salt
WHIPPED CREAM TOPPING
250 g (1 cup) heavy cream, cold
50 g (½ cup) powdered sugar
5 g (¾ tsp) vanilla extract
pinch of salt
lime zest, for topping
HOW TO MAKE KEY LIME PIE
1. Preheat the oven to 375°F (190°C).
2. Melt the butter Melt 65g butter in a small saucepan over very low heat. The second it’s liquid, kill the heat.
Only heat the butter until it’s melted. As soon as it’s liquid, pull it off. You don’t want it browning, and you definitely don’t want it boiling. Boiling butter makes the crust sticky and harder to press evenly.
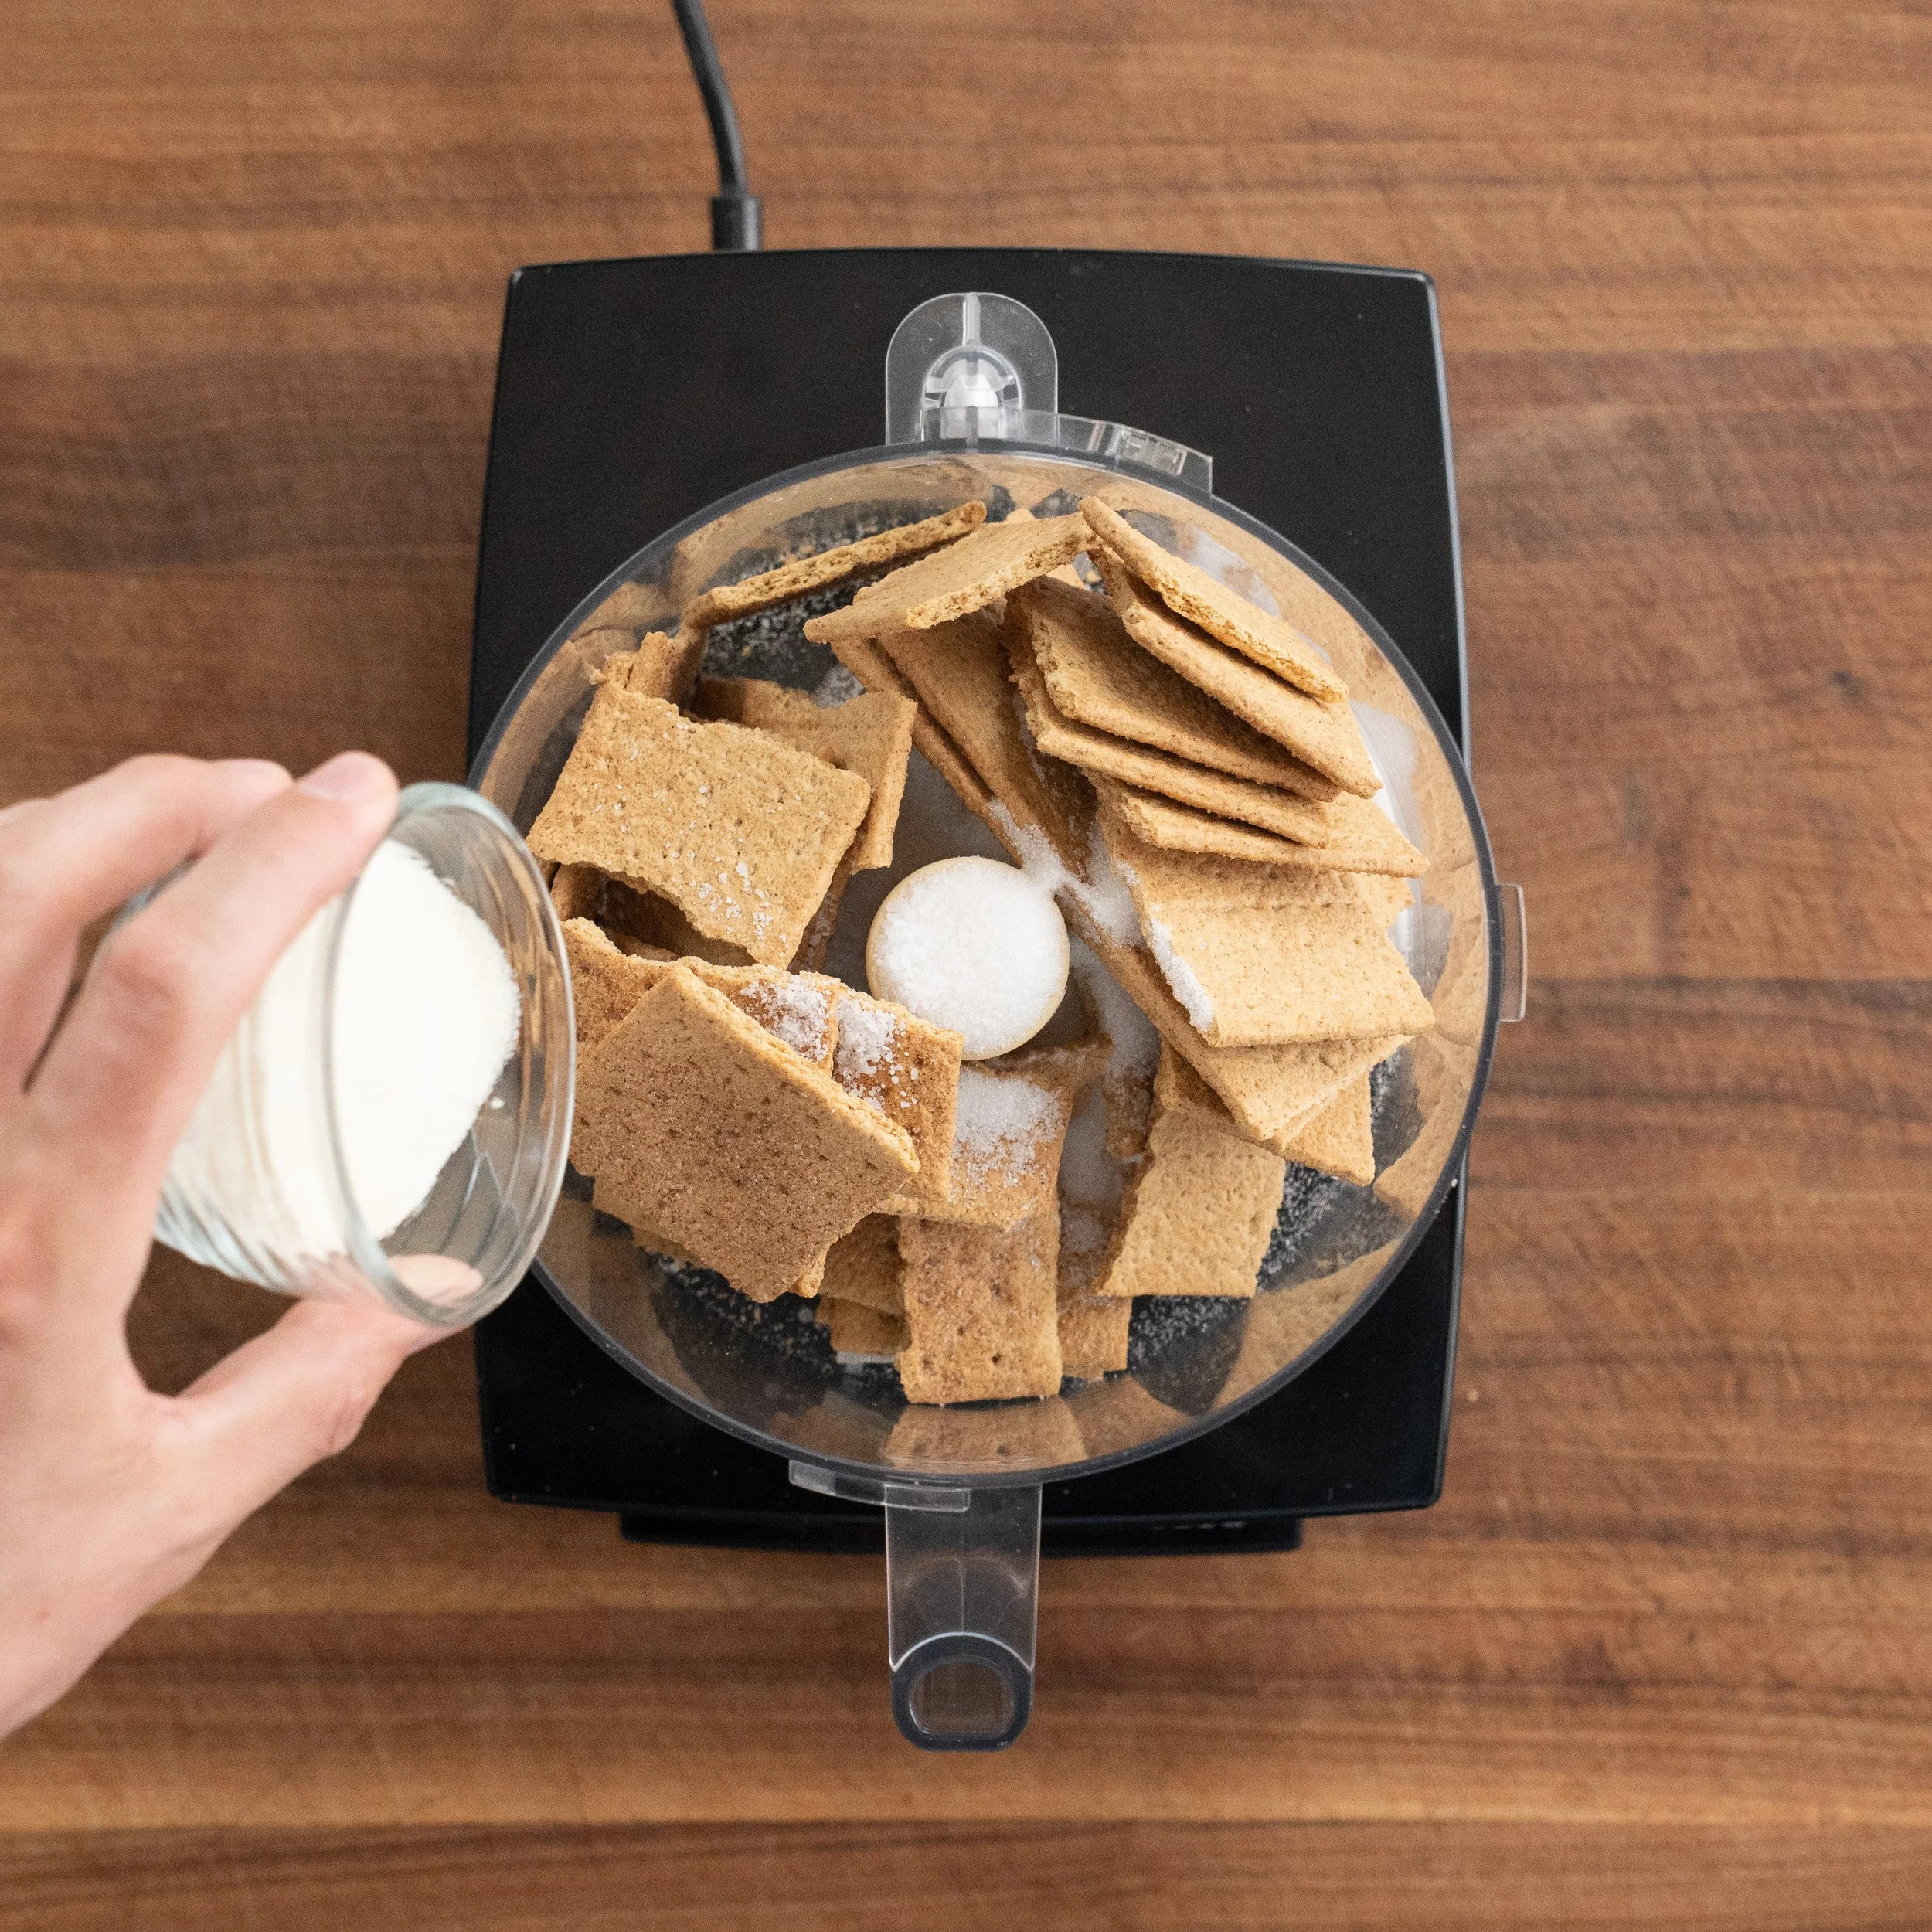
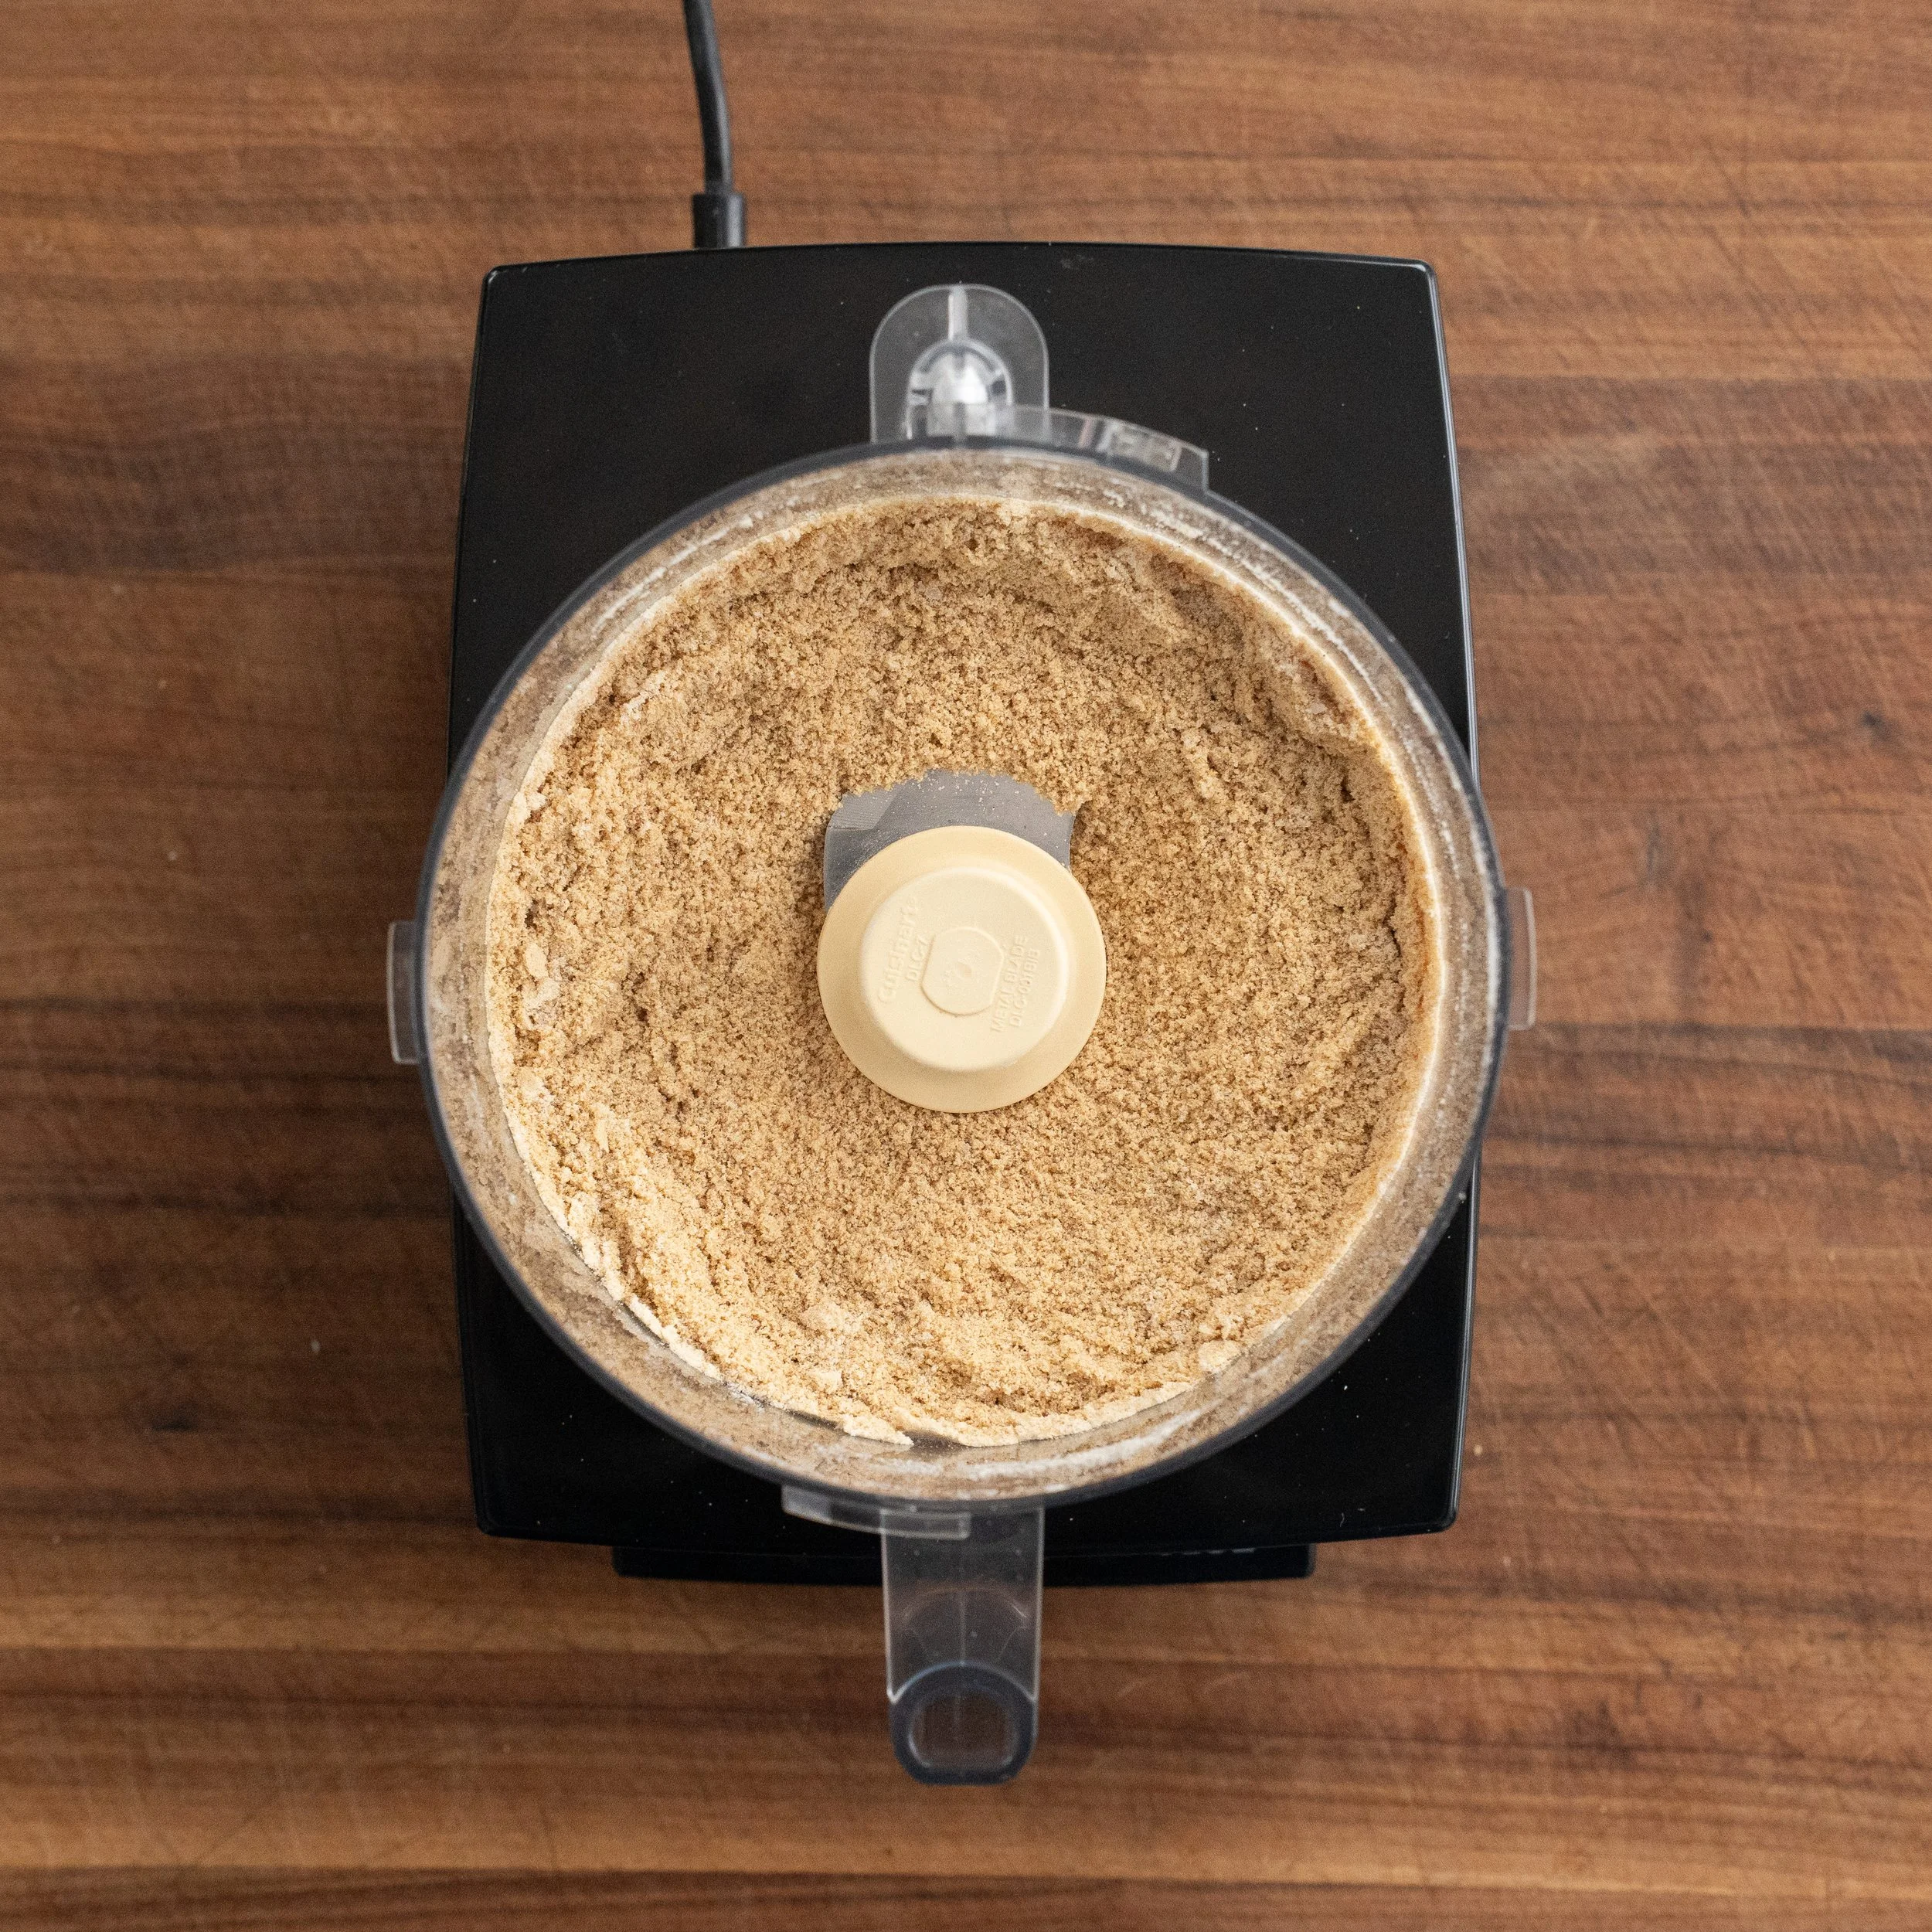
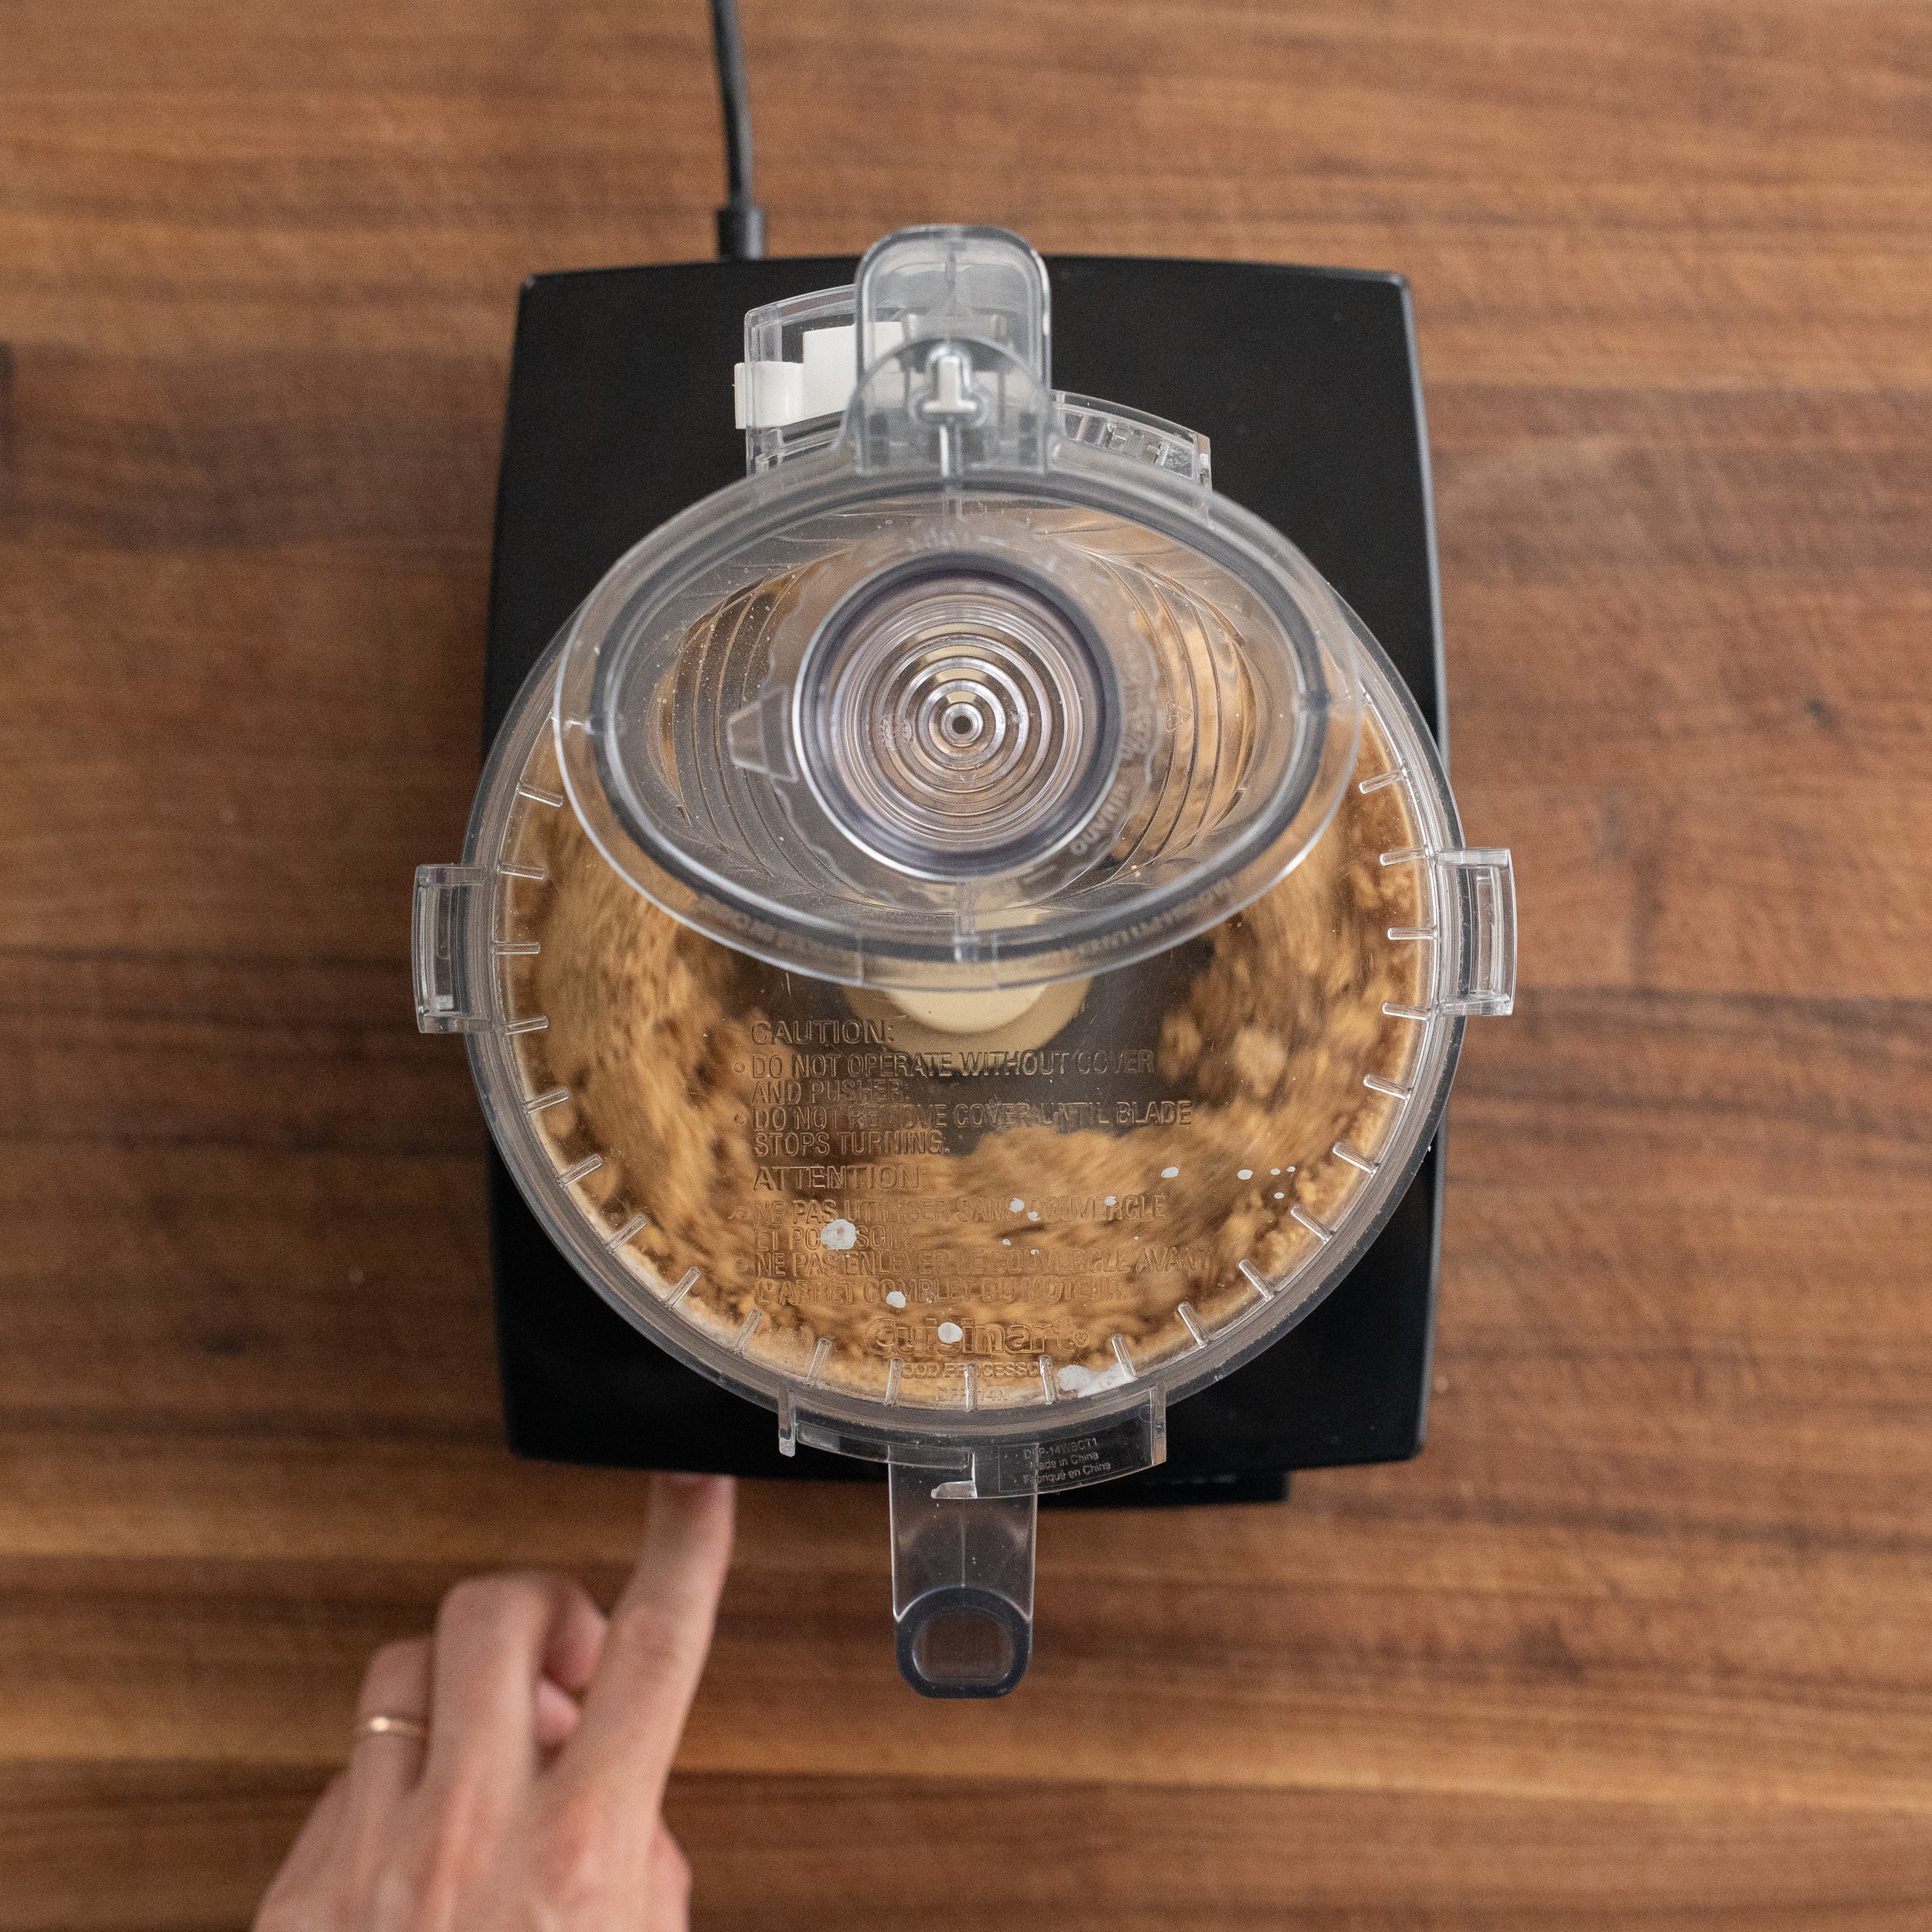
3. Process the graham crackers. Combine 230g cinnamon graham crackers, 25g milk powder, 30g sugar, and 4g salt in a food processor. Pulse for 30ish seconds until it’s well broken down into a sandy crumb. Avoid a coarse crumb, that makes a crust that’s too crumbly in my opinion.
No Food Processor? Throw the crackers in a zip-top bag and crush them with a rolling pin or the bottom of a heavy pan until they’re fine crumbs.
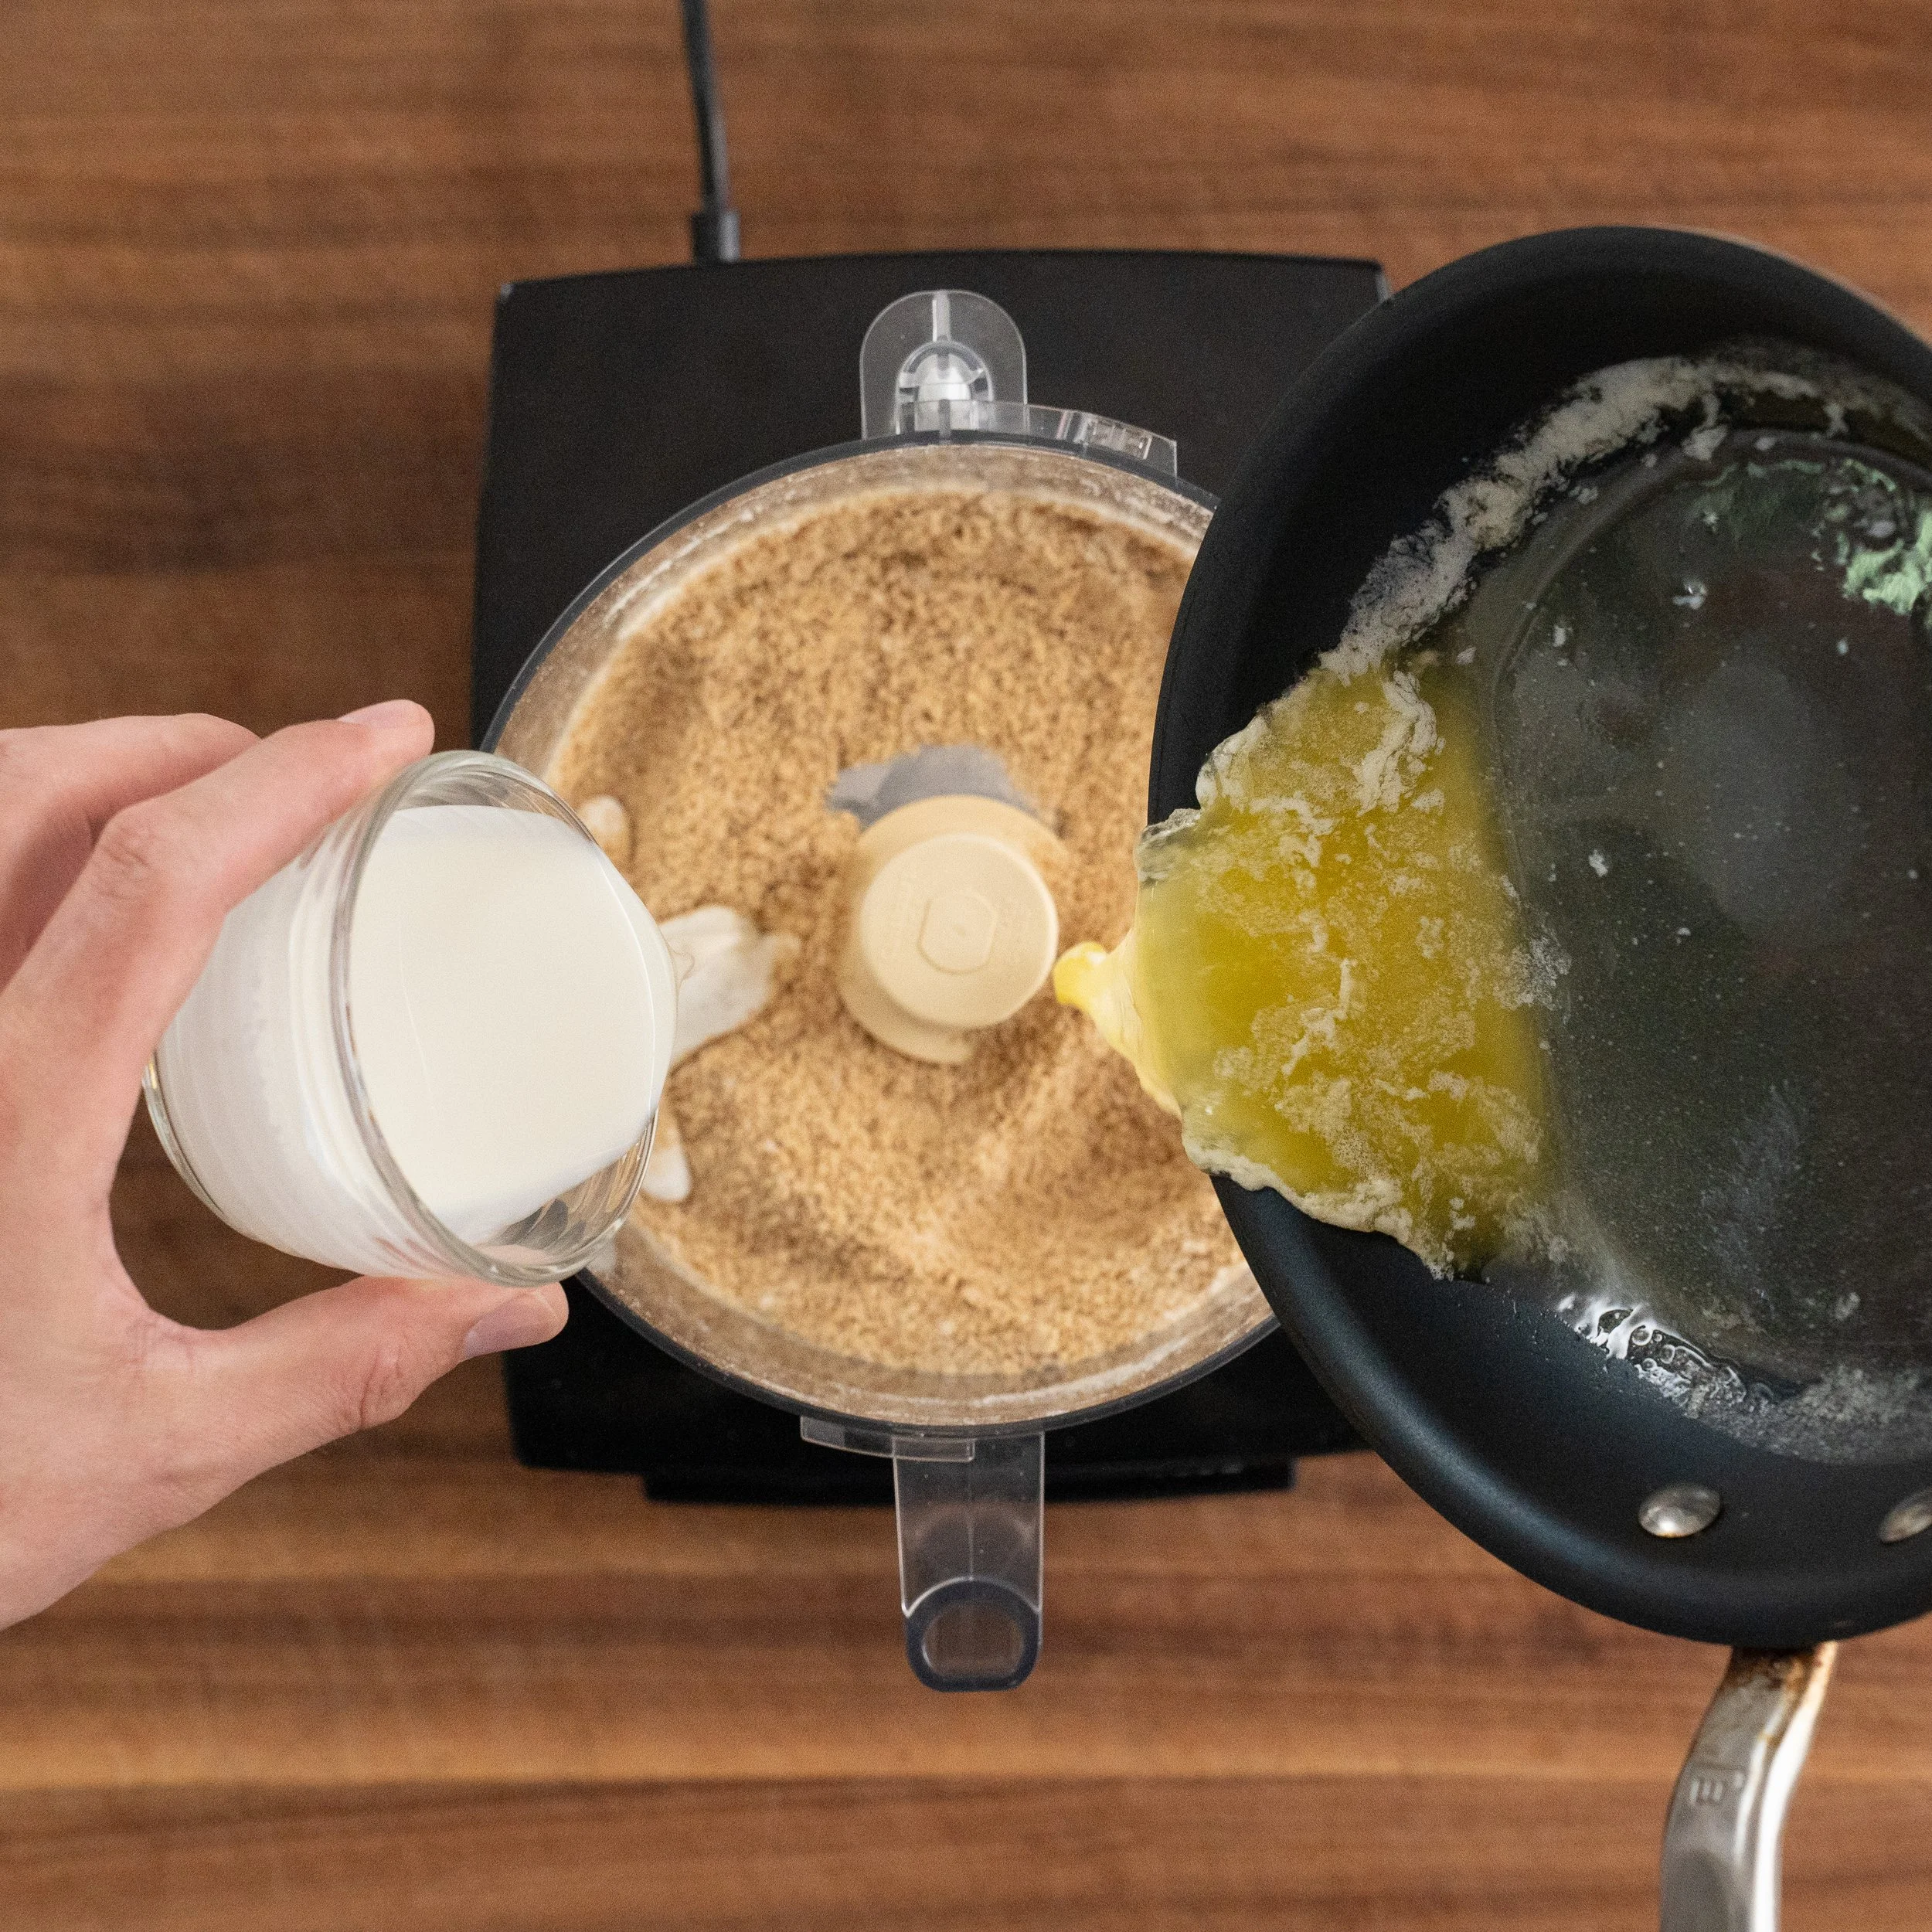
4 Add the butter and cream and pulse to combine. Stream the butter and cream into the food processor and spin until the texture is like damp sand. When you squeeze a handful, it should hold together.
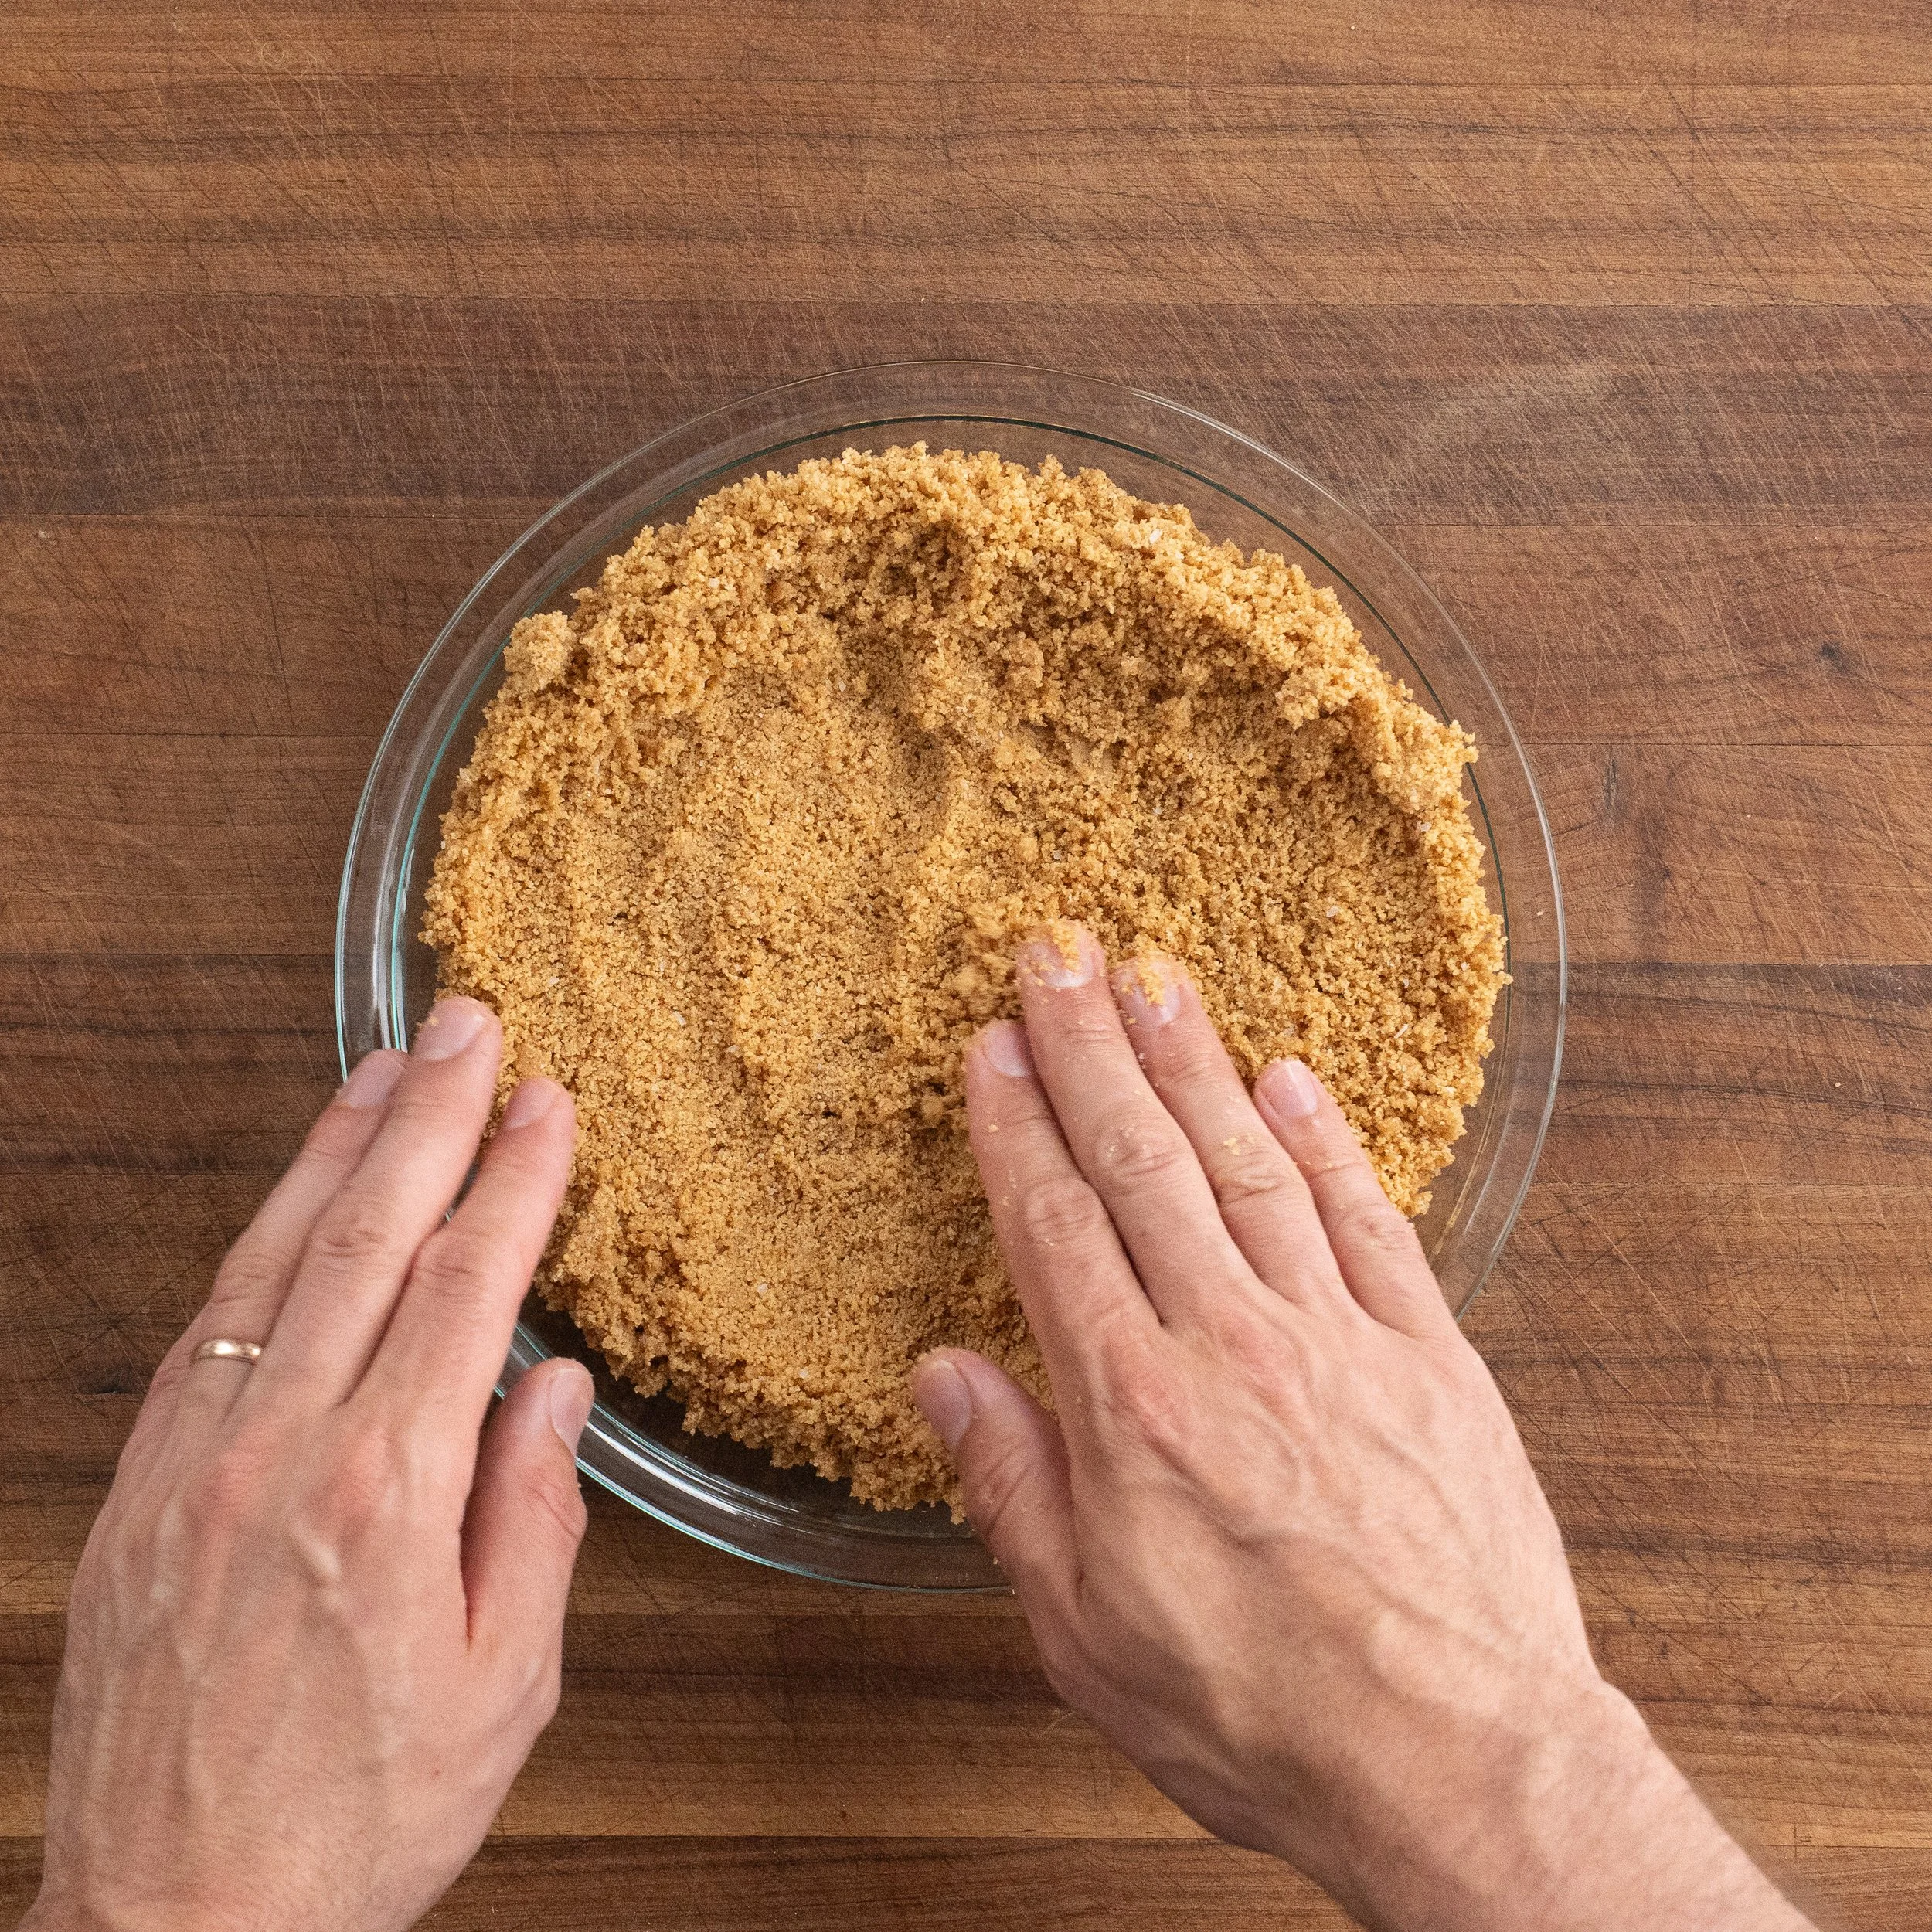
5. Press the crust into an oiled pie dish. Spray or oil a 9-inch glass pie dish with pan spray. Dump the crust mixture in and spread it out evenly, biased a little toward the edges. Break up any clumps with your fingertips, then press with your fingertips to start forming the shape.
Once it’s roughly in place, come back with the bottom of a measuring cup and pack everything down hard. Start in the center first and work outward. Use the side of the cup to pack the walls. Push the crust just past the lip of the dish so it doesn’t slouch into the pan as it bakes.
6. Bake the crust at 375°F (190°C) for 12 minutes. You’re looking for a nice set and a light golden brown color all the way to the edges.
If the crust slumps into the pan while baking it means it wasn’t packed tightly enough. While it’s still warm and pliable, take the back of a spoon and push the slumped crust back up the walls. It’ll re-set as it cools.
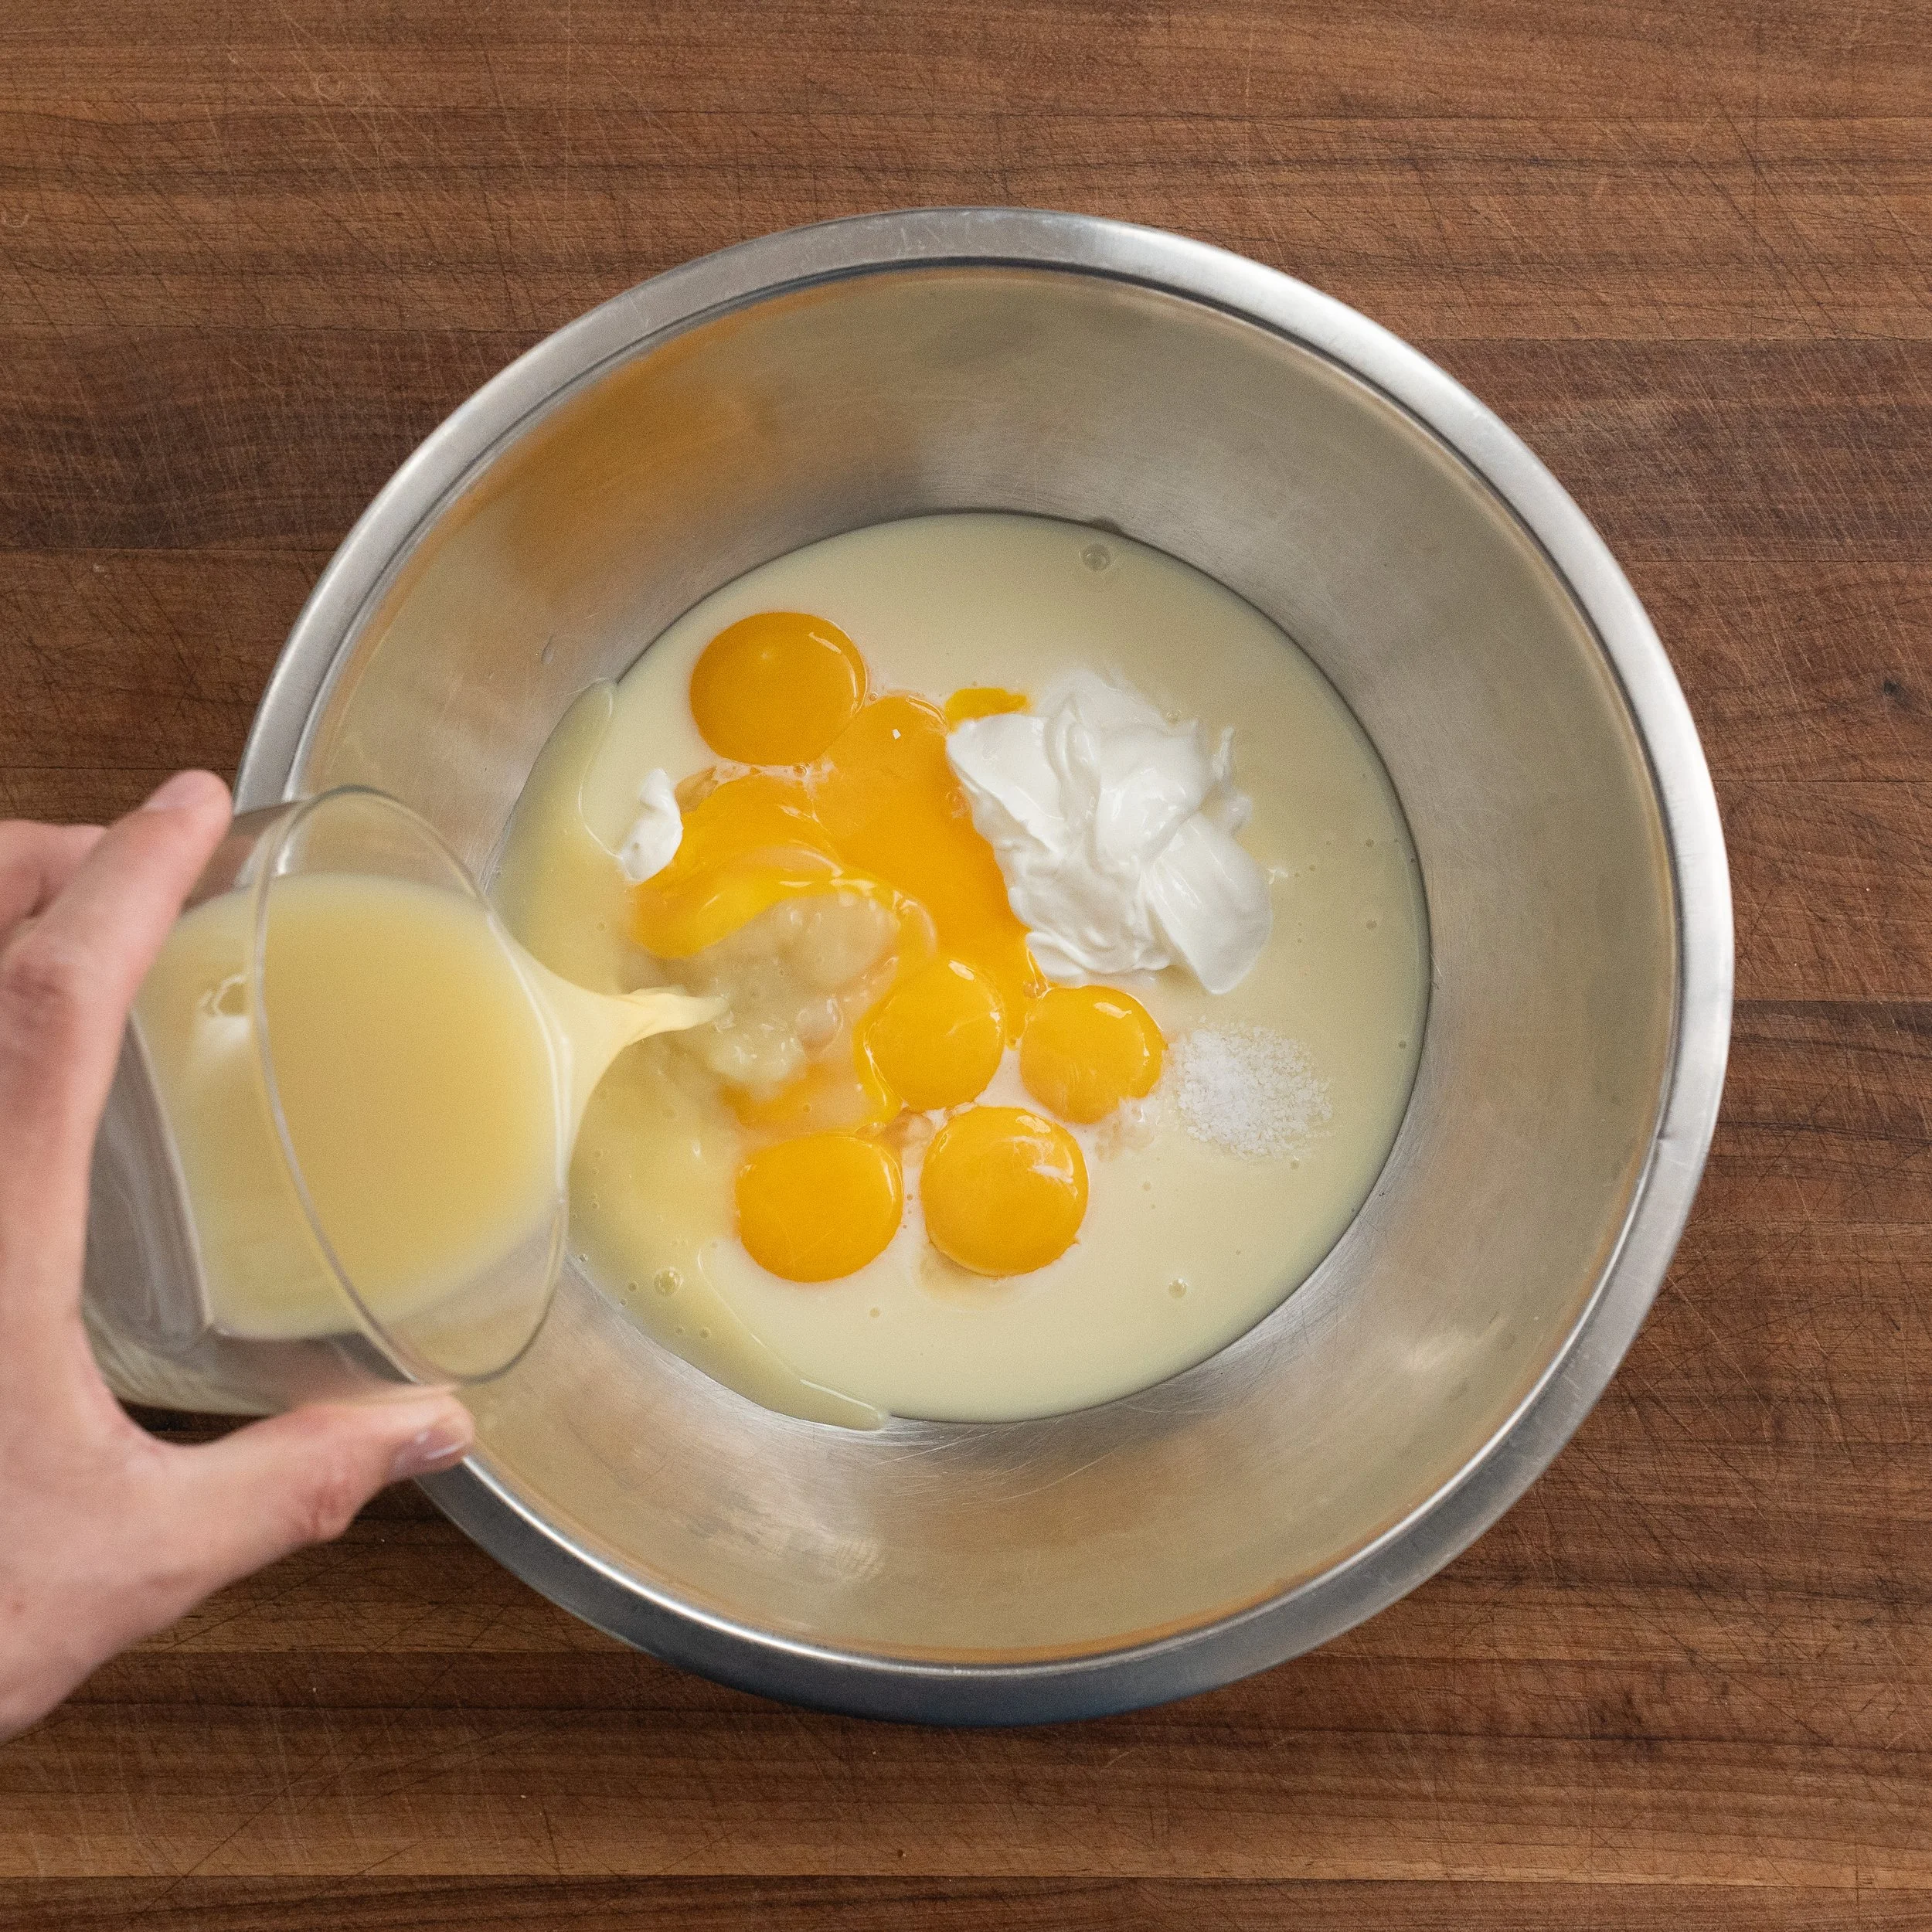
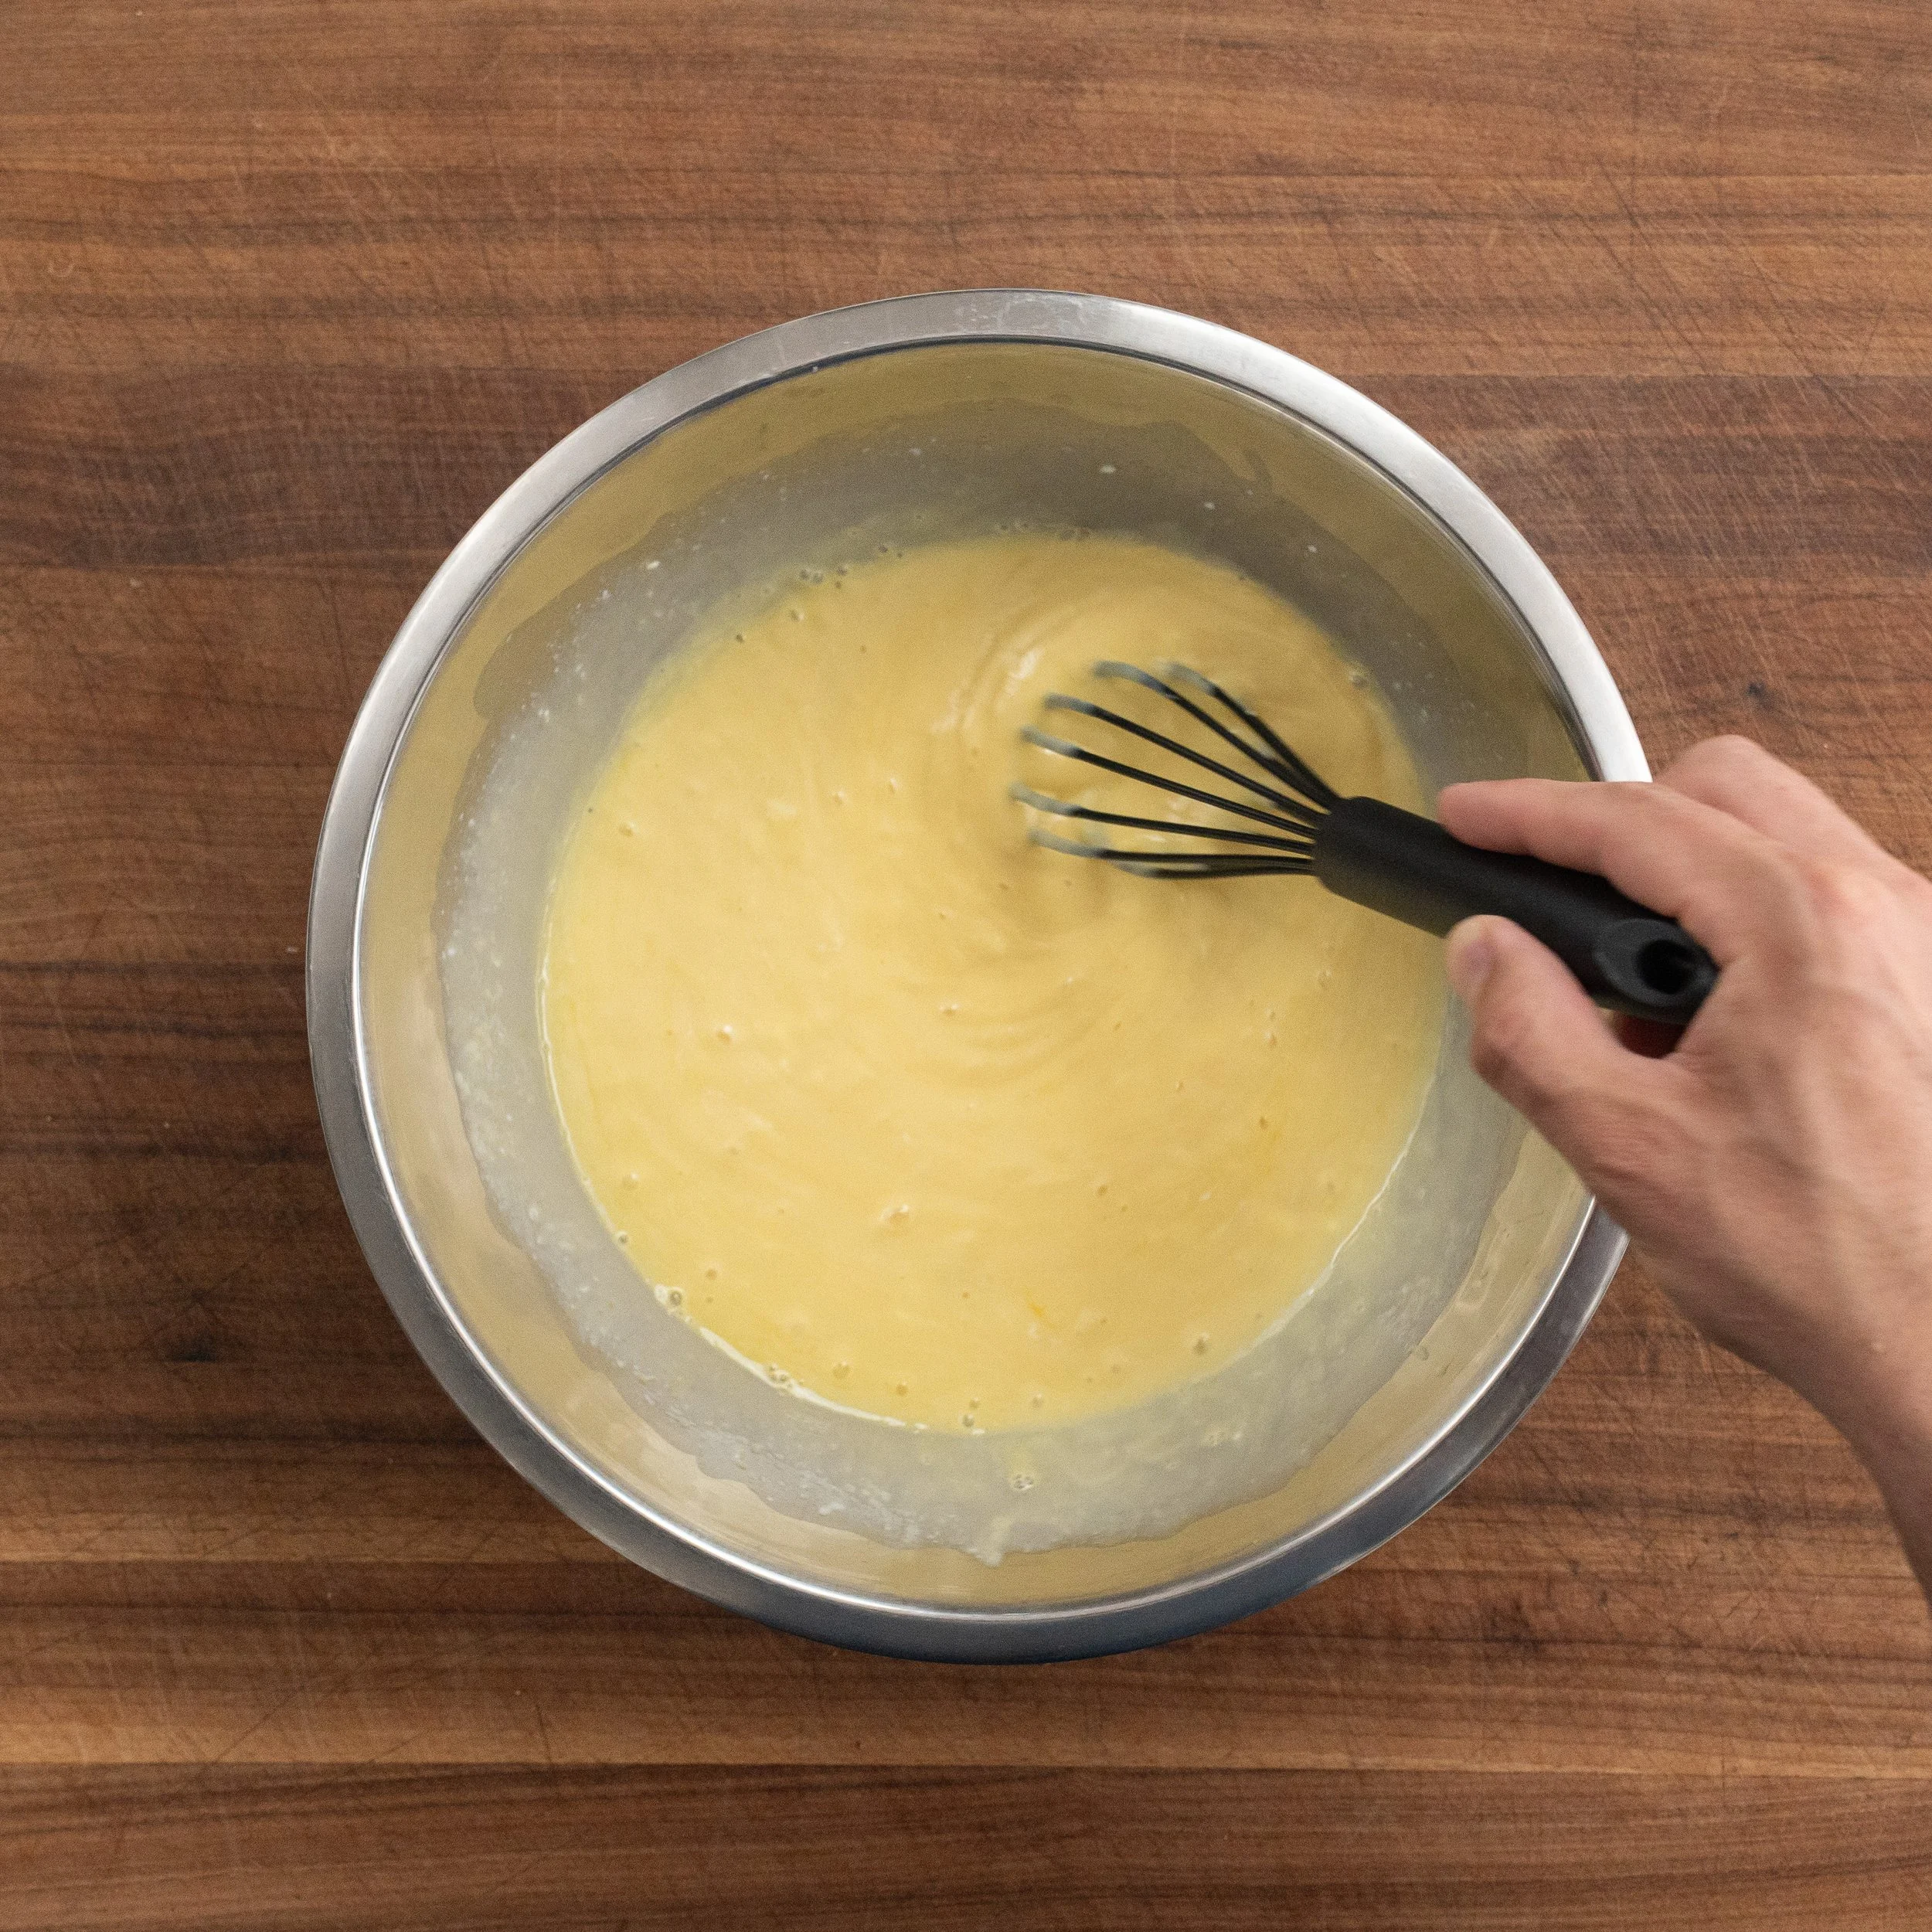
7. Mix the custard and let it rest. While the crust bakes, whisk together the 7 egg yolks, 75g sour cream, 1 400g can sweetened condensed milk, 120g Nellie & Joe’s Key Lime Juice and 2g salt in a bowl until smooth and uniform. Let the mixture sit until time to bake.
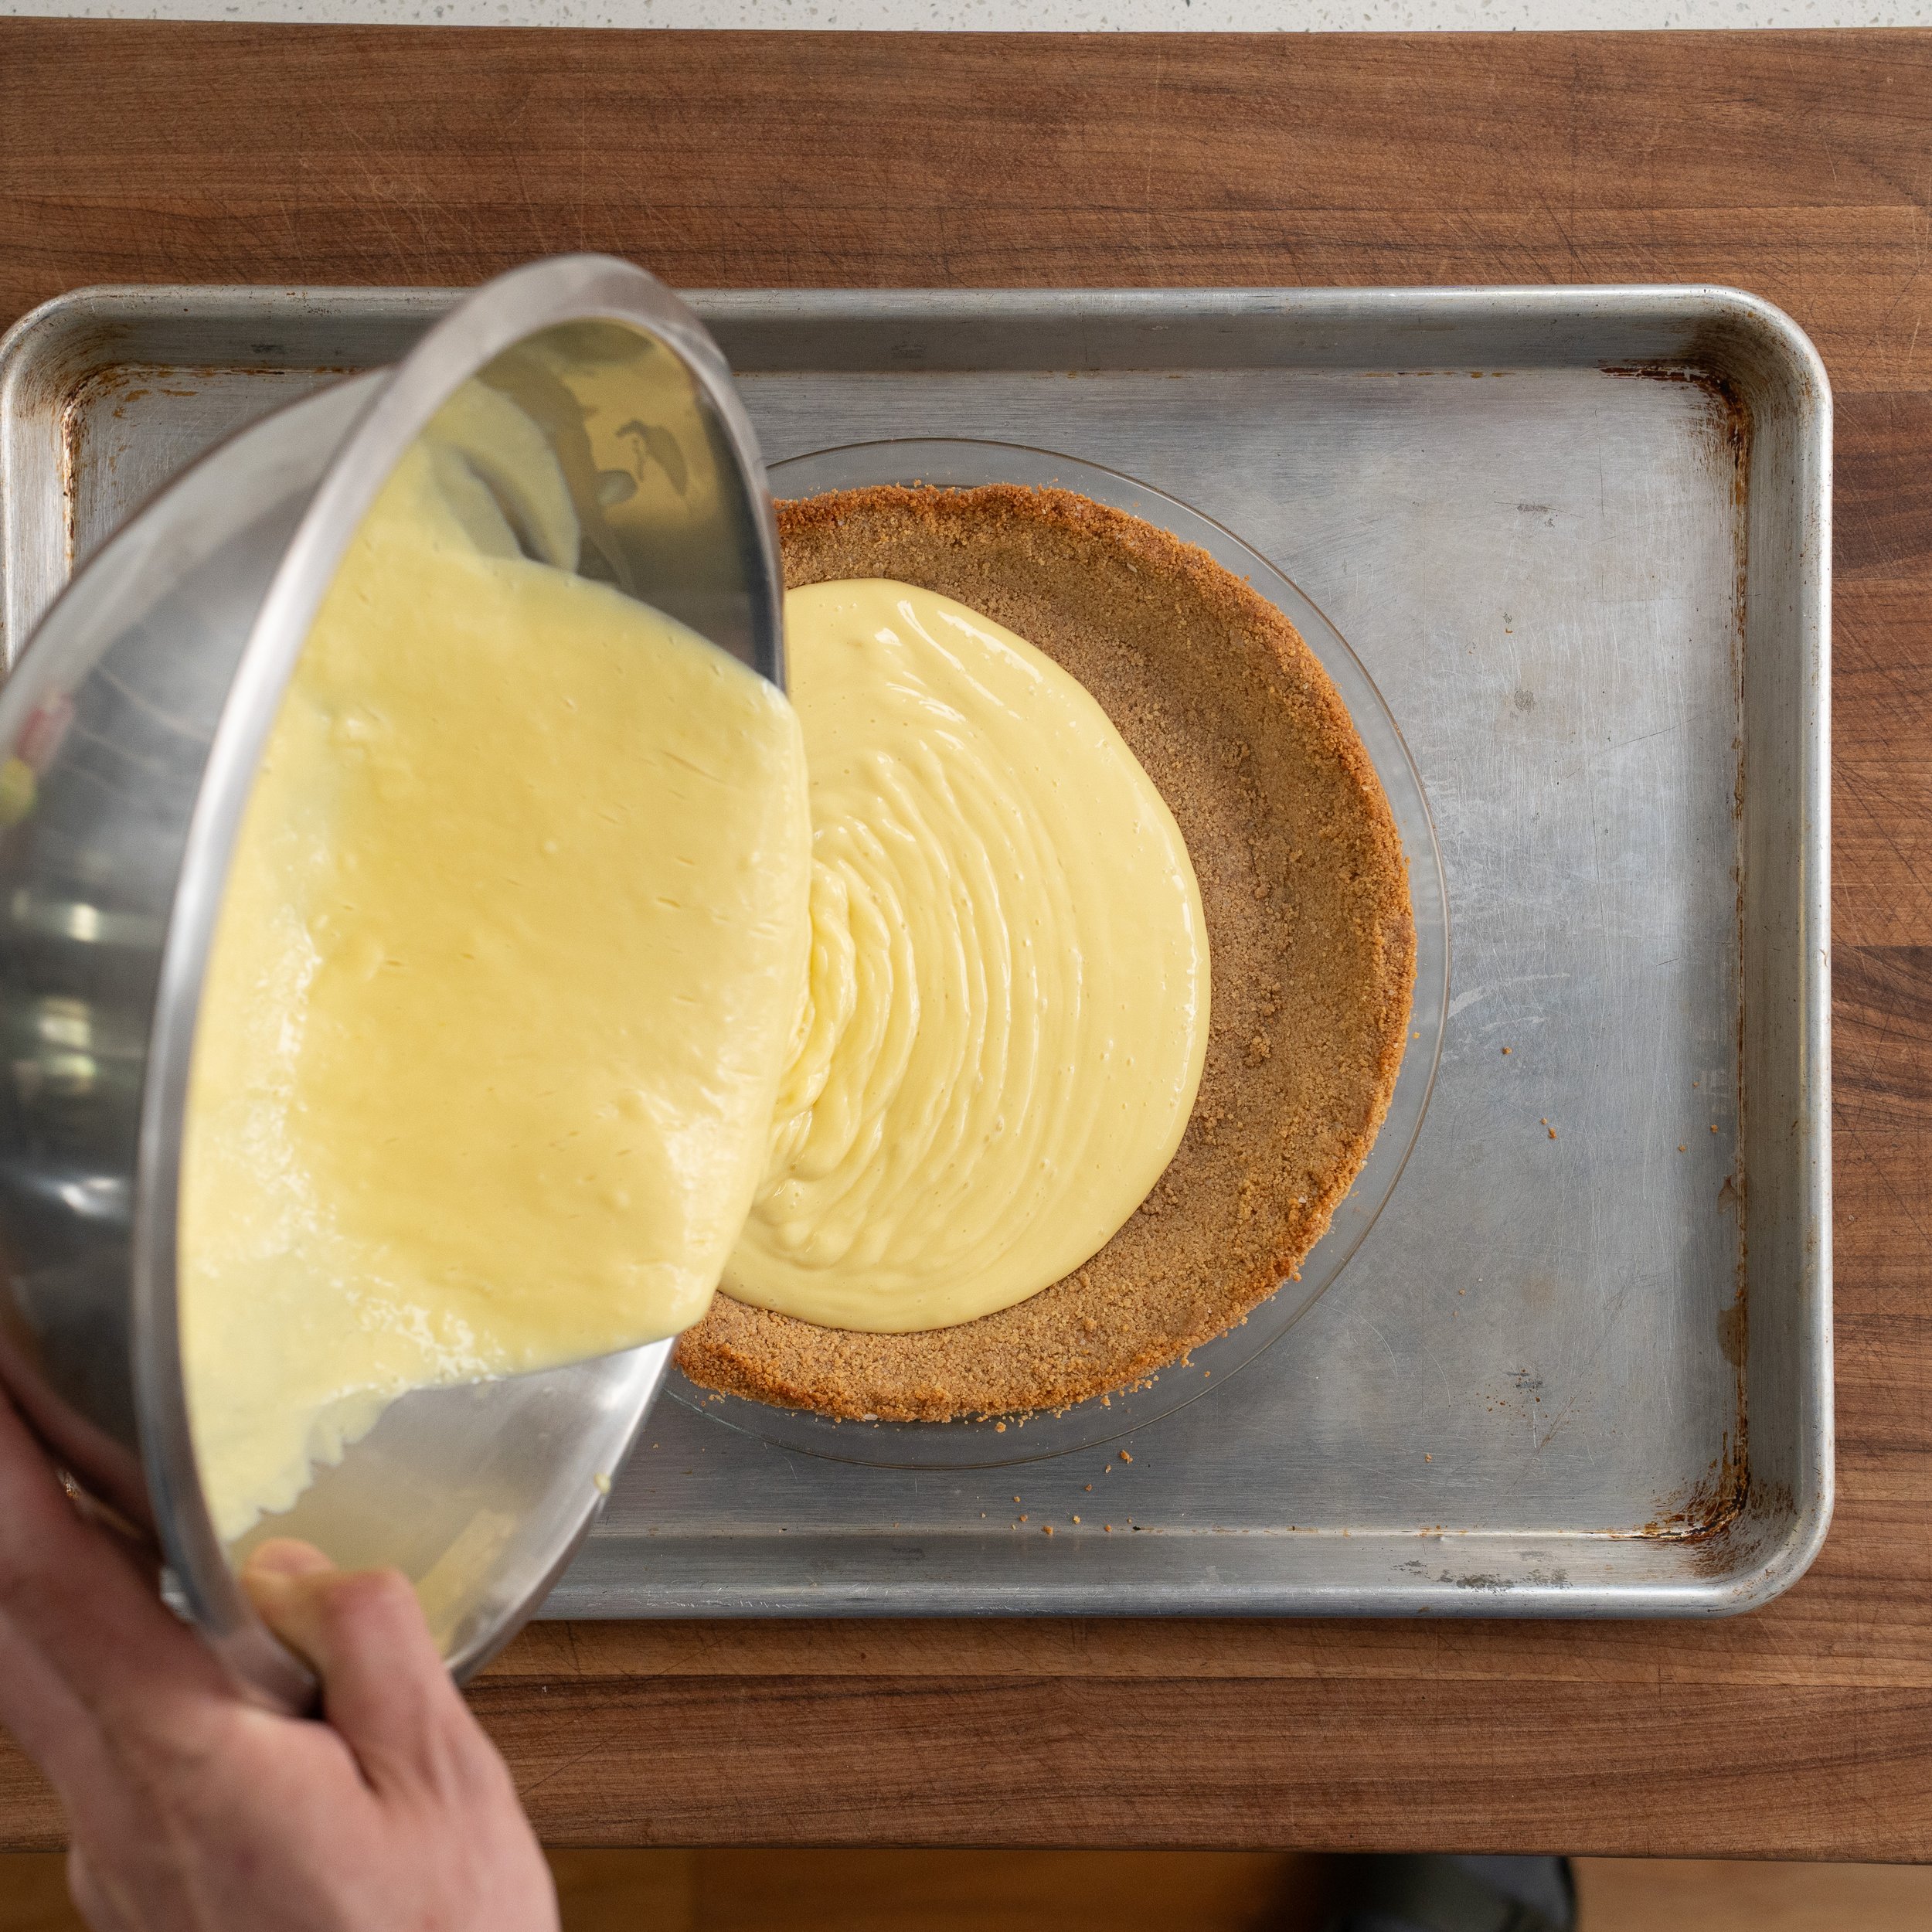
8. Drop the oven to 325°F, pour, and bake the custard. Once the crust is out, knock the oven temp down to 325°F (160°C). Pour the custard into the warm crust and bake for 17-20 minutes. The edges should look set and barely move when you nudge the dish. The center 2-3 inches should wobble slightly like Jell-O. If the middle looks loose give it 2–4 more minutes, but pull it before the center fully sets.
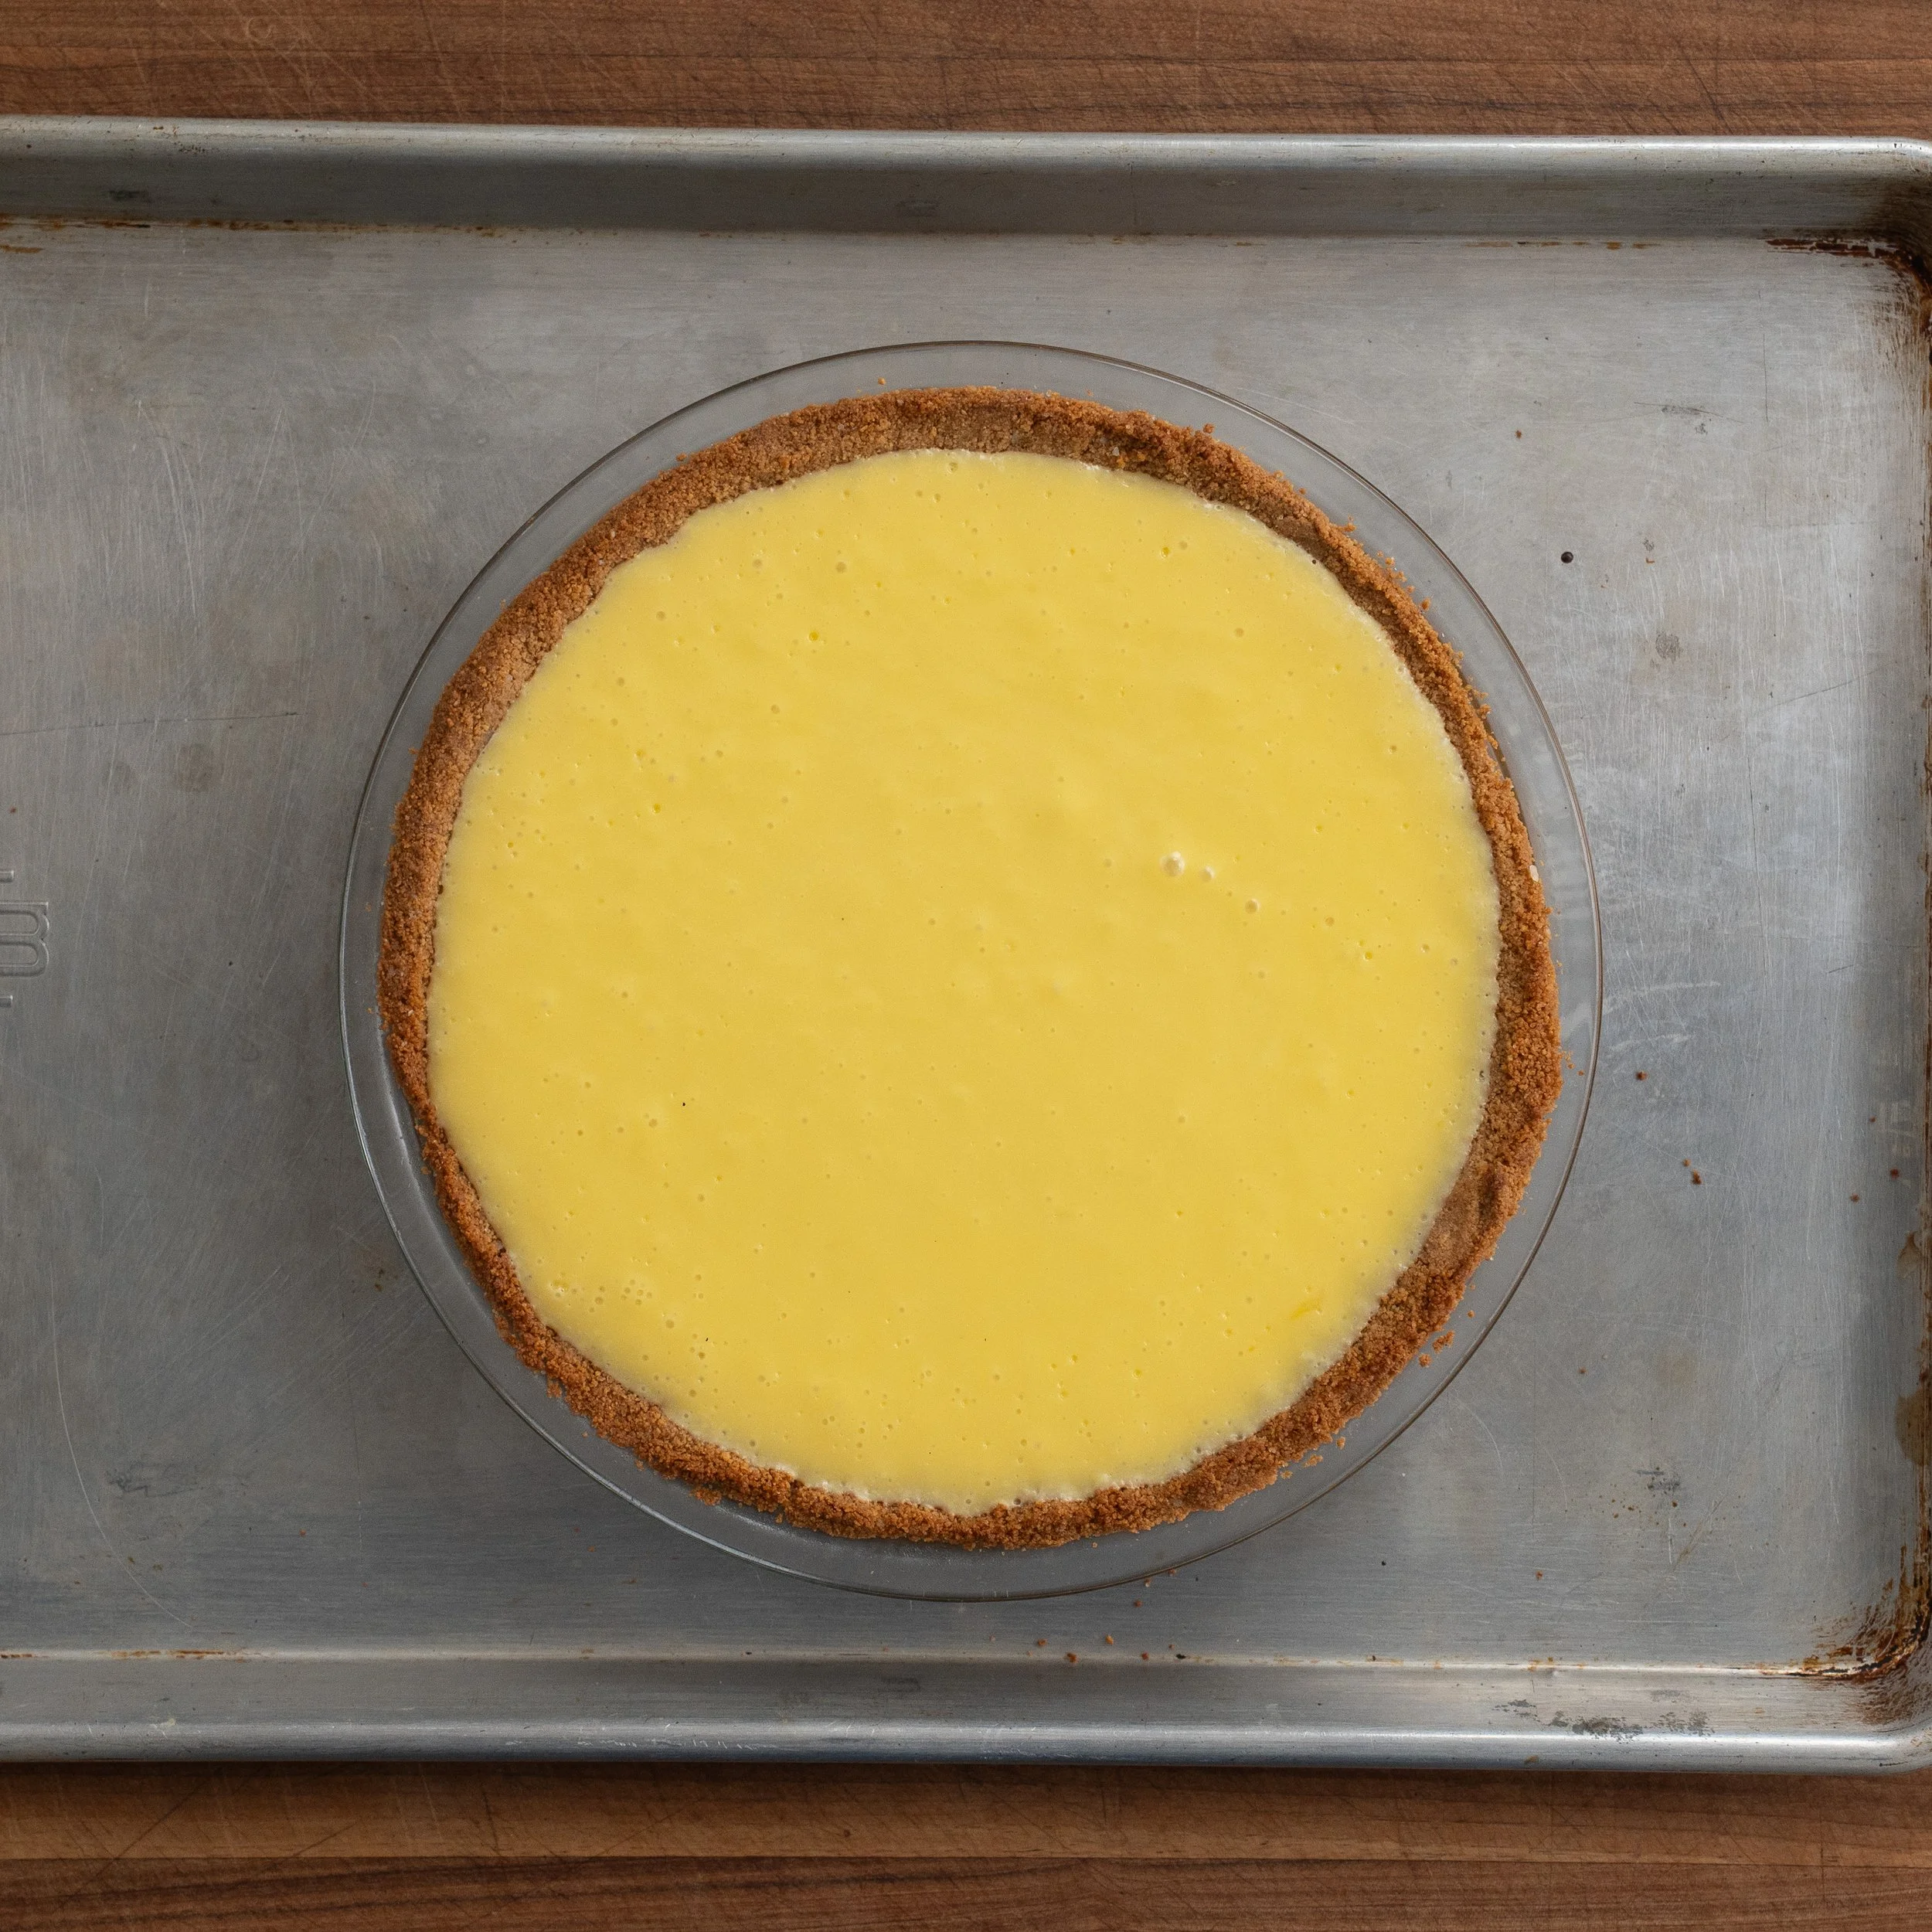
9. Cool to room temp, then refrigerate covered overnight. Let the pie cool on the counter until it’s no longer warm to the touch. Cover loosely and move it to the fridge. Letting it cool overnight is the move
Can I cheat the overnight wait chill? You can chill it for 2 hours but you’ll get a slightly softer slice. I would caution against skipping any form of chilling. The pie will be a little sloppy and it’s just better served chilled.
10. Whip the cream to stiff peaks. The day you plan to serve the pie, in a stand mixer with the whisk attachment, whip 250g cold heavy cream and a pinch of salt for 3-5 minutes or until you hit stiff peaks. Stiff peaks stand straight up with no flop and the cream looks glossy, not grainy. That’s where you want to be. Past stiff and you’ve made butter .
Why add the powdered sugar and vanilla after whipping to peaks? Sugar and vanilla deflate the cream a little when they go in, so you want the structure built first. Powdered sugar specifically — the cornstarch in it helps stabilize the cream so it holds its shape longer in the fridge.
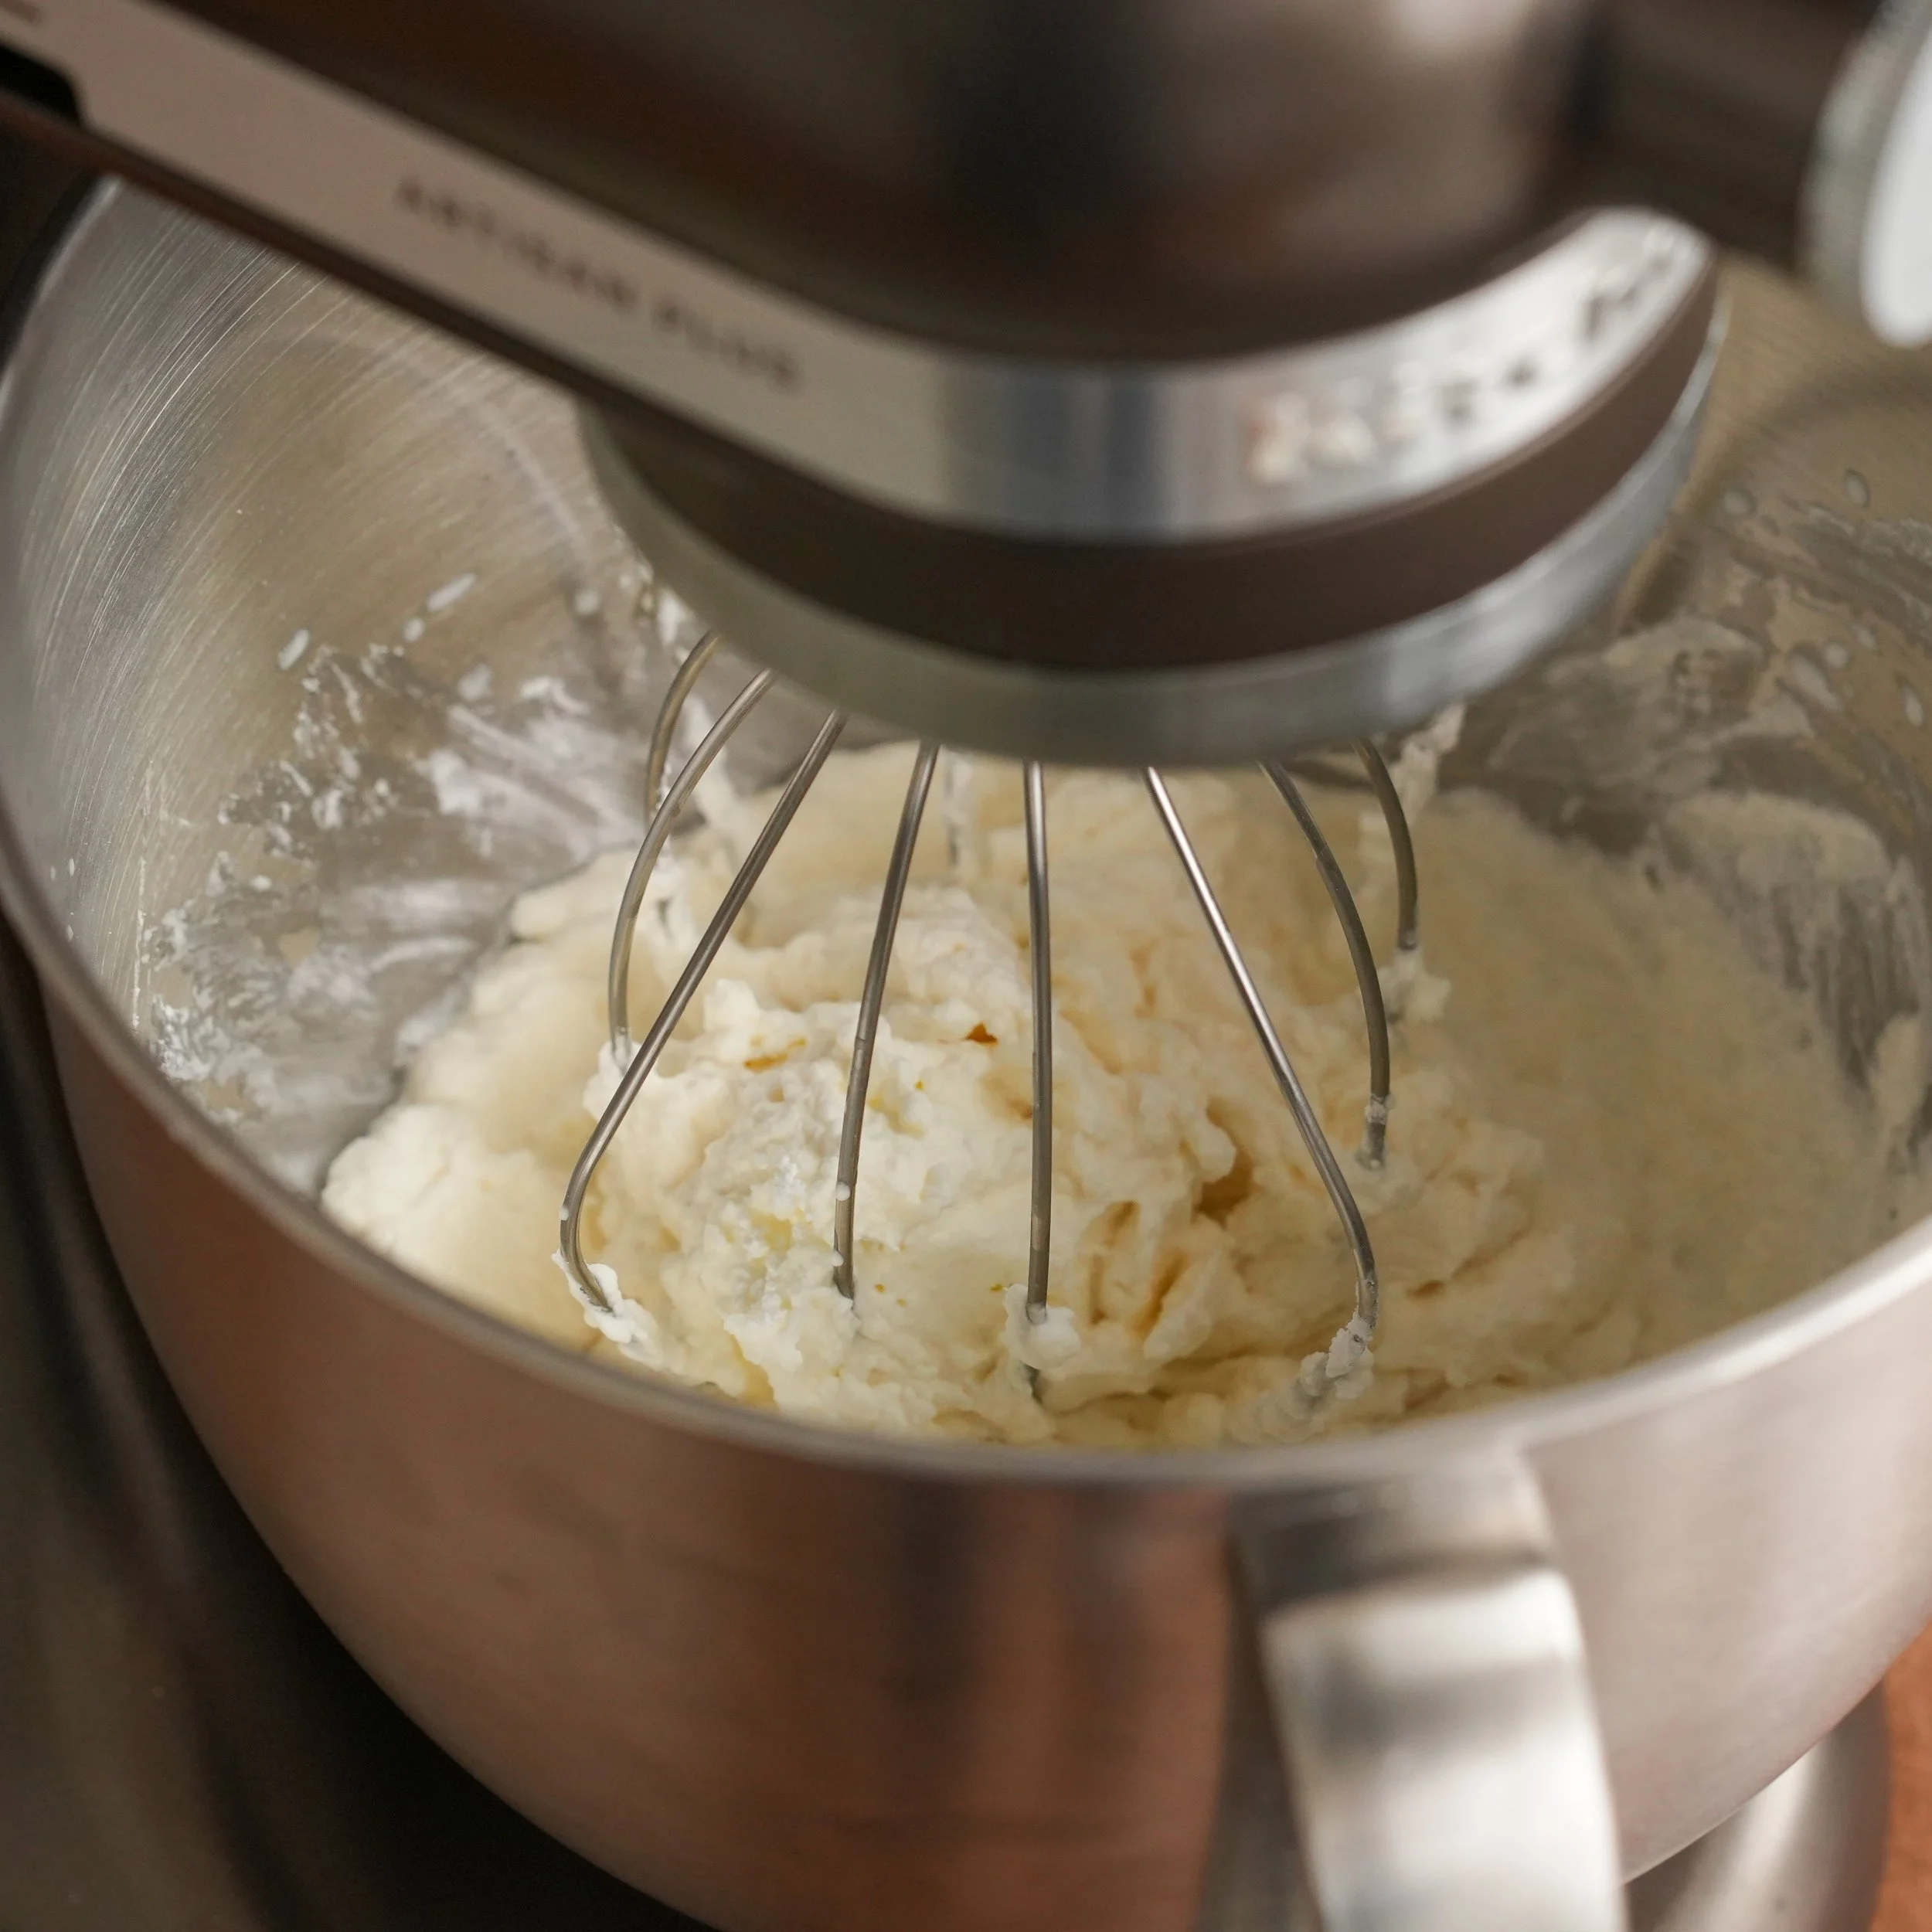
11. Add powdered sugar and vanilla, then top the pie. Add 45g powdered sugar and 4g vanilla to the whipped cream and mix just until incorporated. Don’t over whip here, this is the most common way to break the cream into butter.
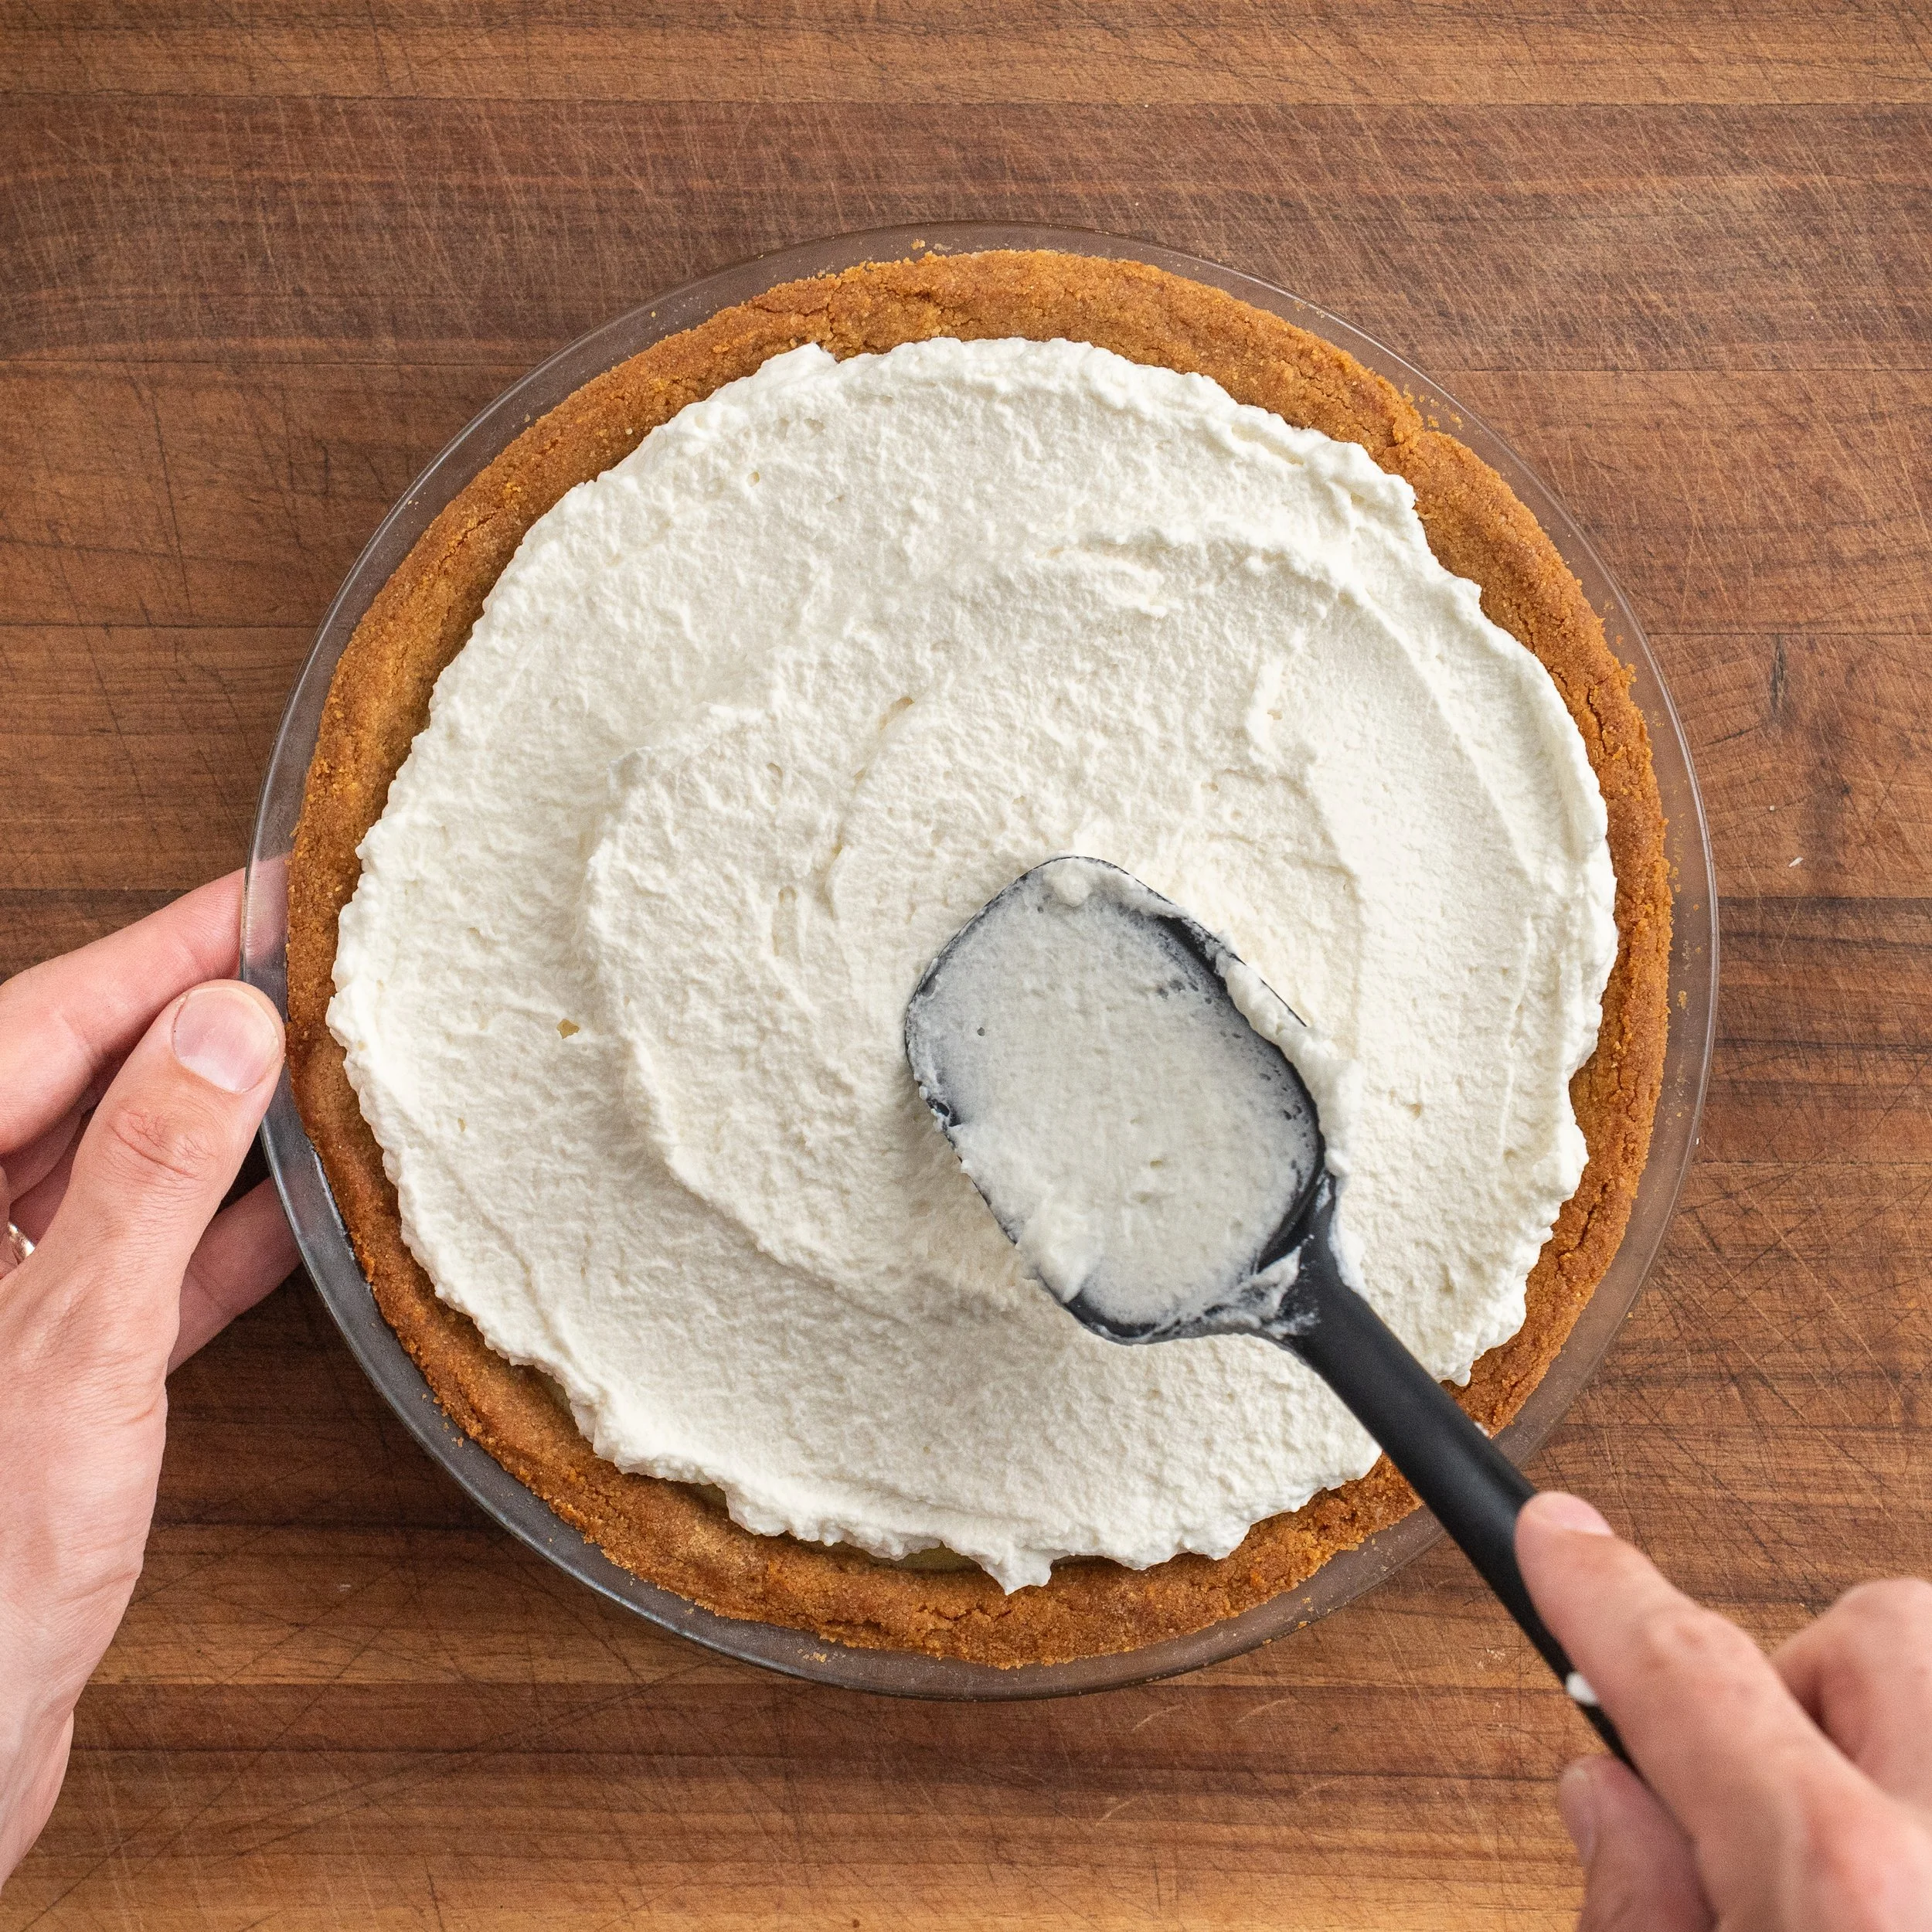
12. Finish the pie. Spread the cream over the chilled pie in big swooping motions with the back of a spoon for texture and shadow. Microplane fresh lime zest over the top, slice, and serve.
MY GO-TO GEAR FOR KEY LIME PIE
Below are the tools I actually use when making this recipe. Some of these are affiliate links, which means I may earn a small commission if you purchase through them—at no extra cost to you.
9-Inch Glass Pie Dish – Glass over metal here. You can see the crust browning from the side, which means you can pull it when you can see that it’s a nice light golden brown. Glass also conducts heat more gently than dark metal, which keeps the bottom from over-baking.
Food Processor – For the crust. You want fine, even crumbs — a food processor gets you there in 15 seconds. Cuisinart 14-cup is the workhorse I reach for.
Stand Mixer – For the whipped cream. A hand mixer works too, but a stand mixer means you can walk away.
Microplane – For the lime zest on top. Cheap, sharp, lasts forever, and the fine zest melts into the whipped cream instead of sitting on top in chunks.
FREQUENTLY ASKED QUESTIONS
CAN I MAKE MY PIE GLUTEN FREE? Yes, gluten free graham crackers work just as well as regular in this recipe.
WHY DID MY KEY LIME PIE CUSTARD CRACK ON TOP? It probably baked too long or too hot. Custard cracks when the eggs over-coagulate and the structure shrinks. Remember to drop the oven to 325°F (160°C) and pull the pie when the center still wobbles slightly. A few small surface cracks are fine, the whipped cream covers everything anyway.
CAN I USE COOL WHIP INSTEAD OF HOMEMADE WHIPPED CREAM? Sure. Fresh whipped cream tastes better and it’s fun to make, but if you’re in a rush or just feeling lazy, tubbed whipped dessert topping won’t ruin the pie.
CAN I USE REGULAR KEY LIMES OR LIMES IF I CAN’T FIND NELLIE & JOE’S? Yes. Drop the amount from 120g down to about 90-100g since fresh lime juice is sharper and more acidic. Also and add a tiny pinch of vanilla extract to the custard to help mimic the tropical, floral note that key lime brings. It won’t be identical, but it’ll still be a great pie.